tengine安装教程/nginx
下载地址:https://download.csdn.net/download/qq_36961226/92789916
安装目录
/opt/tengine
下载tengine
wget http://tengine.taobao.org/download/tengine-2.2.0.tar.gzip
或者手动复制 tengine-2.2.0.tar.gz 到目录下 /opt/tengine
解压
tar -zxvf tengine-2.2.0.tar.gz
编译安装
yum -y install gcc gcc-c++ autoconf automake
yum -y install openssl-devel pcre-devel zlib-developer/article/1148841
进入目录:
cd tengine
检查编译环境,注意:--prefix 后面跟着的是你的nginx安装的路径
./configure --prefix=/opt/tengine/ \
--with-http_gzip_static_module \
--with-http_realip_module \
--with-http_stub_status_module \
--with-http_concat_module \
--with-pcre
安装组件
pacman -S mingw-w64-x86_64-pcre
pacman -S mingw-w64-x86_64-openssl
pacman -S mingw-w64-x86_64-zlib
安装成功展示如下
checking for OS
MINGW64_NT-10.0-22631 3.6.7-f2802c5f.x86_64 x86_64
using GNU C compiler
gcc version: 15.2.0 (Rev13, Built by MSYS2 project)
checking for gcc -pipe switch ... found
checking for MINGW64_NT-10.0-22631 specific features
checking for OpenSSL DTLS support ... found
creating objs/Makefile
Configuration summary
using PCRE library: /mingw64
using OpenSSL library: /mingw64
using zlib library: /mingw64
jemalloc library is disabled
nginx path prefix: "/c/tengine-install"
nginx binary file: "/c/tengine-install/sbin/nginx"
nginx modules path: "/c/tengine-install/modules"
nginx configuration prefix: "/c/tengine-install/conf"
nginx configuration file: "/c/tengine-install/conf/nginx.conf"
nginx pid file: "/c/tengine-install/logs/nginx.pid"
nginx error log file: "/c/tengine-install/logs/error.log"
nginx http access log file: "/c/tengine-install/logs/access.log"
nginx http client request body temporary files: "client_body_temp"
nginx http proxy temporary files: "proxy_temp"
nginx http fastcgi temporary files: "fastcgi_temp"
nginx http uwsgi temporary files: "uwsgi_temp"
nginx http scgi temporary files: "scgi_temp"
编译和安装命令
make && make install
手动启动
//进入你的安装目录
cd /opt/tengine/sbin
//执行nginx的启动文件
./nginx
-- 根据系统情况是否配置下面镜像
安装阿里云镜像
备份原有 resolv.conf
cp /etc/resolv.conf /etc/resolv.conf.bak
临时更换 DNS(重启网络后失效)
echo "nameserver 223.5.5.5" > /etc/resolv.conf
echo "nameserver 114.114.114.114" >> /etc/resolv.conf
重新尝试安装
yum -y install gcc gcc-c++ autoconf automake
yum clean all
yum makecache
yum install -y wget
默认监听80端口 (我这里改成9999)
查看进程
ps aux | grep tengine
root 2027587 0.0 0.0 59904 1984 ? Ss 20:08 0:00 nginx: master process /opt/tengine/sbin/nginx -s start
root 2034895 0.0 0.0 214080 1536 pts/2 S+ 20:10 0:00 grep tengine
root@Server-c225b45f-15f7-433b-9c80-606b33d8ac76 conf#
查看端口号
查看所有监听端口,过滤出 nginx 进程 输出端口 : 9999
netstat -anp | grep 2027587
tcp 0 0 0.0.0.0:9999 0.0.0.0:* LISTEN 2027587/nginx: mast
unix 3 STREAM CONNECTED 38301344 2027587/nginx: mast
unix 3 STREAM CONNECTED 38301345 2027587/nginx: mast
root@Server-c225b45f-15f7-433b-9c80-606b33d8ac76 conf#
启动,停止,重启
/opt/tengine/sbin/nginx -s reload
/opt/tengine/sbin/nginx -s stop
/opt/tengine/sbin/nginx -s start
配置反向代理
cd /opt/tengine/conf/
vi nginx.conf
配置反向代理 配置
#user nobody;
worker_processes 1;
events {
worker_connections 1024;
}
http {
log_format main 'remote_addr - remote_user $time_local "$request" '
'status body_bytes_sent "$http_referer" '
'"http_user_agent" "http_x_forwarded_for"';
check_shm_size 100m;
resolver 8.8.8.8 114.114.114.114;
include mime.types;
default_type application/octet-stream;
sendfile on;
keepalive_timeout 65;
#gzip on;
upstream gateway {
server 172.31.0.12:8080;
}
server {
listen 9999;
server_name
gzip on;
gzip_buffers 32 4K;
gzip_min_length 1k;
gzip_comp_level 6;
gzip_types text/plain application/javascript application/x-javascript text/css application/xml text/javascript application/x-httpd-php image/jpeg image/gif image/png;
gzip_vary on;
gzip_disable "MSIE 1-6\.";
client_max_body_size 500m;
location / {
root html;
index index.html index.htm;
}
去掉 rewrite,直接代理并保留 /api 前缀
location ^~/api/ {
proxy_set_header Host $host;
proxy_set_header X-Real-IP $remote_addr;
proxy_set_header X-Forwarded-For $proxy_add_x_forwarded_for;
proxy_pass http://gateway/api/;
}
error_page 500 502 503 504 /50x.html;
location = /50x.html {
root html;
}
}
}
参考地址
参考地址:
https://cloud.tencent.com/developer/article/1148841
https://blog.csdn.net/arthurdev/article/details/73385351?ops_request_misc=elastic_search_misc&request_id=1e1a3139bf45e42080aef9a10e6b9b98&biz_id=0&utm_medium=distribute.pc_search_result.none-task-blog-2~all~baidu_landing_v2~default-5-73385351-null-null.142^v102^pc_search_result_base5&utm_term=linux%20%E5%AE%89%E8%A3%85%20Tengine&spm=1018.2226.3001.4187
宝兰德服务器
宝兰德服务 IP地址: 172.101.0.12 浮动IP:110.102.2.255
查看宝兰德服务部署的war包日志
tail -f /home/bes/BES955STD/logs/server.log
修改端口;将端口 1901 改成 3000 注意改成自己的密码
cd /home/bes/BES955STD/bin
./iastool --user admin --password '密码' --host 0.0.0.0 --port 1901 update --http-listener --listenerport 3000 admin-listener
停用宝兰德服务器
cd /home/bes/BES955STD/script && sh stopbes.sh
lsof -i:3000
kill -9
启动宝兰德服务器
cd /home/bes/BES955STD/script && sh startbes.sh
测试是否启动成功
curl -I http://172.101.0.12:3000/console
服务器一: 端口使用
数据库:5236
tendis: 6379
tengine: 9999
宝兰德端口:3000 / 访问端口:8080
xxl-job:9671
springboot 服务: 9000
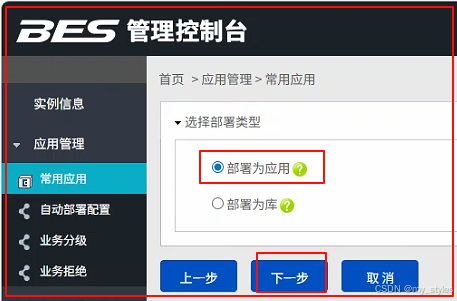
宝兰德部署项目
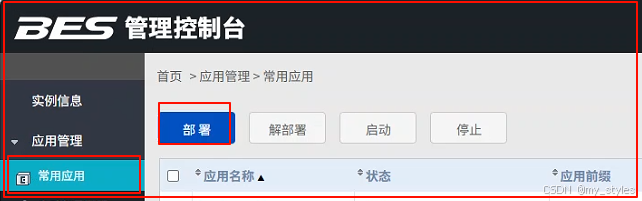
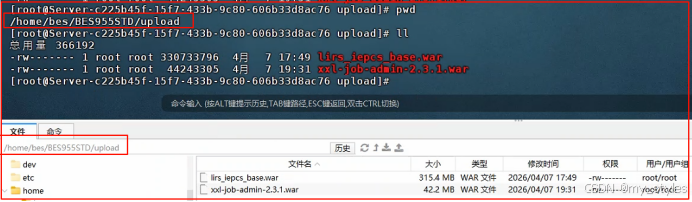
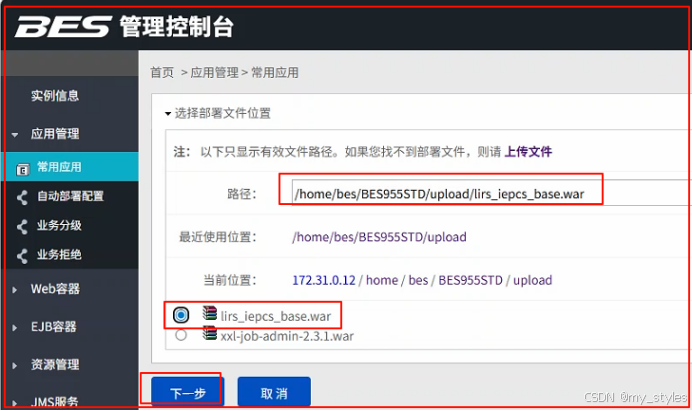
将war包复制到宝兰德目录下
将上传的项目选择,也可以通过 上传文件进行上传(会有失败风险)
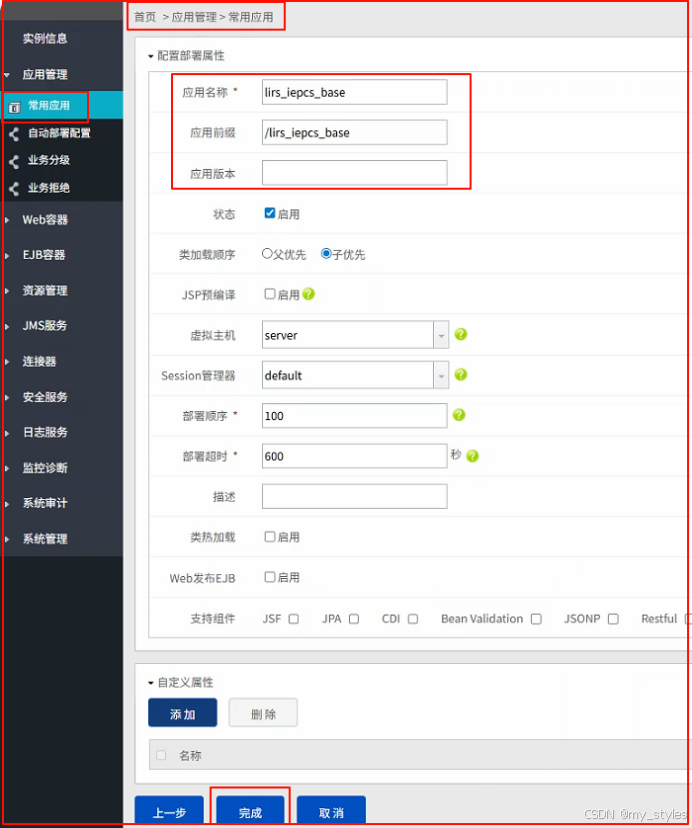
启动成功

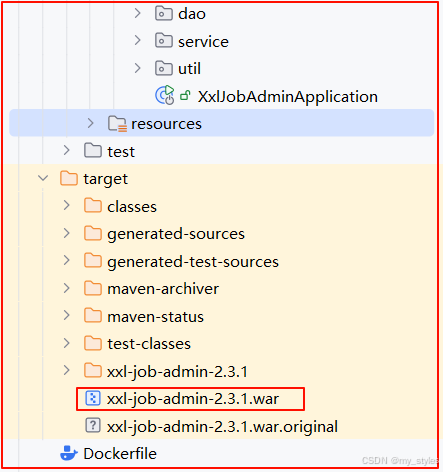
将springboot 打war包
修改pom.xml依赖
XML
 <!--   将 jar 改成 war-->
	<packaging>war</packaging>

	修改相关依赖
	<dependencies>

        <!-- 引入核心包 xxl-job-core -->
        <dependency>
            <groupId>com.xuxueli</groupId>
            <artifactId>xxl-job-core</artifactId>
            <version>2.3.1</version>
        </dependency>
        <!--  引入达梦库驱动  -->
        <dependency>
            <groupId>com.dameng</groupId>
            <artifactId>DmJdbcDriver18</artifactId>
            <version>8.1.3.140</version>
        </dependency>
        <!-- 添加servlet容器  -->
        <dependency>
            <groupId>javax.servlet</groupId>
            <artifactId>javax.servlet-api</artifactId>
            <version>4.0.1</version>
            <scope>provided</scope>
        </dependency>

		<dependency>
			<groupId>org.springframework.boot</groupId>
			<artifactId>spring-boot-starter-web</artifactId>
            <exclusions>
                <!--  排除springboot 默认集成的tomcat -->
                <exclusion>
                    <groupId>org.springframework.boot</groupId>
                    <artifactId>spring-boot-starter-tomcat</artifactId>
                </exclusion>
            </exclusions>
		</dependency>

	</dependencies>
修改启动类
XML
package com.xxl.job.admin;

import org.springframework.boot.SpringApplication;
import org.springframework.boot.autoconfigure.SpringBootApplication;
import org.springframework.boot.builder.SpringApplicationBuilder;
import org.springframework.boot.web.servlet.support.SpringBootServletInitializer;

@SpringBootApplication
public class XxlJobAdminApplication  extends SpringBootServletInitializer {

    @Override
    protected SpringApplicationBuilder configure(SpringApplicationBuilder builder) {
        return builder.sources(XxlJobAdminApplication.class);
    }

	public static void main(String[] args) {
        SpringApplication.run(XxlJobAdminApplication.class, args);
	}

}
源码下载包:
https://download.csdn.net/download/qq_36961226/92789911
注意、注意、注意
<!--  注意是  jar 还是成 war
javax.servlet-api 和 spring-boot-starter-tomcat 不能共存,
如果是springboot 启动,需要注释 javax.servlet-api  移除 spring-boot-starter-tomcat 不能排除默认集成的tomcat
如果是 tomcat 容器启动,需要 javax.servlet-api 依赖  ,
 -->