文章目录
org.openpnp.vision.pipeline.stages.DetectEdgesCanny
功能
对当前工作图像执行 Canny 边缘检测。该算法能够提取图像中亮度变化剧烈的边界,输出为二值边缘图像(边缘处像素值为 255,非边缘处为 0)
参数
| 参数 | 类型 | 默认值 | 说明 |
|---|---|---|---|
threshold1 |
double | 40 | Canny 算法的低阈值。边缘梯度值低于此阈值的像素被直接忽略(非边缘)。 |
threshold2 |
double | 180 | Canny 算法的高阈值。边缘梯度值高于此阈值的像素被确认为强边缘。介于两阈值之间的像素,若与强边缘相连则保留,否则丢弃。 |
例子
bash
# @fn generate_color_test_image.py
import cv2
import numpy as np

width, height = 600, 400
img = np.zeros((height, width, 3), dtype=np.uint8)

# 创建水平渐变背景:从左到右 红 -> 绿 -> 黄
for x in range(width):
    # 红色分量:从左到右 255 -> 0 -> 255
    r = int(255 * (1 - x/width)) if x < width/2 else int(255 * ((x - width/2) / (width/2)))
    # 绿色分量:从左到右 0 -> 255 -> 255
    g = int(255 * (x / (width/2))) if x < width/2 else 255
    # 蓝色分量:始终为0
    b = 0
    img[:, x] = (b, g, r)  # OpenCV BGR

# 绘制红色矩形(颜色:纯红,但渐变背景中红色区域在左侧,故矩形放在右侧,对比明显)
cv2.rectangle(img, (400, 50), (550, 150), (0, 0, 255), -1)  # BGR: (0,0,255) 红色

# 绘制绿色圆形(颜色:纯绿,放在背景绿色区域,但边缘仍可见)
cv2.circle(img, (300, 250), 50, (0, 255, 0), -1)  # BGR: (0,255,0) 绿色

# 绘制黄色三角形(颜色:纯黄,放在背景红色到绿色过渡区)
pts = np.array([[100, 300], [200, 380], [20, 380]], np.int32)
cv2.fillPoly(img, [pts], (0, 255, 255))  # BGR: (0,255,255) 黄色

# 保存图像
output_path = "test_canny_color.png"
cv2.imwrite(output_path, img)
print(f"彩色测试图像已生成: {output_path}")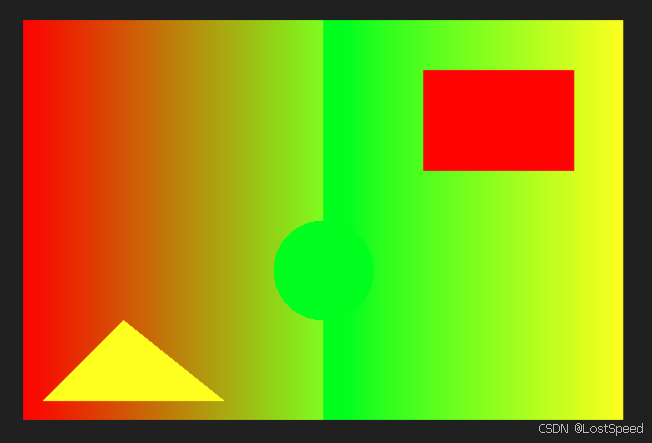
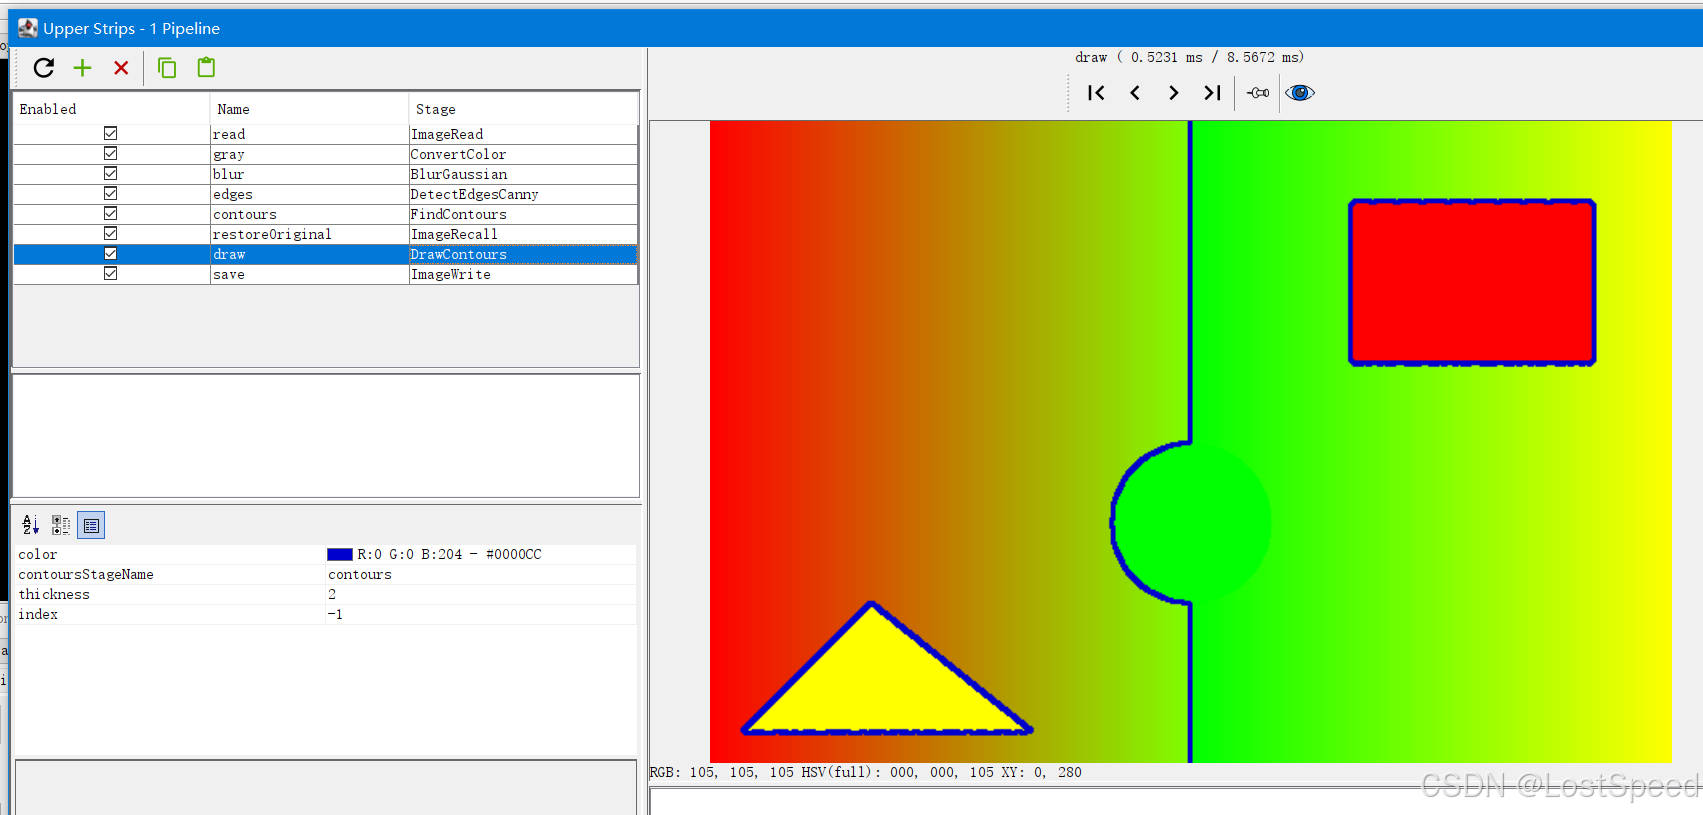
cv-pipeline
bash
<cv-pipeline>
   <stages>
      <cv-stage class="org.openpnp.vision.pipeline.stages.ImageRead" name="read" enabled="true" file="D:\3rd\openpnp_prj\openpnp-official\openpnp-test-images\my_test\test_canny_color.png" color-space="Bgr" handle-as-captured="false"/>
      <cv-stage class="org.openpnp.vision.pipeline.stages.ConvertColor" name="gray" enabled="true" conversion="Bgr2Gray"/>
      <cv-stage class="org.openpnp.vision.pipeline.stages.BlurGaussian" name="blur" enabled="true" kernel-size="3" property-name="BlurGaussian"/>
      <cv-stage class="org.openpnp.vision.pipeline.stages.DetectEdgesCanny" name="edges" enabled="true" threshold-1="50.0" threshold-2="150.0"/>
      <cv-stage class="org.openpnp.vision.pipeline.stages.FindContours" name="contours" enabled="true" retrieval-mode="List" approximation-method="Simple"/>
      <cv-stage class="org.openpnp.vision.pipeline.stages.ImageRecall" name="restoreOriginal" enabled="true" image-stage-name="read"/>
      <cv-stage class="org.openpnp.vision.pipeline.stages.DrawContours" name="draw" enabled="true" contours-stage-name="contours" thickness="2" index="-1">
         <color r="0" g="0" b="204" a="255"/>
      </cv-stage>
      <cv-stage class="org.openpnp.vision.pipeline.stages.ImageWrite" name="save" enabled="true" file="output_edges_on_original.png"/>
   </stages>
</cv-pipeline>
效果