文章目录
- [openpnp - stages.ScriptRun和后续stage的数据交互方法](#openpnp - stages.ScriptRun和后续stage的数据交互方法)
openpnp - stages.ScriptRun和后续stage的数据交互方法
概述
openpnp可以调用python脚本来干活。
但是能找到的资料不多。
脚本干活要和stages.ScriptRun之后的串接stage产生交互才好,今天实验通了。
笔记
例子1
在脚本中直接返回处理过的图像
scripted_stage.py
bash
# @fn scripted_stage.py
from org.openpnp.vision.pipeline import CvStage
from org.opencv.core import Scalar

print(">>> ScriptRun: Modifying working image directly...")

# 获取当前工作图像(引用,不克隆)
mat = pipeline.getWorkingImage()
if mat is None:
    print(">>> ERROR: No working image.")
    CvStage.Result(None, None)
else:
    print(">>> Image size: {}x{}".format(mat.width(), mat.height()))

    # 直接将整个图像填充为红色 (BGR: 0,0,255)
    mat.setTo(Scalar(0, 0, 255))

    print(">>> Image set to RED. Returning modified image.")
    # 返回修改后的同一个 Mat 对象
    CvStage.Result(mat, None)
cvpipeline管道数据
bash
<cv-pipeline>
<stages>
<cv-stage class="org.openpnp.vision.pipeline.stages.ImageRead" name="read" enabled="true" file="D:\3rd\openpnp_prj\openpnp-official\openpnp-test-images\my_test\obj.png" color-space="Bgr" handle-as-captured="false"/>
<cv-stage class="org.openpnp.vision.pipeline.stages.ScriptRun" name="script" enabled="true" file="D:\3rd\openpnp_prj\openpnp-official\openpnp-test-images\my_test\scripted_stage.py" args=""/>
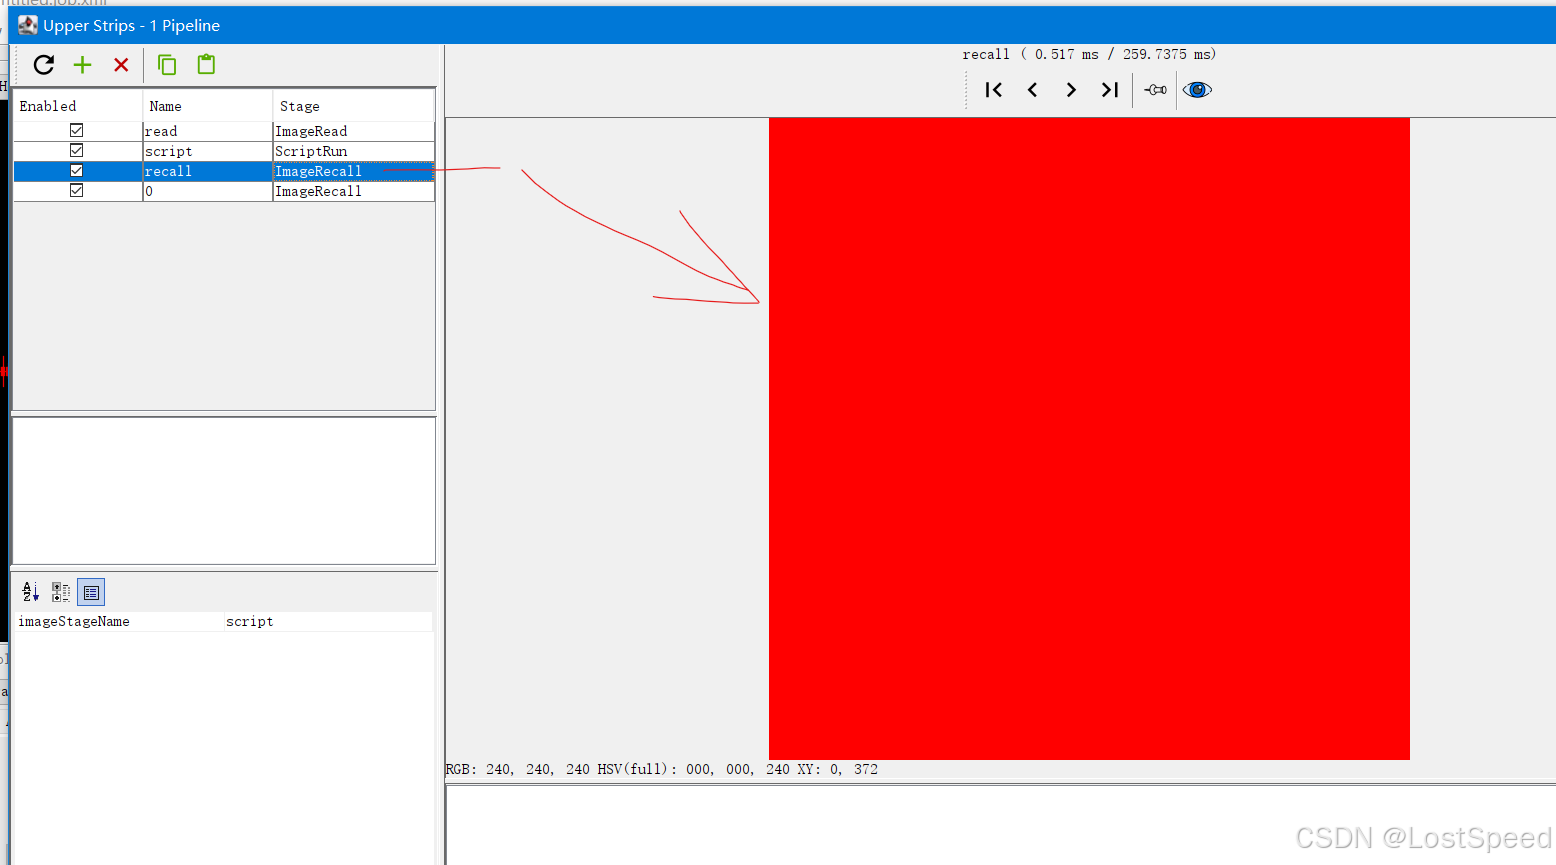
<cv-stage class="org.openpnp.vision.pipeline.stages.ImageRecall" name="recall" enabled="true" image-stage-name="script"/>
<cv-stage class="org.openpnp.vision.pipeline.stages.ImageRecall" name="0" enabled="true" image-stage-name="read"/>
</stages>
</cv-pipeline>效果
脚本之后可以调用ImageRecall,使用ScriptRun处理过的图像。
例子2
在脚本中通过属性,间接返回非图像的数据
scripted_stage.py
bash
# 文件名: scripted_stage.py
# 功能: 计算图像尺寸并存入 pipeline 属性,同时返回红色图像

from org.openpnp.vision.pipeline import CvStage
from org.opencv.core import Scalar

print(">>> ScriptRun 1: Calculating image size...")
mat = pipeline.getWorkingImage()
if mat is None:
    print(">>> ERROR: No working image.")
    # 返回原样
    CvStage.Result(None, None)
else:
    width = mat.width()
    height = mat.height()
    print(">>> Image size: {}x{}".format(width, height))

    # 将尺寸存入 pipeline 属性,供后续脚本读取
    pipeline.setProperty("image_width", width)
    pipeline.setProperty("image_height", height)

    # 将图像填充为红色以便可视化确认
    mat.setTo(Scalar(0, 0, 255))
    print(">>> Image set to RED and size stored in pipeline properties.")
    CvStage.Result(mat, None)
read_size.py
bash
# 文件名: read_size.py
# 功能: 从 pipeline 属性中读取前序脚本存入的尺寸

print(">>> ScriptRun 2: Reading size from pipeline properties...")
width = pipeline.getProperty("image_width")
height = pipeline.getProperty("image_height")
if width is not None and height is not None:
    print(">>> Received image size: {}x{}".format(width, height))
else:
    print(">>> No size data found in properties.")
cvpipeline管道数据
bash
<cv-pipeline>
   <stages>
      <cv-stage class="org.openpnp.vision.pipeline.stages.ImageRead" name="read" enabled="true" file="D:\3rd\openpnp_prj\openpnp-official\openpnp-test-images\my_test\obj.png" color-space="Bgr" handle-as-captured="false"/>
      <cv-stage class="org.openpnp.vision.pipeline.stages.ScriptRun" name="script" enabled="true" file="D:\3rd\openpnp_prj\openpnp-official\openpnp-test-images\my_test\scripted_stage.py" args=""/>
      <cv-stage class="org.openpnp.vision.pipeline.stages.ScriptRun" name="read_size" enabled="true" file="D:\3rd\openpnp_prj\openpnp-official\openpnp-test-images\my_test\read_size.py" args=""/>
      <cv-stage class="org.openpnp.vision.pipeline.stages.ImageRecall" name="recall" enabled="true" image-stage-name="script"/>
   </stages>
</cv-pipeline>
效果
从日志中可以看出来,脚本确实设置了属性。
bash
2026-04-12 13:00:49.506 SystemLogger INFO: >>> ScriptRun 1: Calculating image size...
2026-04-12 13:00:49.507 SystemLogger INFO: >>> Image size: 735x735
2026-04-12 13:00:49.507 SystemLogger INFO: >>> Image set to RED and size stored in pipeline properties.
2026-04-12 13:00:49.755 SystemLogger INFO: >>> ScriptRun 2: Reading size from pipeline properties...
2026-04-12 13:00:49.755 SystemLogger INFO: >>> Received image size: 735x735