前言
-
今天和朋友在聊天的时候聊到了
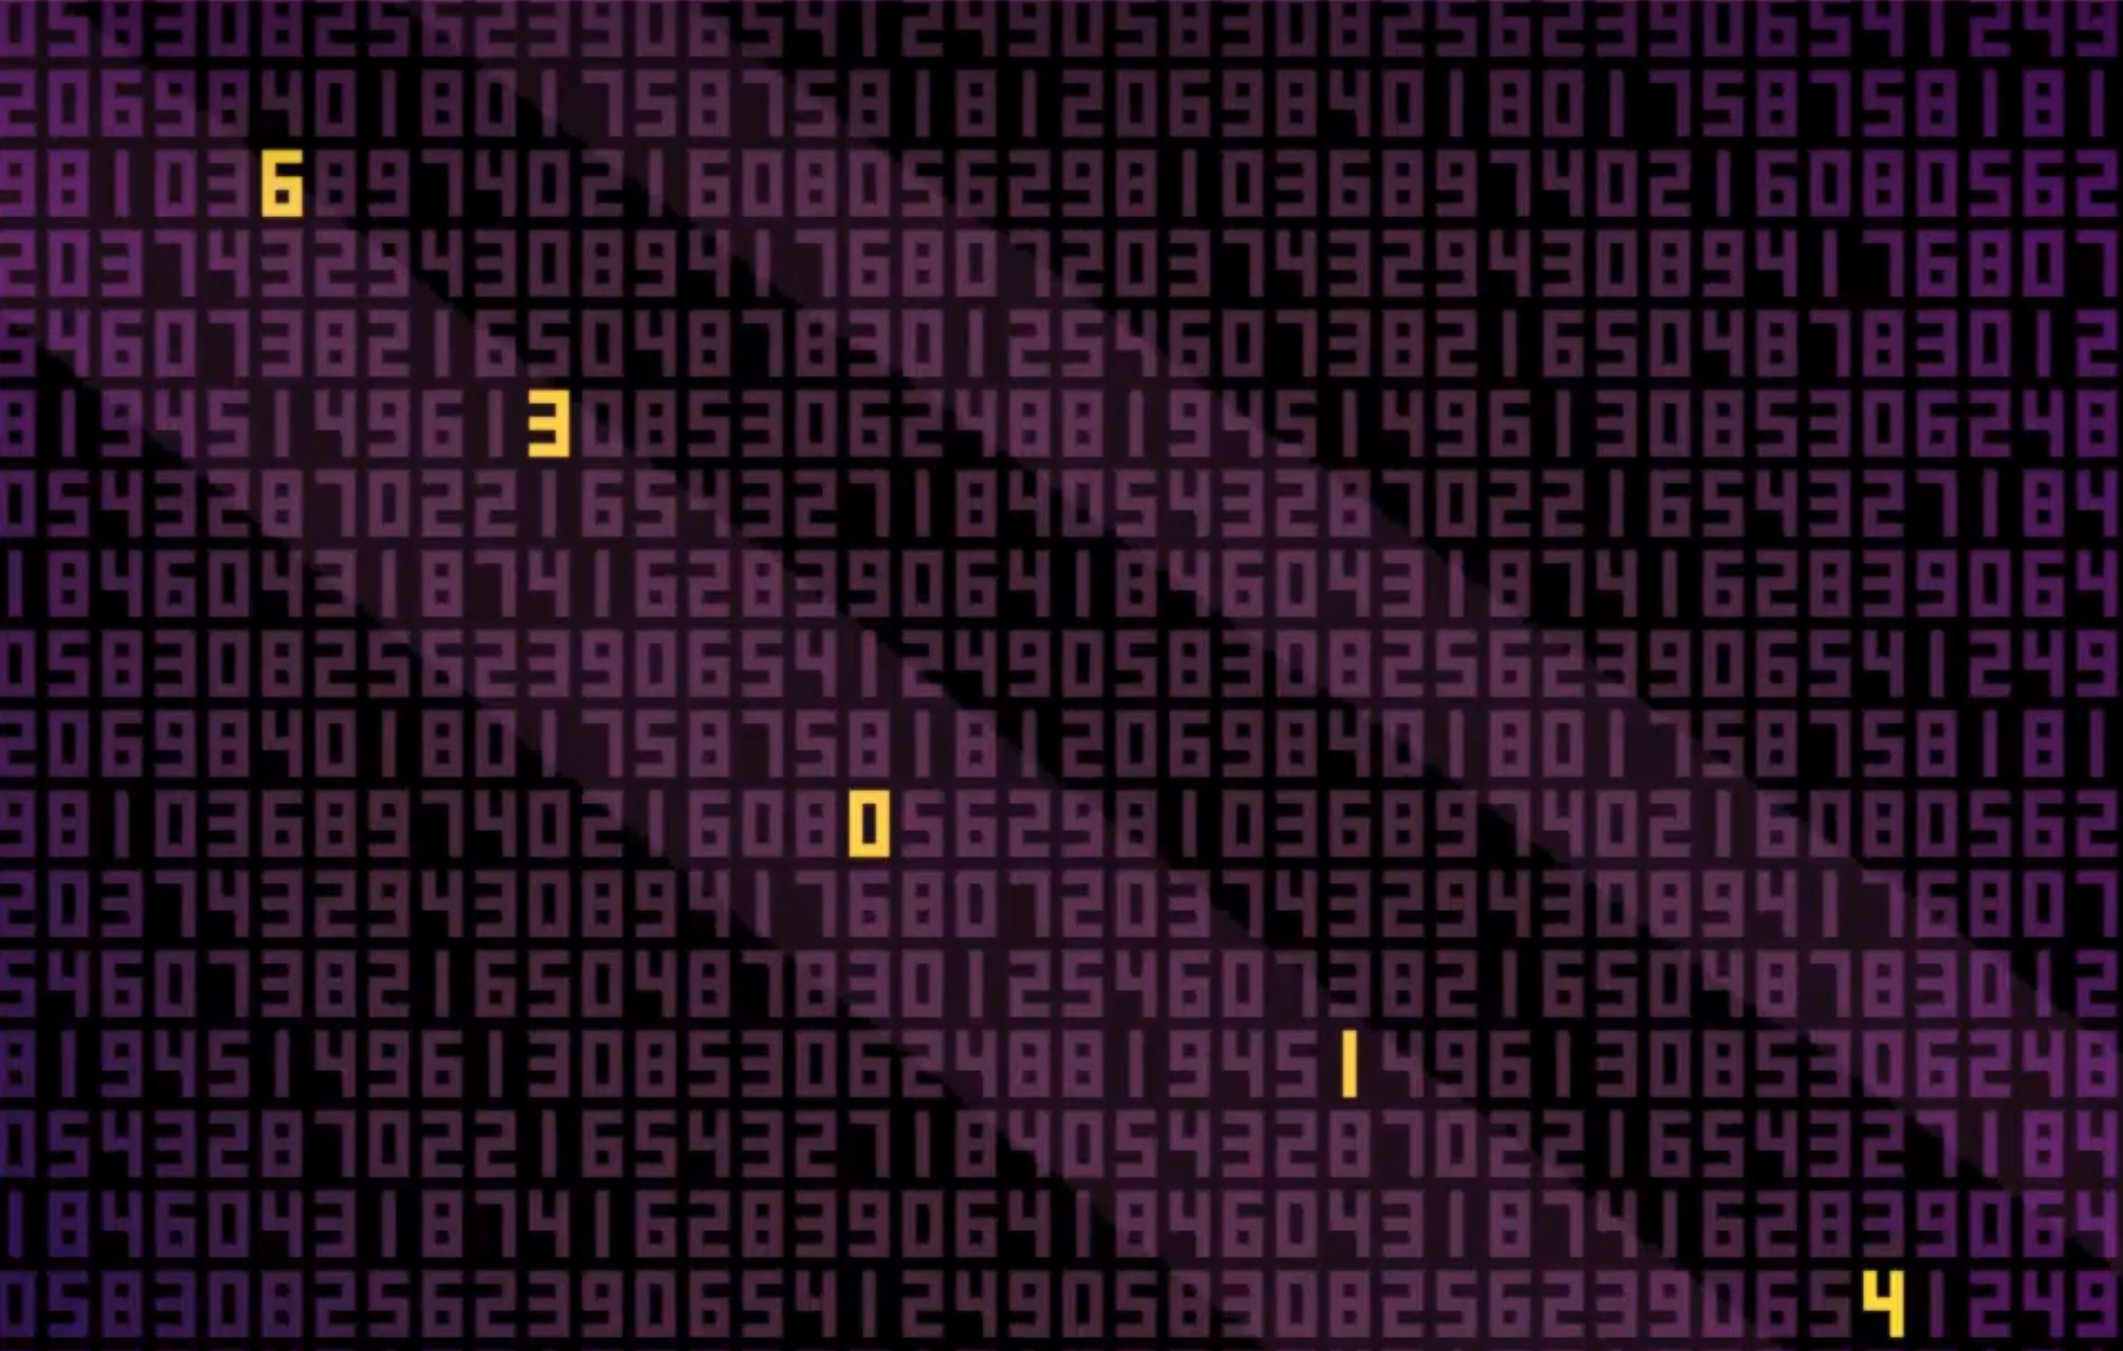
Oneshot中的游戏中地表区章节拖动游戏窗口到屏幕之外使胶片显形的游戏现象。胶片显形状的事情,于是就尝试复刻判断条件。 -
游戏中的现象是这样的:玩家在窗口化游戏的前提下,把整个窗口拖动到任务栏以下后,游戏中的胶卷发生了替换。
-
实现的具体逻辑很简单,只需要判断窗口化的游戏窗口是否已经移动玩家的屏幕下方即可,注意这里应该判断到屏幕底端的位置而不是到状态栏的位置,因为玩家可能隐藏了状态栏。因此完整实现逻辑如下:
- 窗口化实现
- 窗口触底检测
1 窗口化实现
1-1 代码实现
- 在
Unity中,实现游戏窗口的方式很简单: - 我们随机在空场景新建一个全新的脚本并挂载
cs
using System.Collections;
using System.Collections.Generic;
using UnityEngine;

public class WindowSet : MonoBehaviour
{
    void Awake()
    {
        Screen.fullScreenMode = FullScreenMode.Windowed;
        Screen.SetResolution(1280, 720, false);
    }
}
Screen.fullScreenMode = FullScreenMode.Windowed;将设置游戏的显示模式
| 模式 | 含义 |
|---|---|
| FullScreenWindow | 无边框全屏 |
| ExclusiveFullScreen | 独占全屏 |
| Windowed | 窗口模式 |
Screen.SetResolution(1280, 720, false);将设置窗口的尺寸,最后一个参数fullscreen将判断是否强制全屏
| 值 | 含义 |
|---|---|
| true | 强制全屏 |
| false | 窗口模式 |
1-2 测试
-
同时我们需要注意,窗口化的实现最好在
build后测试,因为在Unity中的Editor里的GameView并非独立窗口
-
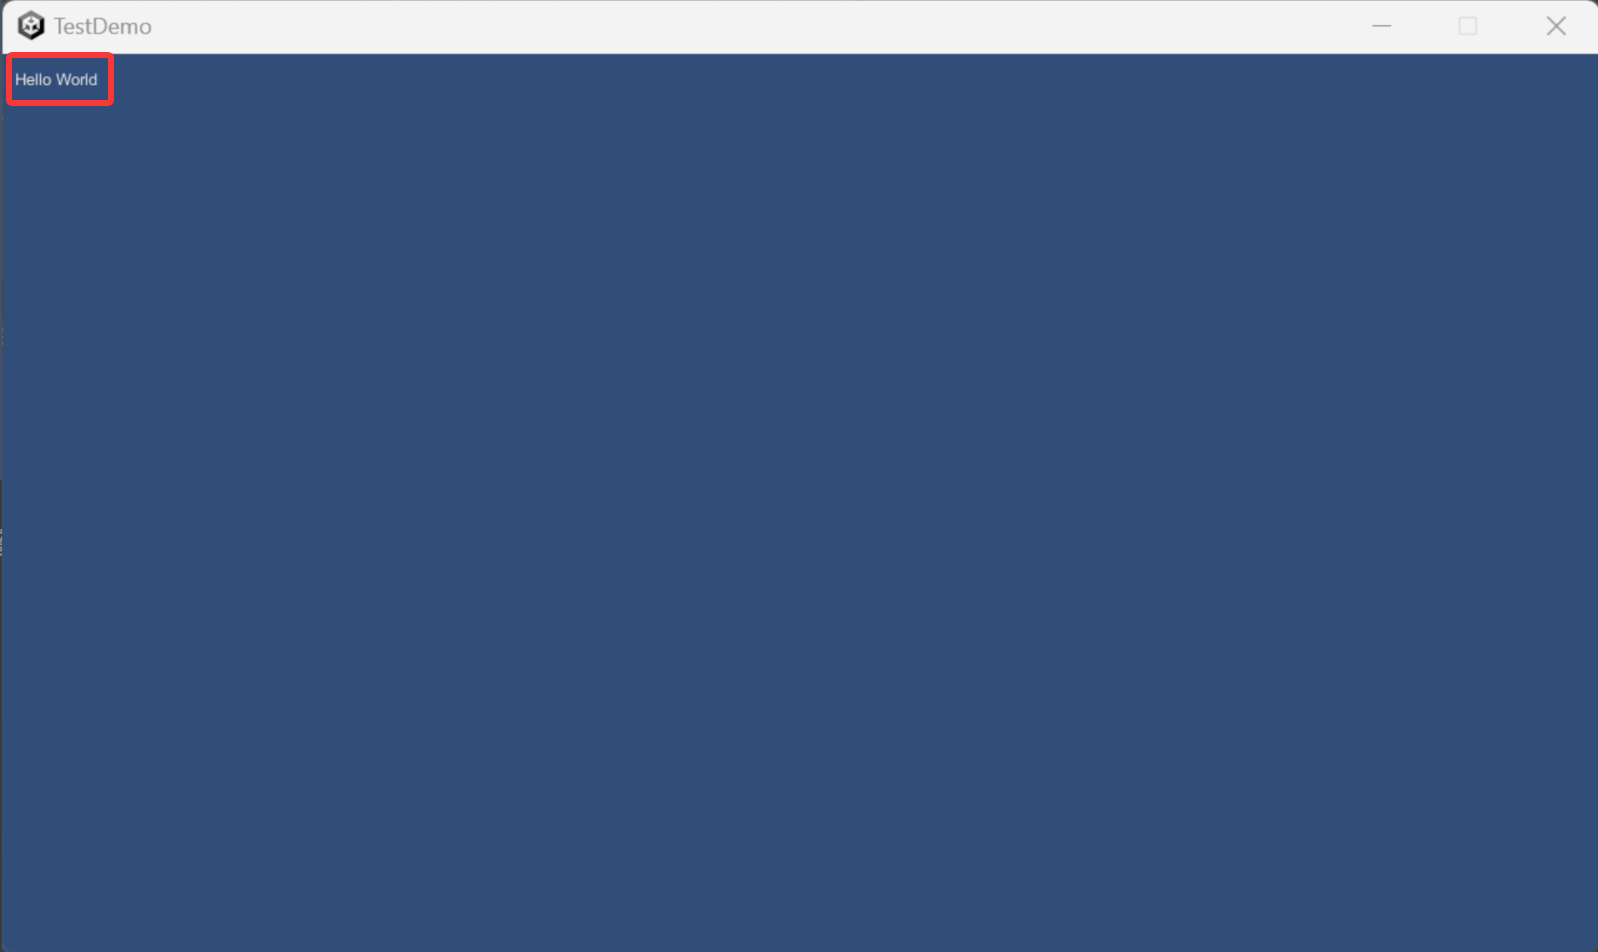
我们点击左上角的
Build And Run进行编译项目,生成 Windows 程序然后直接直接启动游戏(其实就是打包生成exe),初次运行需要指定打包后生成的位置,随便创建个文件夹放置就行了。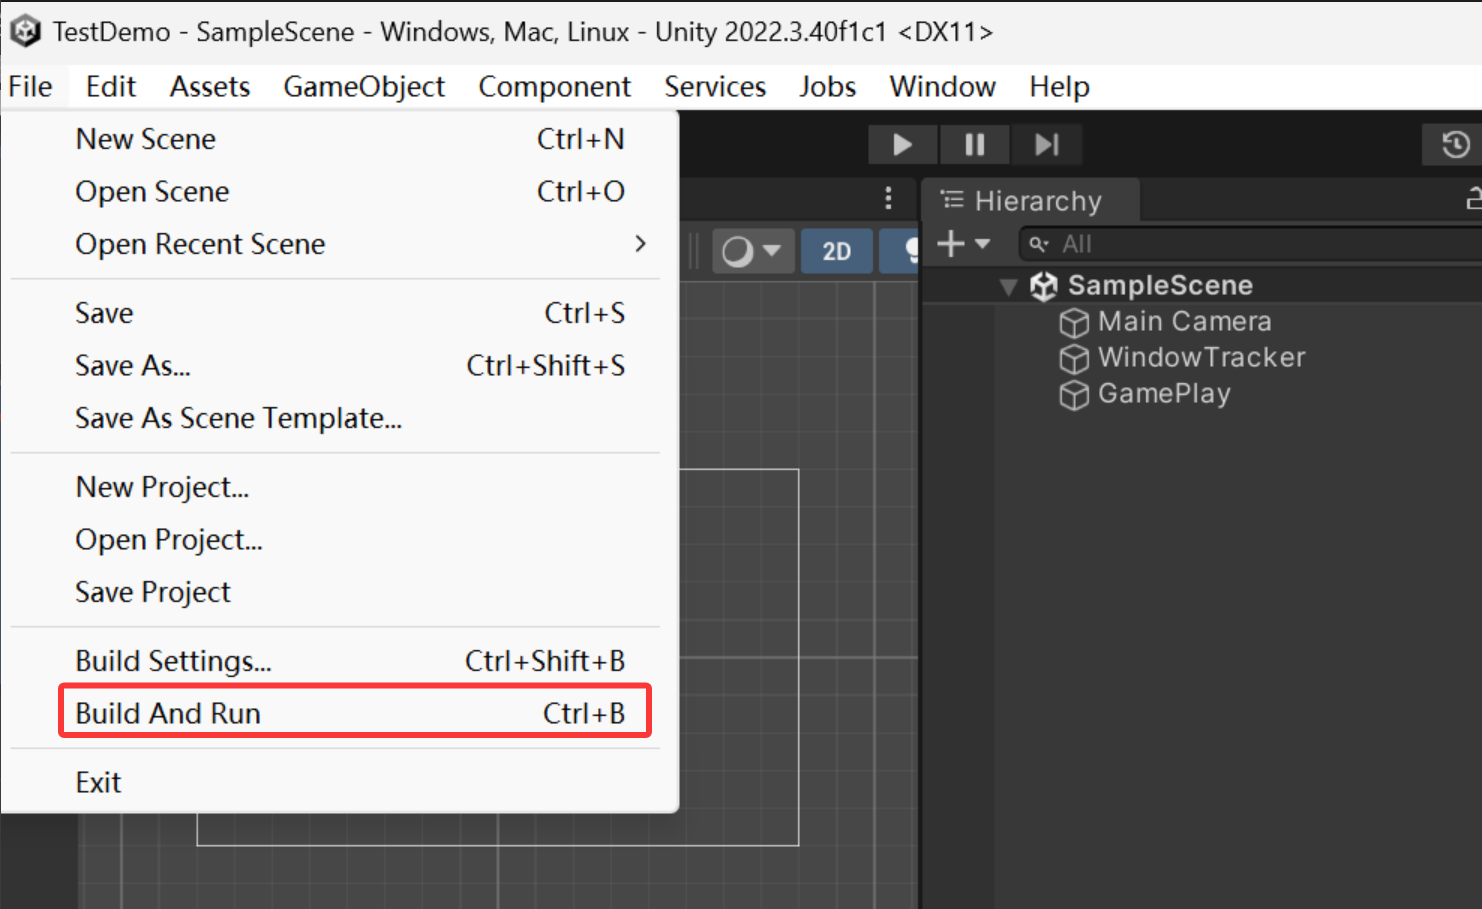
-
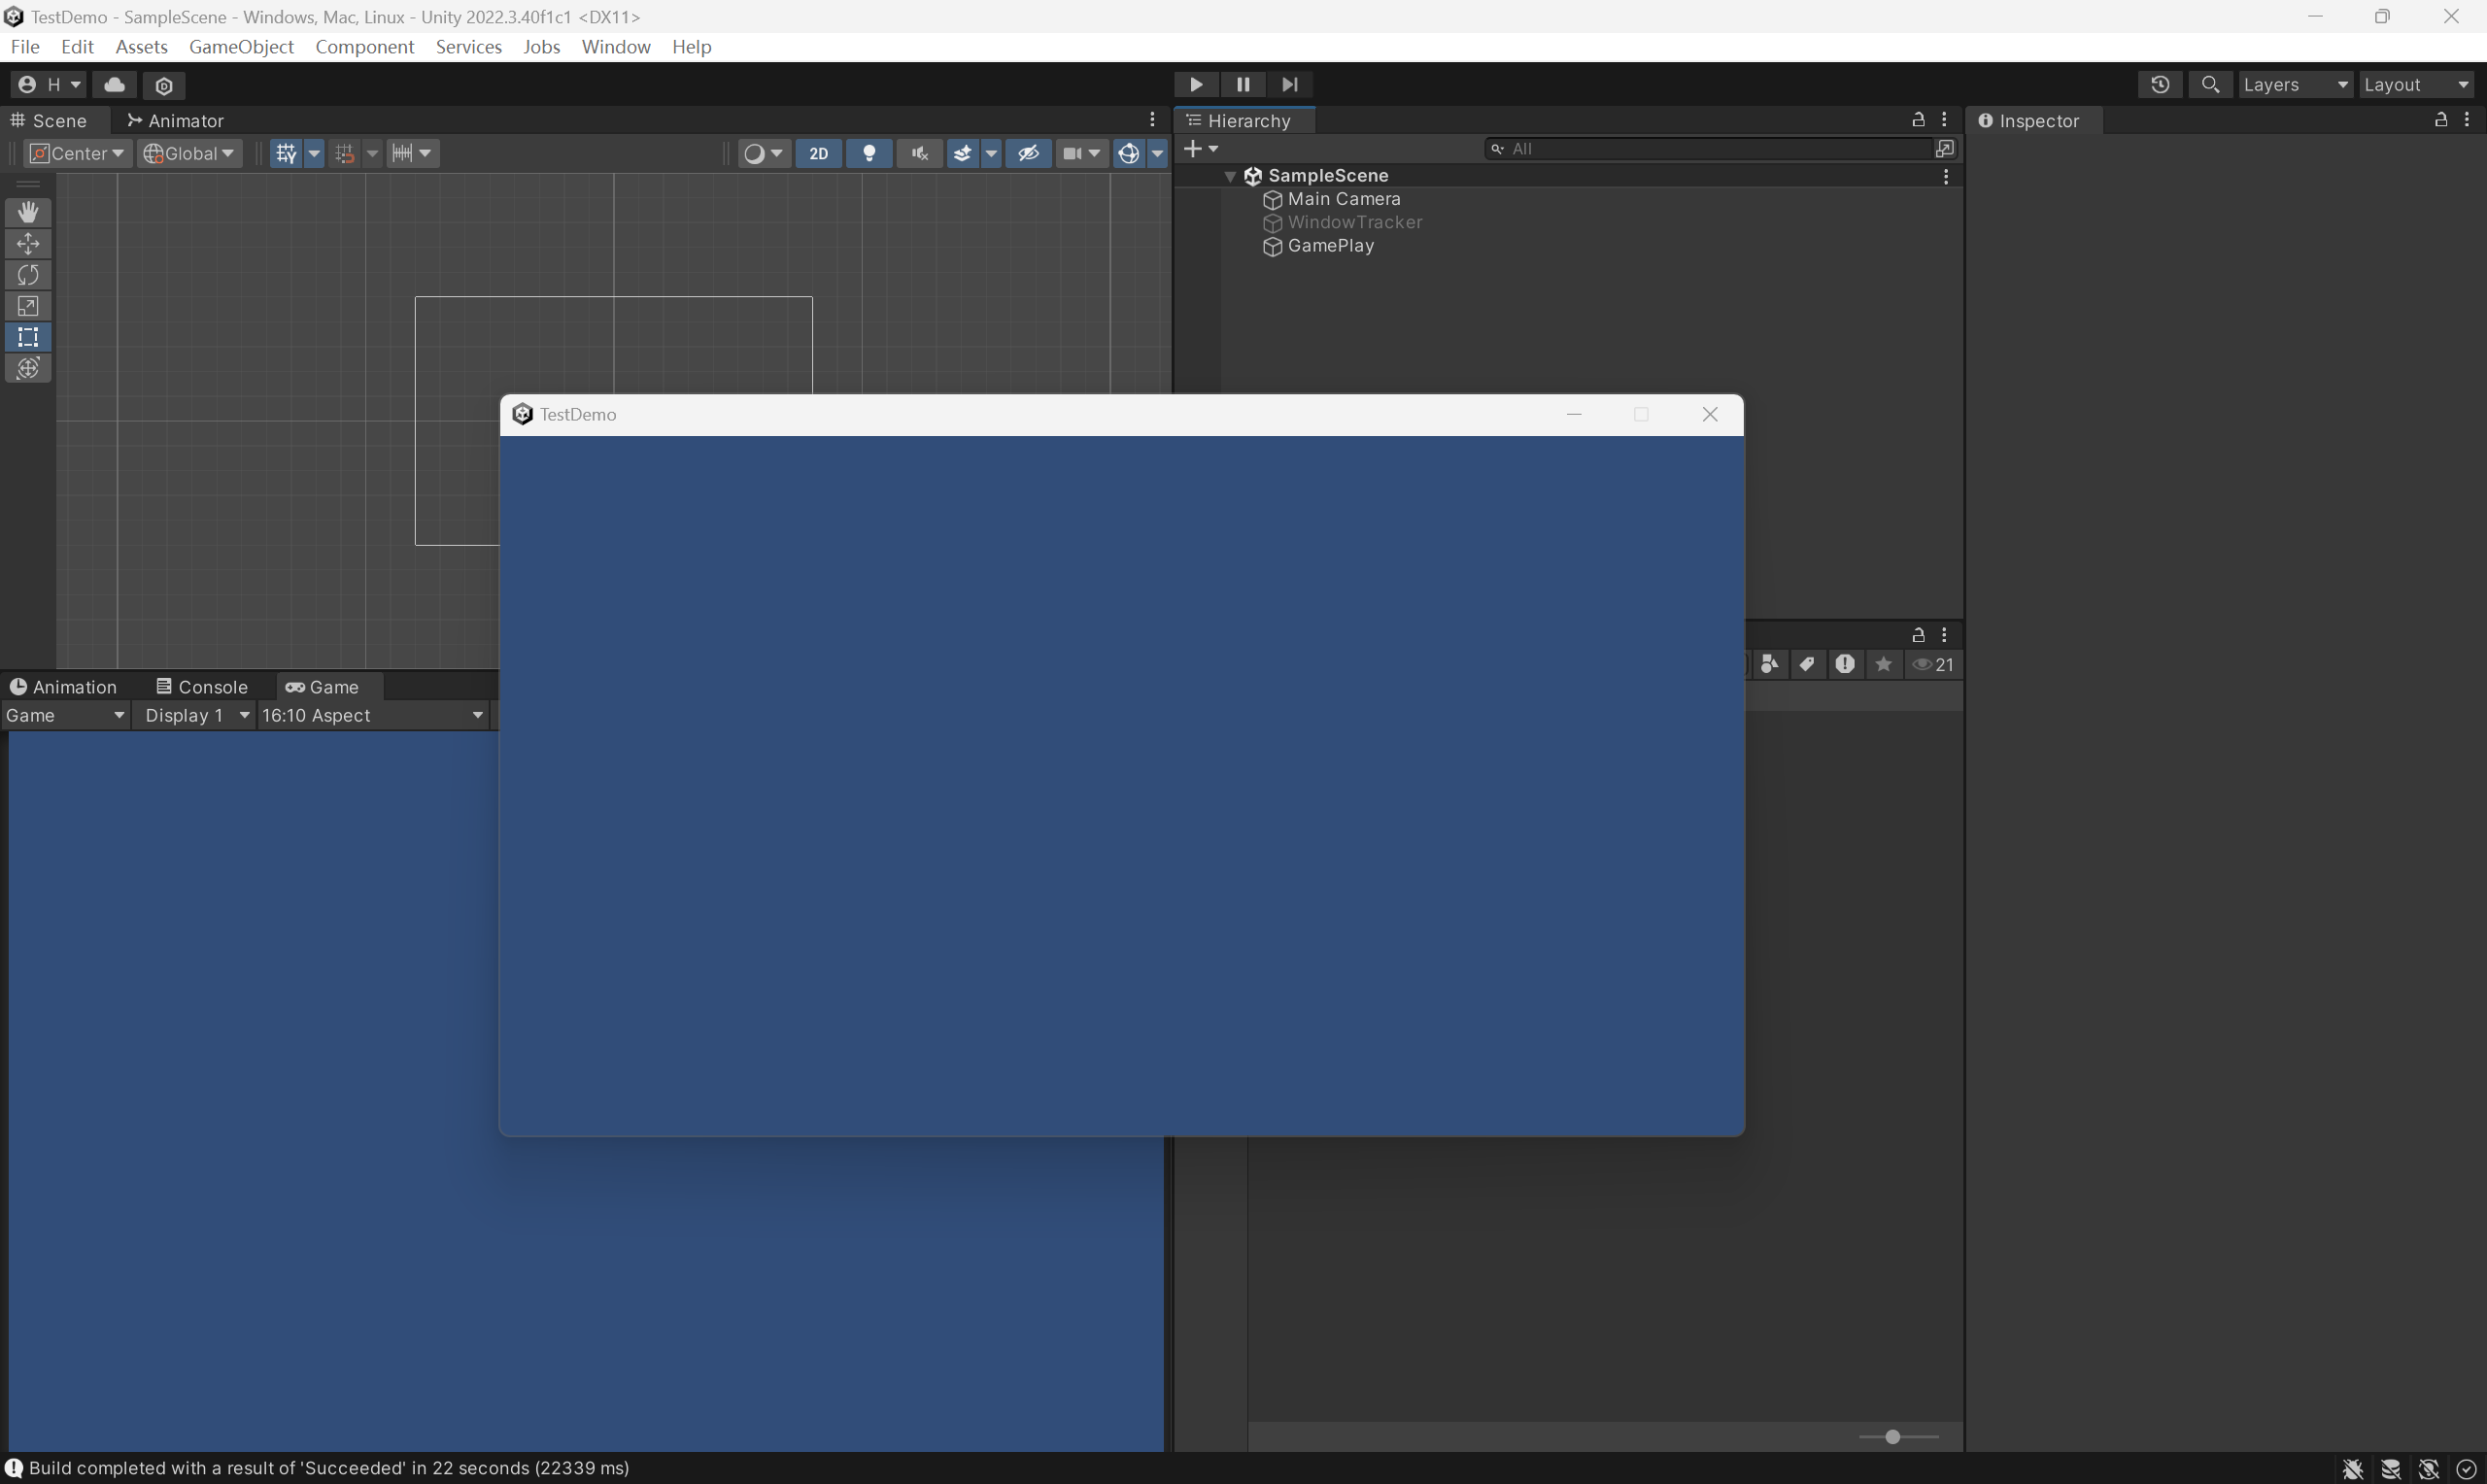
等待进度条结束,我们就可以看到窗口化运行的游戏窗口了
窗口触底检测
2-1 小工具DebugLog
-
通常我们在游戏测试阶段的时候,会使用
Debug.Log语句来打印输出内容,但是这依赖于编辑器页面的Console模块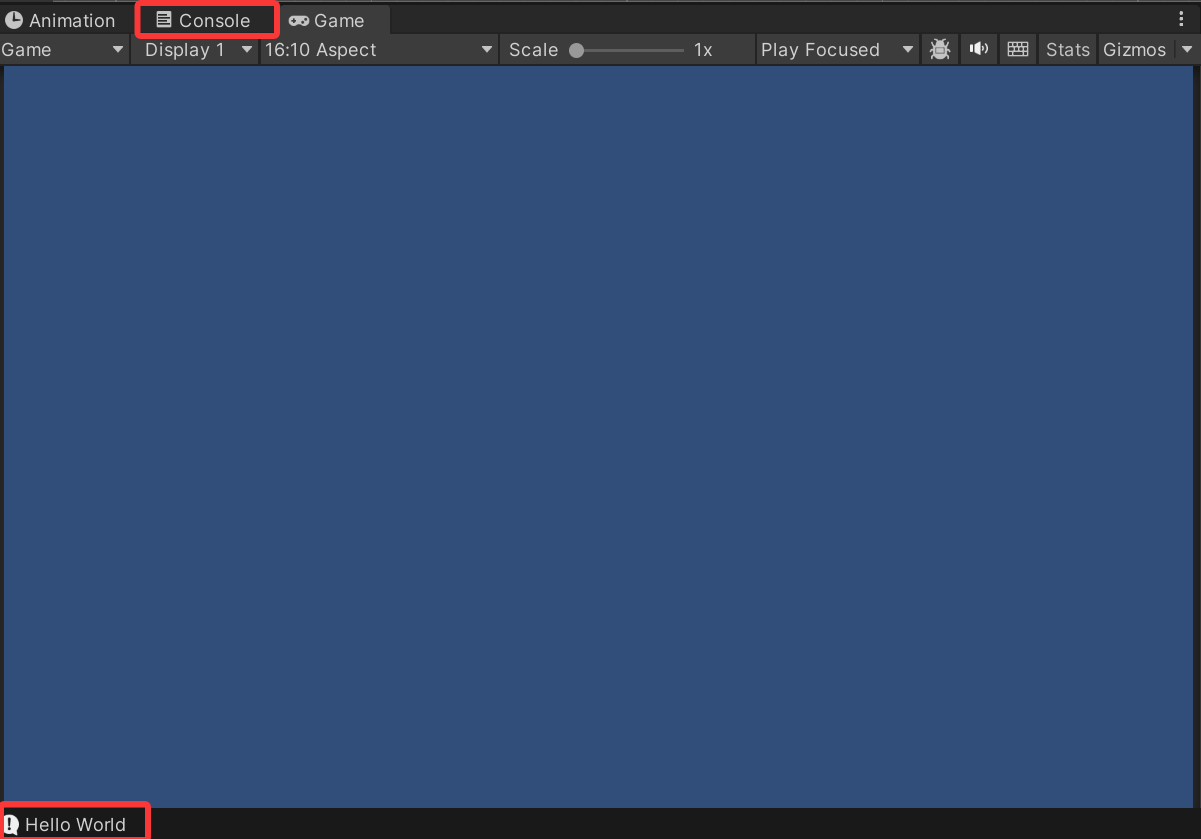
-
这时候我们需要在游戏窗口内置一个运行时日志控制台,作用是在游戏运行时直接输出在屏幕上,就比如这样:
-
具体实现逻辑如下:
cs
using System.Collections;
using System.Collections.Generic;
using UnityEngine;

public class RuntimeConsole : MonoBehaviour
{
    Queue<string> logs = new Queue<string>();

    void OnEnable()
    {
        Application.logMessageReceived += HandleLog;
    }

    void OnDisable()
    {
        Application.logMessageReceived -= HandleLog;
    }

    void HandleLog(string logString, string stackTrace, LogType type)
    {
        logs.Enqueue(logString);

        if (logs.Count > 10)
            logs.Dequeue();
    }

    void OnGUI()
    {
        int y = 10;
        foreach (var log in logs)
        {
            GUI.Label(new Rect(10, y, 800, 20), log);
            y += 20;
        }
    }
}-
上述代码构建了一个日志队列
Queue<string> logs,并存储最近十条日志 -
OnEnable将Unity 全局日志事件绑定,使触发来源包括:Debug.Log()
Debug.LogWarning()Debug.LogError()
-
void OnGUI()用的是Unity 老式 IMGUI 绘制系统 -
有了上述脚本,随便挂在空物体上,以后程序调试的时候使用日志输出游戏内也可以看到了。
2-2 触底判断
- 首先我们需要知道的是,
Unity本身没有提供"获取窗口在屏幕中真实位置"的跨平台 API,因此在 Windows 平台下,通常需要借助:- Windows API(
user32.dll) - 原生插件(
Native Plugin)
- Windows API(
- 这里我们直接用最方便的
user32.dll(啥也不用装) - 完整代码先放在这,然后我们仔细看做了啥。
cs
using System;
using System.Collections;
using System.Collections.Generic;
using System.Runtime.InteropServices;
using UnityEngine;

public class WindowTracker : MonoBehaviour
{
    [StructLayout(LayoutKind.Sequential)]
    public struct RECT
    {
        public int left;
        public int top;
        public int right;
        public int bottom;
    }

    [DllImport("user32.dll")]
    static extern IntPtr GetActiveWindow();

    [DllImport("user32.dll")]
    static extern bool GetWindowRect(IntPtr hWnd, out RECT rect);

    IntPtr hwnd;

    void Start()
    {

        hwnd = GetActiveWindow();
    }

    //标志位,判断是否触发了逻辑(这里只用于单次判断)
    bool isTrigger = false;
    void Update()
    {


        RECT rect;
        if (GetWindowRect(hwnd, out rect))
        {

            Debug.Log($"Pos: ({rect.left}, {rect.top}),isTrigger:{isTrigger}");
            //判断是否触发
            CheckTrigger(rect);
        }
    }

    void CheckTrigger(RECT rect)
    {
        int screenHeight = Screen.currentResolution.height;
        float windowHeight = rect.bottom - rect.top;
        // 计算进入屏幕外的深度
        float depth = rect.bottom - screenHeight;
        //换算成百分比
        float percent = Mathf.Clamp01(depth / windowHeight);
        //打印百分比
        Debug.Log($"percent:{percent}");
        // 判断是否贴近底部
        if (percent >0.9)
        {
            //触发逻辑,这里可以绑定事件去触发图片替换
            //这里测试就设置一次,因为窗口化拖到屏幕外我们是看不到输出的(乐)
            isTrigger = true;
        }
    }
}
2-3 分析
cs
 [DllImport("user32.dll")]
static extern IntPtr GetActiveWindow();

[DllImport("user32.dll")]
static extern bool GetWindowRect(IntPtr hWnd, out RECT rect);- 上面这两函数来自
user32.dll,他们分别的作用是:GetActiveWindow:获取当前窗口句柄GetWindowRect:获取窗口位置,需要传入窗口句柄
- 通过上述代码的组合我们就可以获取到当前窗口的位置
cs
hwnd = GetActiveWindow();
GetWindowRect(hwnd, out rect)- 同时为了接收
GetWindowRect传回的参数,我们需要借助cs的特殊机制out = 输出参数(output parameter),他允许函数"直接修改调用者的变量" - 因此我们需要构建一个结构体来对接参数
cs
public struct RECT
{
    public int left;
    public int top;
    public int right;
    public int bottom;
}| 字段 | 含义 |
|---|---|
| left | 左边 X |
| top | 上边 Y |
| right | 右边 X |
| bottom | 下边 Y |
cs
void CheckTrigger(RECT rect)
{
	int screenHeight = Screen.currentResolution.height;
	float windowHeight = rect.bottom - rect.top;
	// 计算进入屏幕外的深度
	float depth = rect.bottom - screenHeight;
	//换算成百分比
	float percent = Mathf.Clamp01(depth / windowHeight);
	//打印百分比
	Debug.Log($"percent:{percent}");
	// 判断是否贴近底部
	if (percent >0.9)
	{
		//触发逻辑,这里可以绑定事件去触发图片替换
		//这里测试就设置一次,因为窗口化拖到屏幕外我们是看不到输出的(乐)
		isTrigger = true;
	}
}- 紧接着我们只需要计算游戏窗口距离玩家游戏屏幕底端的距离,计算出超出屏幕底端的部分并换算出半分比即可,如果后续游戏逻辑需要实时根据深度进行特殊判断,直接使用换算后的
percent即可。
3 测试
-
确保上述三个脚本在游戏中均被挂载运行,然后点击
File的build and run -
此时会出现我们的游戏窗口,可以看到此时的
isTrigger仍是False并没有触发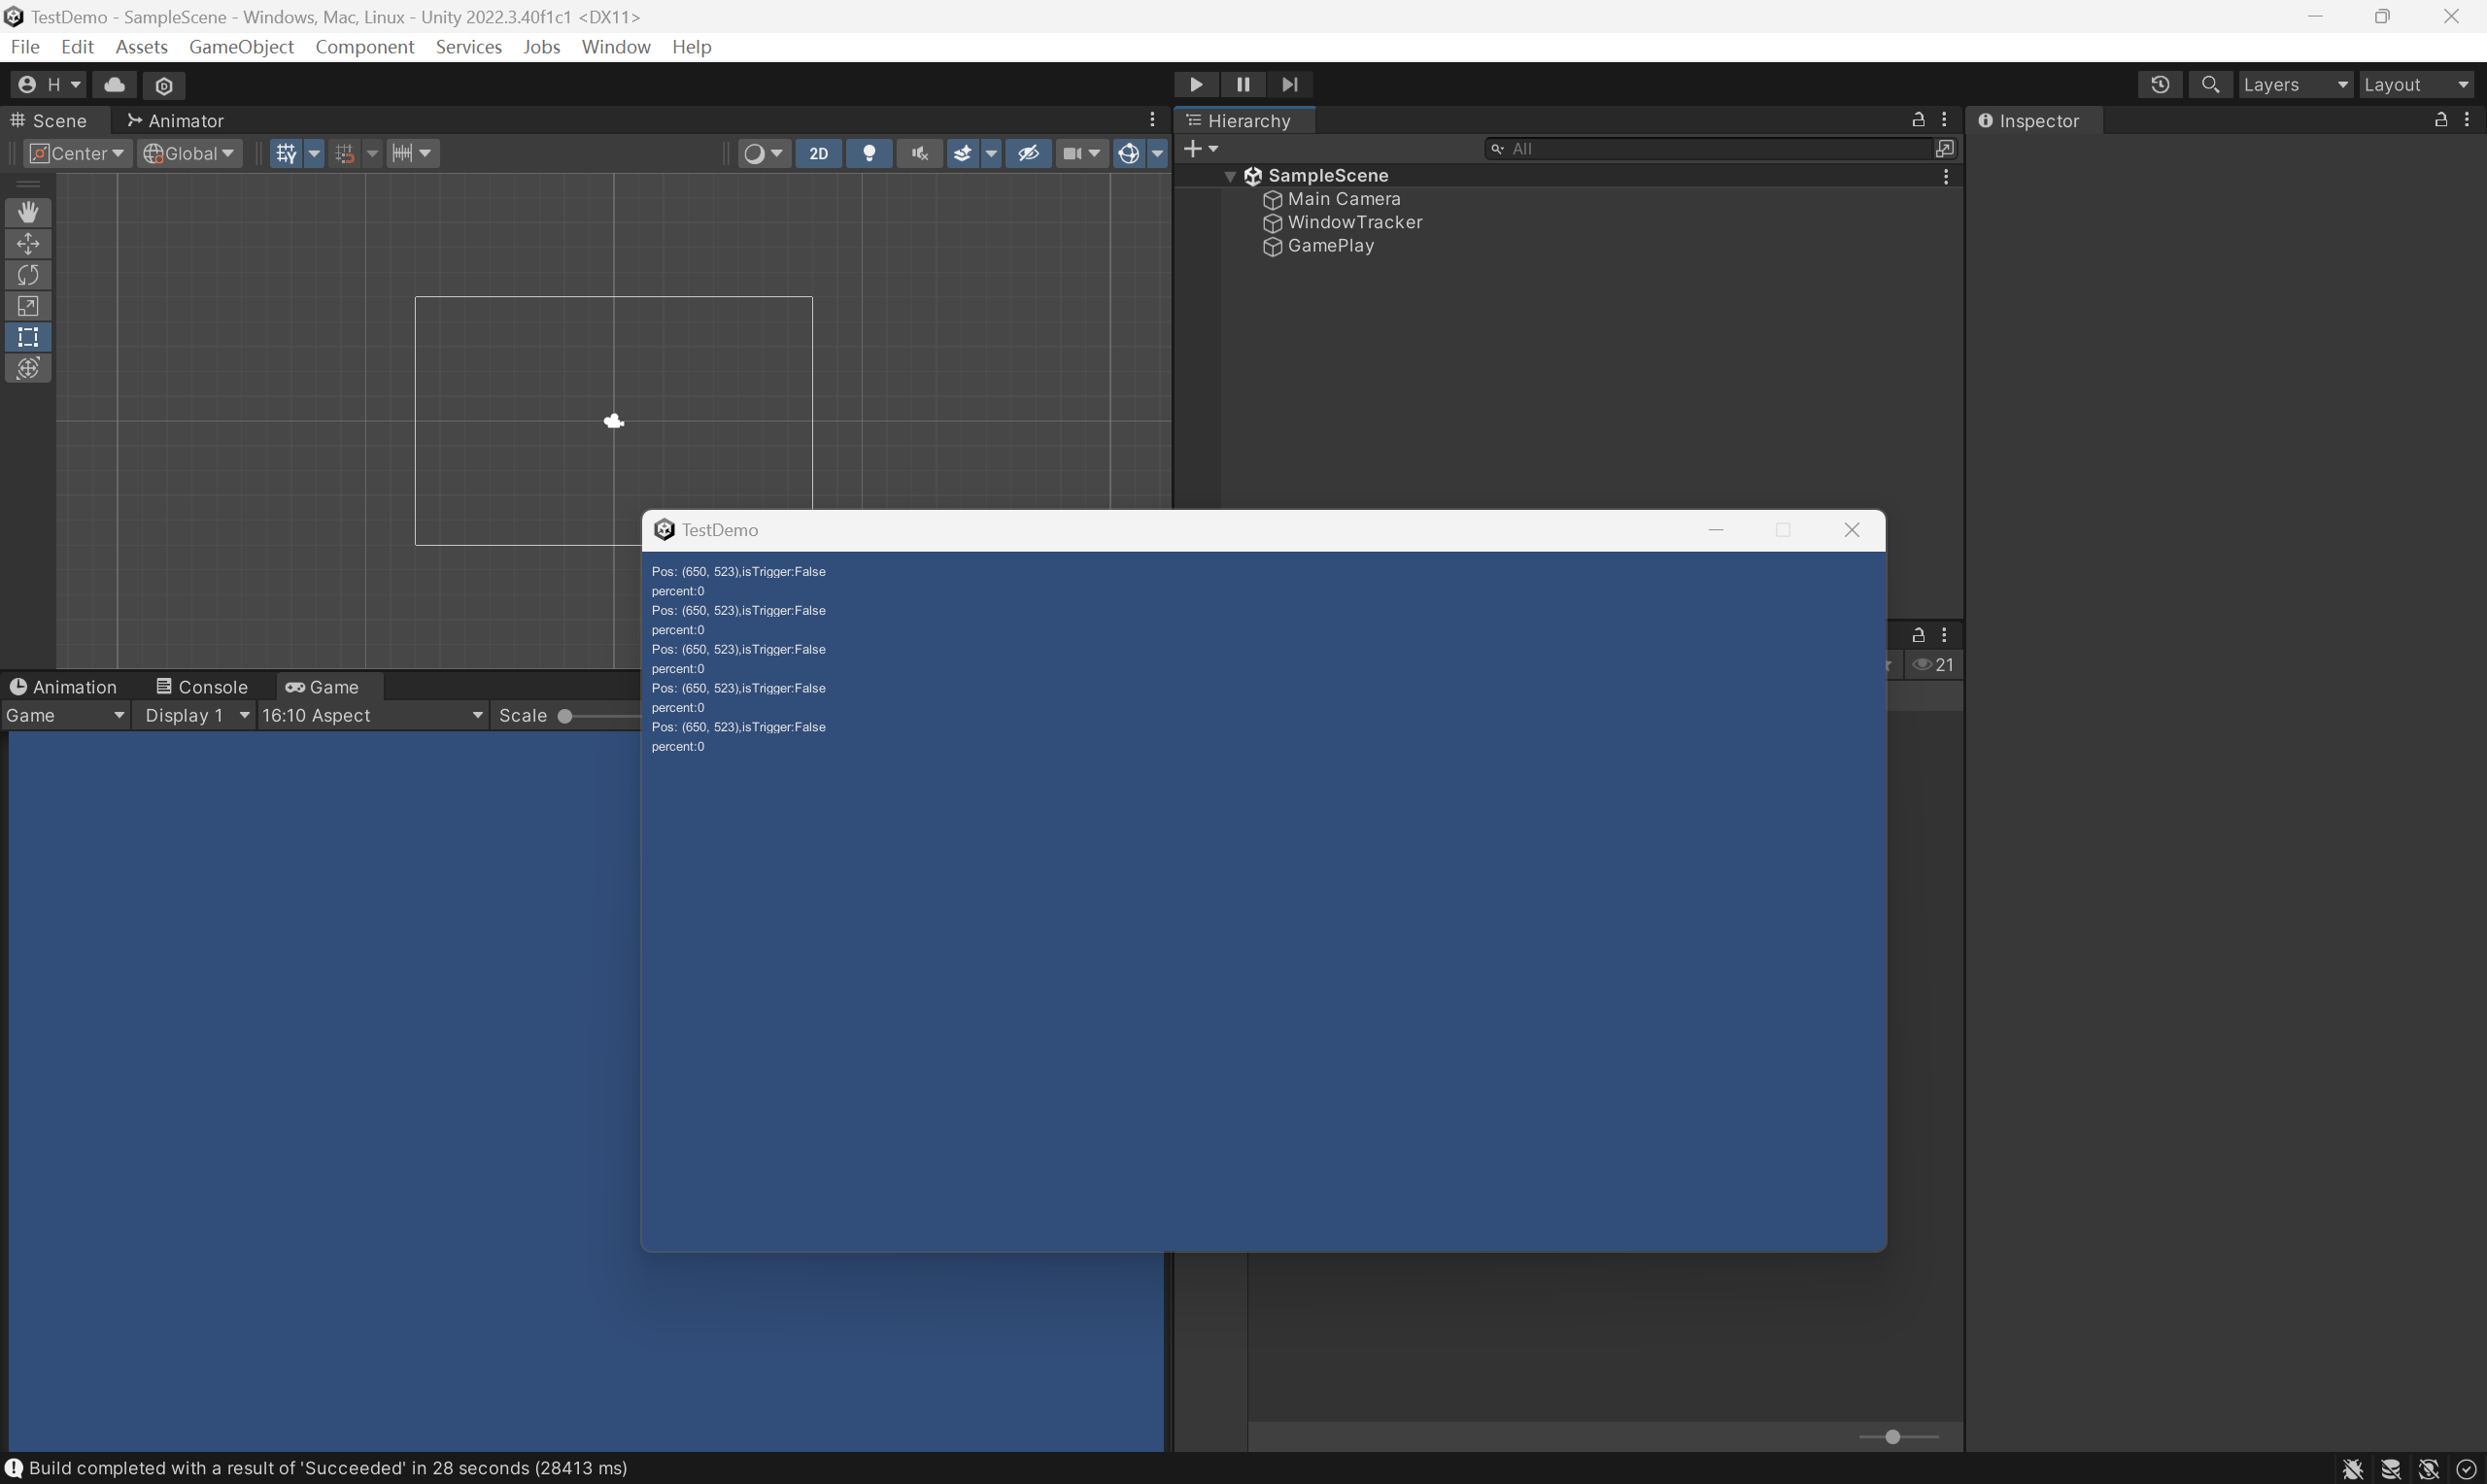
-
我们拖动窗口,可以看到
percent百分比在增加,直到我们拖动窗口完全消失后再次拖动回来,可以发现isTrigger被设置为True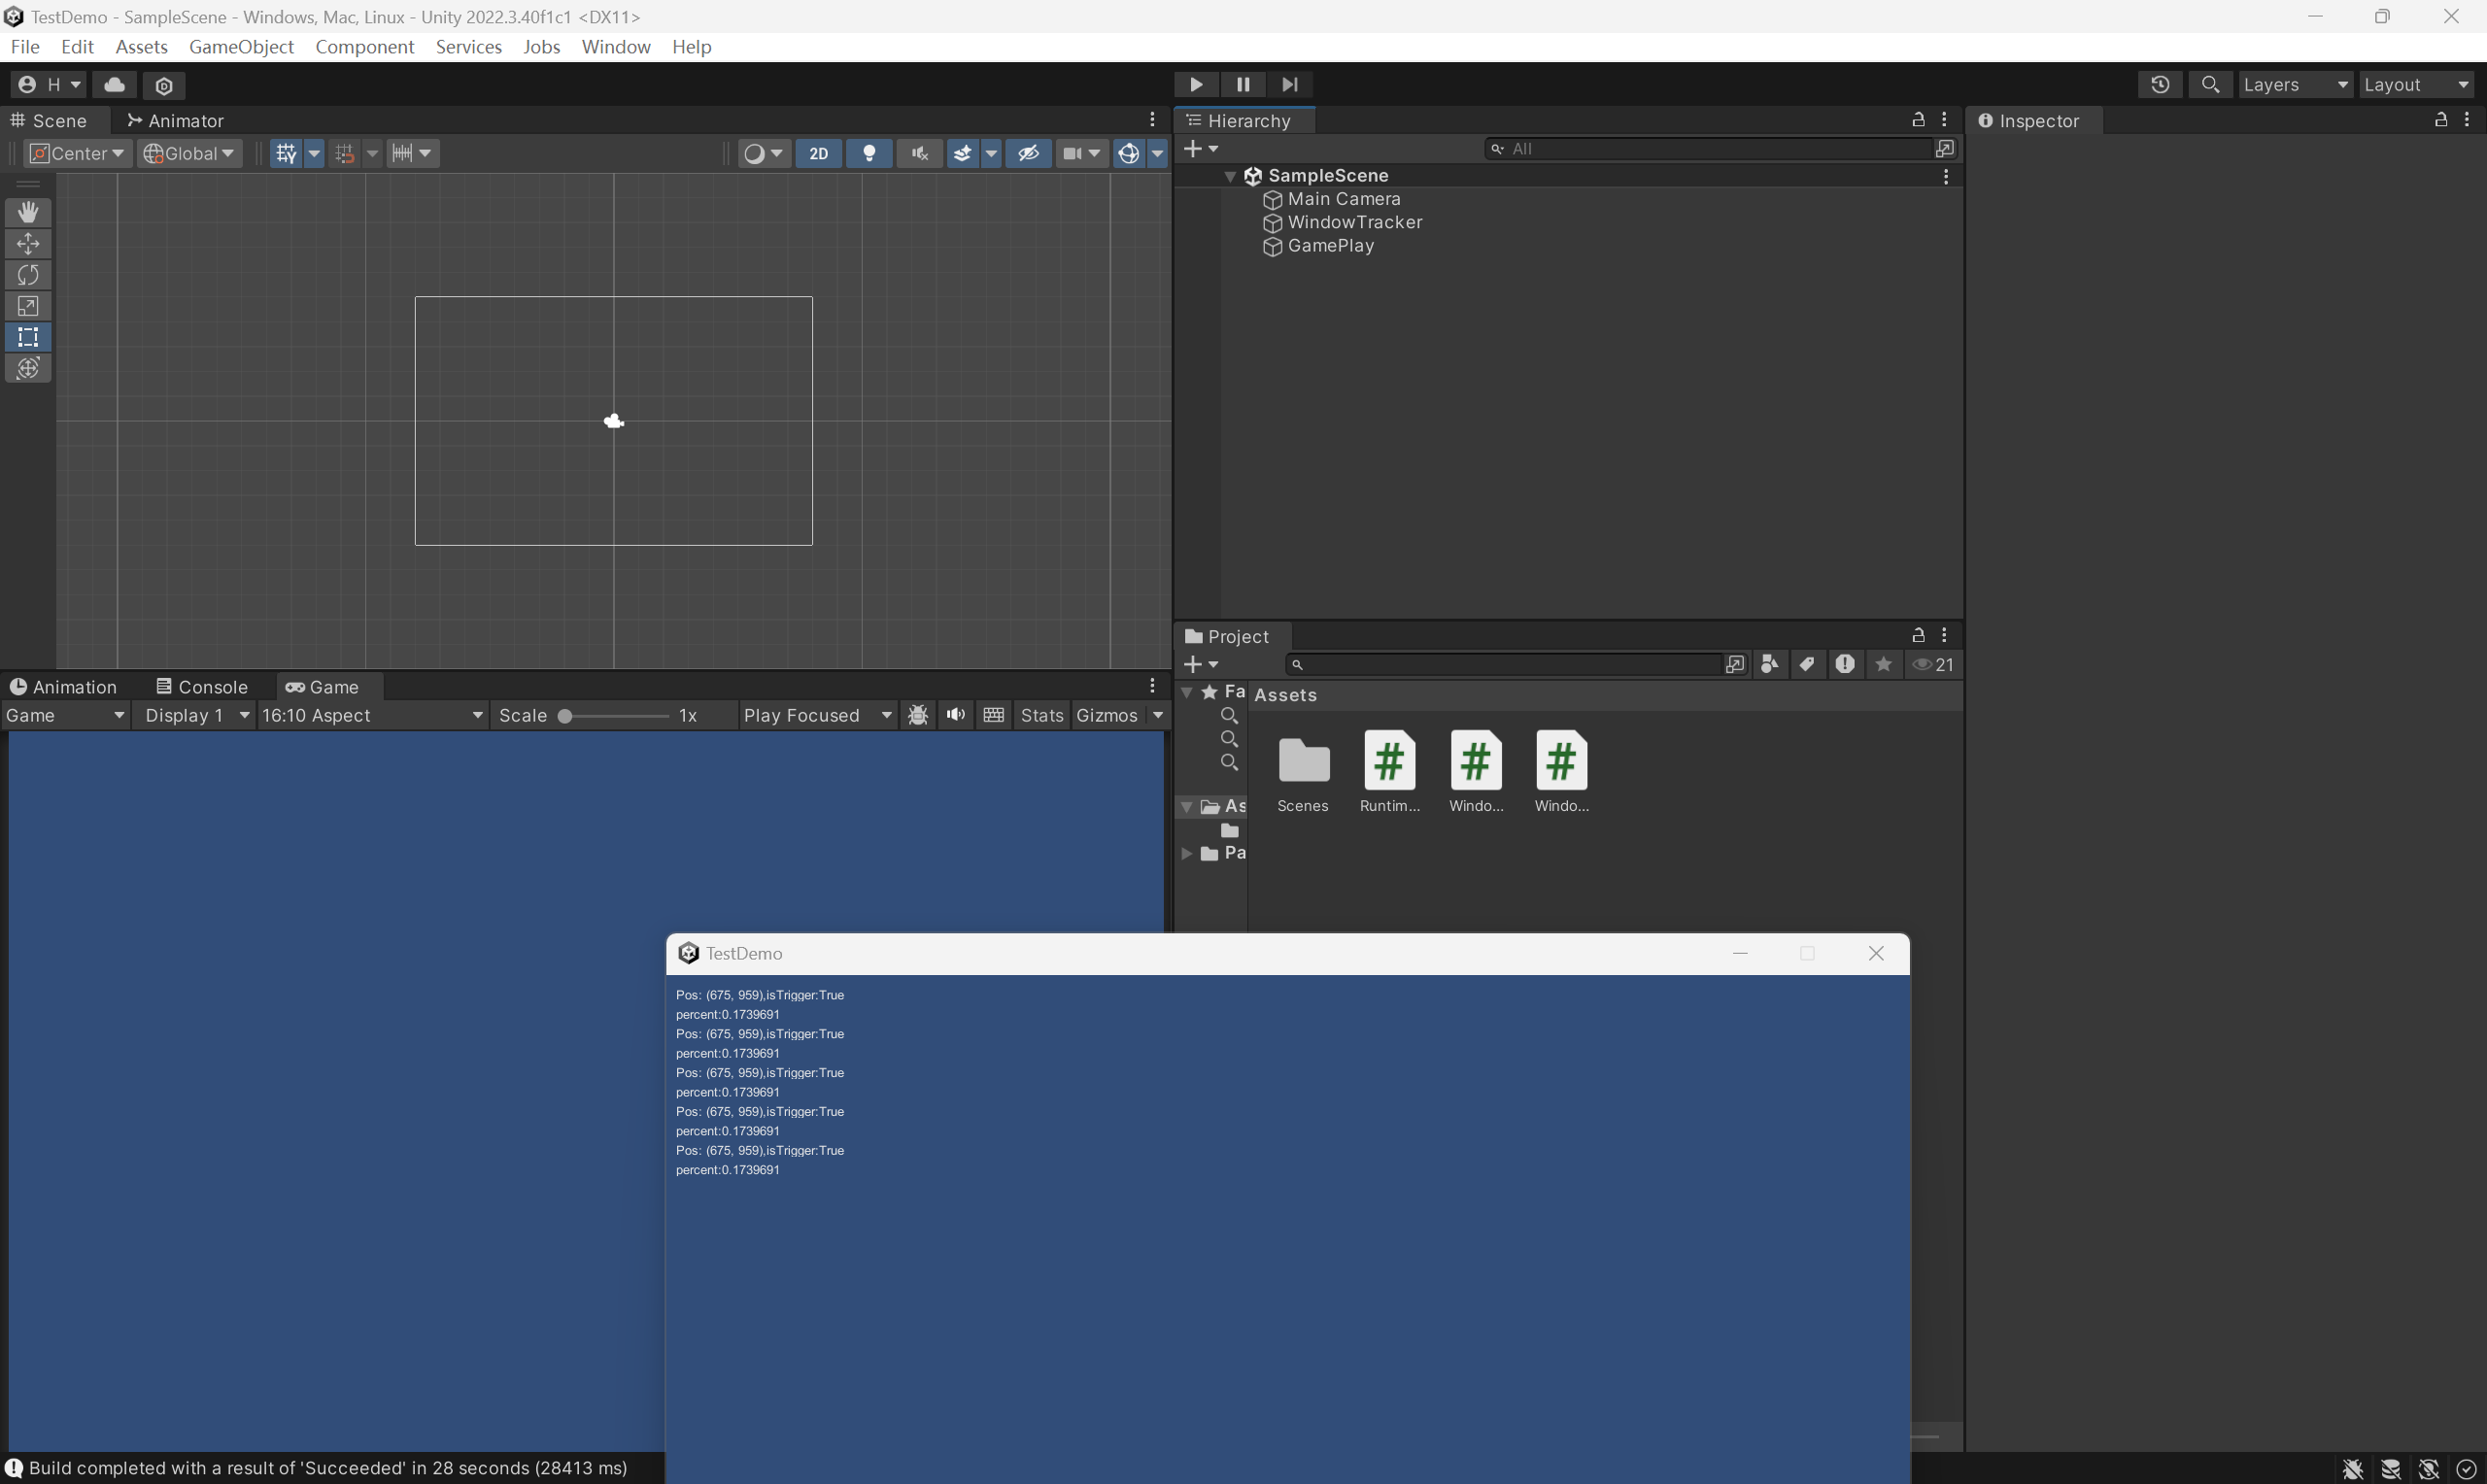
小结
- 本文使用
Unity复刻Oneshot中的游戏中窗口化拖动到屏幕之外使胶片显形的游戏现象。 - 如有错误,欢迎指出!
- 谢谢观看