一、基础概念
1、深度学习框架基础概念
深度学习框架的出现降低了入的槛 。我们不在需要丛从复杂的神经网络和反向传播算法开始编代码,可以依据需要,使用已有的模型配置参数 ,而模型的参数自动训练得到。我们也可以在已有模型的基础上增加自定义网络层 ,或者是在顶端选择自己需要的分类器和优化算法。
一个深度学习框架可以理解为一套积木。积木中的每个组件就是一个模型或者算法 。这就可以群免重复造轮子,我代可以使用积木中的组生去组装符合要求的积木模型。
2、主流深度学习框架tensorflow2基础
来源
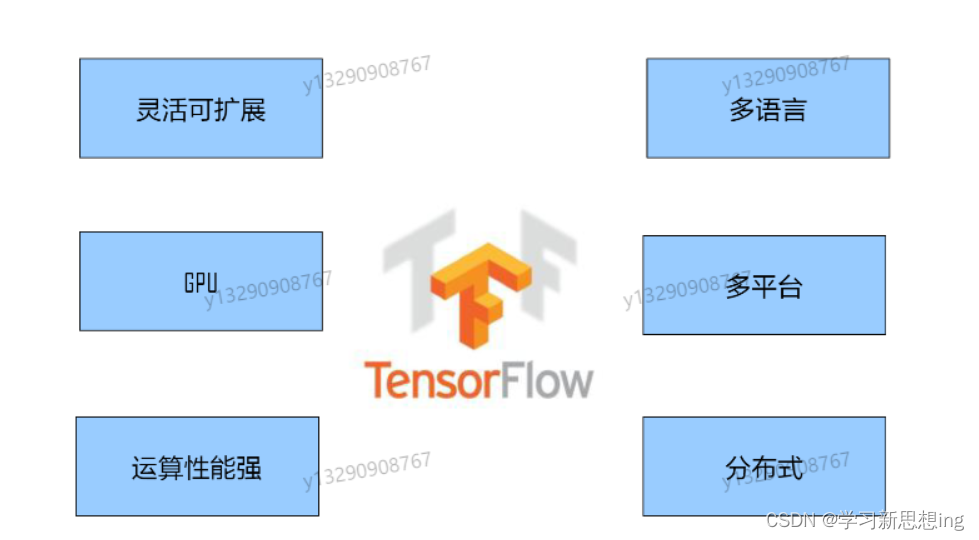
TensorFlow是谷歌开源的第二代用于数字计算的软件库。TensorFlow计算框架可以很好地支持深度学习的各种算法,可以支持多种计算平台,系统稳定性较高。
特点

与1.x版本比tensorflow2.0的特点
Tensorflow2特点:
-
Keras高级接口:
最大的特性(Easytouse):去掉了graph和session机制。变的像Python,Pytorch一样所见即所得。
-
主要改进点:
-
TensorFlow2的核心功能是动态图机制Eagerexecution。它允许用启像正常程序一样去编写、调试模
型,使TensorFlow更易于学习和应用;
-
支持更多平台、更多语言,通过标准化AP的交换格式和提供准线改善这些组件之间的兼容性:
-
删除已弃用的AP并减少重复的AP数,避免给用户造成混淆;
-
兼容性和连续性:兼容1.x模块
-
t.cntrib退出历史舞台。其中有维护价值的模块会被移动到别的地方,剩余的都将被册删除。
-
分布式
- TensorFlow在不同计算机上运行
- 小到智能机,大到集群扩展,可以立刻生成模型
- 目前原生支持的分布式深度学习框架不多,只有TensorFlow、CNTK、DeepLearning4J、MXNet等。
- 在单GPU的条件下,绝大多数深度学习框架都依赖于cuDNN,因此只要硬件计算能力或者内存分配差异
不大,最终训练速度不会相差太大。但是对于大规模深度学习来说,巨大的数据量使得单机很难在有
限的时间完成训练。而Tensorflaw支持分布式训练。
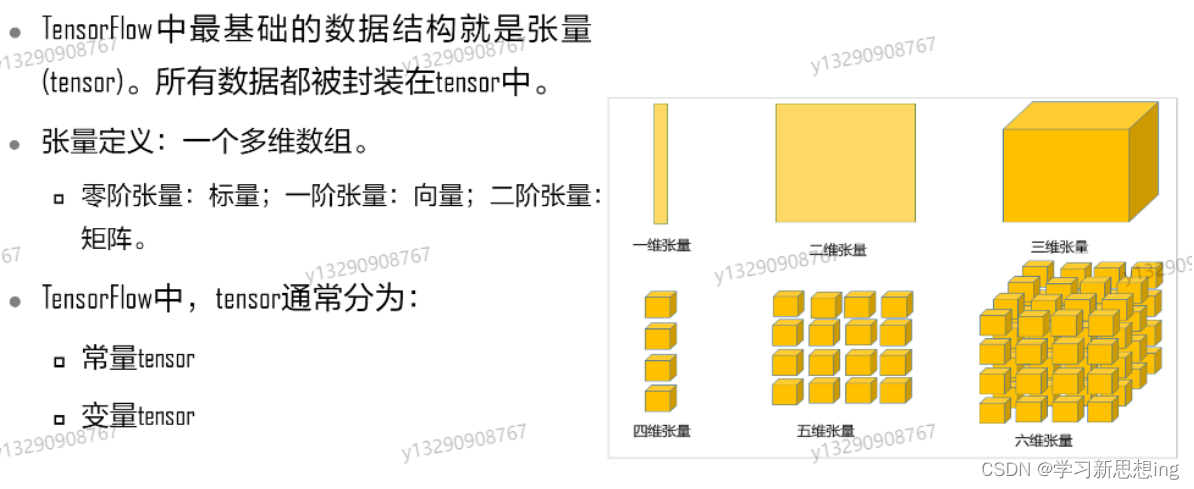
3、张量介绍

4、tensorflow2 Eager Execution VS Auto Graph
4.1 Eager Execution
- 静态图:采用静态图(模式)的即s可正w,通过计算图将计算的定义和热行分隔升,这是-种声明式(declarative)的编程模型。Graph模式下,需要先构建og命计算图然后开启对话(sesSsion),再喂进数据才能得到执行结果。
- 这种静态图在分布式训练,性能优化和部署方面有很多优势。但是在de叫g时确实非常不方 更,类似以于对编译好的语言程序调用,此时是我们无法对其进行内部的调试,因此有了基 于动态计算图的EagerExecutiog
- EagerExecution是一种命令式编程,和原生python一致。当执行某个操作时立即返回结果。
- TensorFlow2.0默认采用EaqerExecution模式。
4.2 Auto Graph
- 在TensorFlow2中,默认情况下启用了Eager Execution 。对于用户而言直观且灵活(运行 一次性操作更容易,更快),但这可能会牲性能和可部署性。
- 要获得最佳性能开使模型可在任何地方部著,可以使用添加装饰器t.uncti叫从程序中构建图,可以使得Python代码更高效。
- tf.function可以将函数中的fersorFlow操作构建为一个Graphep9这个函数就可以在graph模式9o908
下执行。可以看成函数被封装成了一个Graph的TensorFlow操作。
二、Tensorflow2基础操作
1、张量的创建
1.1创建常量的tensor
1.创建常见常量tensor
python
import tensorflow as tf
import numpy as np
const_a = tf.constant([[1,2,3,4]],shape=[2,2],dtype=tf.float32)  #创建2x2矩阵
const_a

########################输出结果################################
<tf.Tensor: shape=(2, 2), dtype=float32, numpy=
array([[1., 2.],
       [3., 4.]], dtype=float32)>
2.创建全零或者全一的
python
zero_b = tf.zeros(shape=[2,2],dtype=tf.int32)
zero_b
#tf.zeros_like(),tf.ones(),tf.ones_like();

<tf.Tensor: shape=(2, 2), dtype=int32, numpy=
array([[0, 0],
       [0, 0]])>
3.自定义数值
python
fill_c = tf.fill([3,3],8);
fill_c
fill_c.numpy()


array([[8, 8, 8],
       [8, 8, 8],
       [8, 8, 8]])
4.已知分布
python
randm_d = tf.random.normal([5,5],mean=0,stddev=1.0);
randm_d.numpy()

array([[ 0.09472452,  1.0340148 , -0.6786982 ,  1.0869443 ,  0.3258813 ],
       [-0.77133644,  0.83533937,  1.2375485 , -1.3813246 , -0.48714033],
       [ 1.6331278 ,  1.5953207 , -0.13377142,  0.4633193 ,  1.2541134 ],
       [ 1.691077  , -2.1534183 ,  0.13208625,  0.47703937, -0.94133264],
       [-2.6030612 , -2.0240393 , -0.5370001 ,  0.3690688 , -0.32192004]],
      dtype=float32)
5.从numpy,list对象创建
python
list_e = [1,2,3,4,5]
type(list_e)
tensor_e = tf.convert_to_tensor(list_e,dtype=tf.float32)
tensor_e

<tf.Tensor: shape=(5,), dtype=float32, numpy=array([1., 2., 3., 4., 5.], dtype=float32)>
1.2创建变量的tensor
python
var1 = tf.Variable(tf.ones([2,3]))
var1

#变量数值读取
print(var1.read_value())
value1 = [[1,2,3],[4,5,6]]
var1.assign(value1)

tf.Tensor(
[[1. 1. 1.]
 [1. 1. 1.]], shape=(2, 3), dtype=float32)
<tf.Variable 'UnreadVariable' shape=(2, 3) dtype=float32, numpy=
array([[1., 2., 3.],
       [4., 5., 6.]], dtype=float32)>
2、张量的索引与切片
2.1 tensor 的索引
索引的基本格式:a[d1] [d2] [d3]
python
#创建一个4维tensor。tensor包含4张图片,每张图片的大小为100*100*3。NHWC
tensor_h = tf.readom.normal([4,100,100,3])
tensor_h
取出第一张图片第二通道中在[20,40]位置的像素点
python
tensor_h[0][19][39][1]如果要提取的索引不连续,在tensorflow里面的用法就是要用到tf.gather和tf.gather_nd。
在某一维度进行索引。tf.gather(params,indices,axis=None)
params:输入张量
indices:取出数据的索引
axis:所取数据所在维度
python
#取出tensor_h([4,100,100,37)中,第1,2,4张图像。
indices = [0,1,3]
tf.gather(tensor_h,axis=0,indices=indices,batch_dims=l)
tf.gather_nd允许在多维上进行索引l:tf.gather_nd(params,indices) params:输入张量; indices:取出数据的索引,一般为多维列表。
python
#取出tensoth(4.100.100.37)中,第一张图像第一个维度中[1,1]的像素点:第二张图片第一维度中[2,2]的像素点
indices = [[0, 1,1,0], [1,2,2,0]]
tf.gathernd(tensorh,indices=indices)
2.2 tensor 切片
start:end\]:从tensor的开始位置到结束位置的数据切片; \[start:end:step\]或者[::step\]:从tensor的开始位置到结束位置每隔step的数据切片; \[::-1\]:负数表示倒序切片: '...':任意长;
python
tensor_h

#每两张图片取出一张的切片
tesnsor_h[::2,...]
python
#倒叙切片
tensor_h[::-1]
3、张量的维度变换
3.1维度查看
python
const_d_1=tf.constant([[1,2,3,4]],shape=[2,2],dtype=tf.float32
井查看维度常用的三种方式
y1329090876
print(const_d_l.shape)
print(const_d_1.get_shape())
print(tf.shape(constd1))#输出为张量,其数值表示的是所查看张量维度大小
可以看出.shape和.get_shape()都是返回TensorShape类型对象,而tf.shape(x)返回的是Tensor类型对象
3.2维度的重组
tf.reshape(tensor,shape,name=None):
tensor:输入张量;
shape:重组后张量的维度。
python
reshape_1=tf.constant([[1,2,3],[4,5,6]])
print(reshape_1)
tf.reshape(reshape_1, (3,2)
3.3维度增加
tf.expand dims(input,axis,name=None):
input:输入张量;
axis:在第axis维度后增加一个维度。在输入D尺寸的情况下,轴必须在[-(D+1),D】(含)范围内。负数代表倒序
python
#生成一个大小为100*100*3的张量来表示一张尺寸为100*100的三通道彩色图片
expand_sample_1 = tf.random.normal([100,100,3])
print("原始数据尺寸:",expand_sample_1.shape)
print("在第一个维度前增加一个维度(axis=0):"tf.expand_dims(expand_sample_l,axis=0).shape)
print("在第二个维度前增加一个维度(axis=1):",tf.expand_dims(expand_sample_1,axis=1).shape)
3.4维度减少
tf.squeeze(input,axis=None,name=None)
input:2输入张量;
axis:axis=1,表示要删掉的为1的维度。
python
#生成一个大小为100*100*3的张量来表示一张尺寸为100*100的三通道彩
squeeze_sample_1=tf.random.normal([1,100,100,3])
print("原始数据尺寸:",squeeze_sample_1.shape)
squeezed_sample_1=tf.squeeze(squeeze_sample_l,axis=0)
print("维度压缩后的数据尺寸:",squeezed_sample_1.shape)
3.5转置
tf.transpose(a,perm=None,conjugate=False,name=transpose)
a:输入张量;
perm:张量的尺寸排列;一般用于高维数组的转置。
conjugate:表示复数转置:
name:名称。
python
#低维的转置问题比较简单,输入需转置张量调用tf.transpose
trans_sample_1=tf.constant([1,2,3,4,5,6]1.shape=[2.3]
print("原始数据尺寸:",trans_sample_1.shape
transposed_sample_l =tf.transpose(trans_sample_l)
print("转置后数据尺寸:",transposed_sample_1.shape)
对于一个三维张量来说,其原始的维度排列为[0,1,2](perm)分别代表高维数据的长宽高,
通过改变perm中数值的排列,可以对数据的对应维度进行转置
python
#生成一个大小为3*100*200*3的张量来表示4张尺寸为100*200的三通道彩色图片
trans_sample_2=tf.random.normal([4,100,200,3])
print("原始数据尺寸:",trans_sample_2.shape)
#对4张图像的长宽进行对调。原始perm为[0,1,2,3],现变为[0,2,1,3]
transposed_sample_2=tf.transpose(trans_sample_2,[0,2,1,3])
print("转置后数据尺寸:",transposed_sample_2.shape)
3.6广播(broadcast_to)
利用把broadcastto可以将小维度推广到大维度。 tf.broadcast_to(input,shape.name=None):
input:输入张量;
shape:输出张量的尺寸。
python
broadcast_sample_1=tf.constant([1,2,3,4,5,6])
print("原始数据:",broadcast_sample_1.numpy)
broadcasted_sample_1=tf.broadcast.to(broadcast_sample_1,shape=[4,6])
print("广播后数据:",broadcasted_sample_l.numpy())
python
#运算时,当两个数组的形状不同时,与numpy一样,tensorf1ow将自动触发广播机制。
a = tf.constant([[0,0,o],
[10,10,10],
[20,20,20],
[30,30,30]])
b = tf.constant([1,2,3])
print(a +b)
4、张量的算数运算
4.1算术运算符
算术运算主要包括了:加(tf.add)、减(tf.subtract)、乘(tf.multiply)、除(tf.divide)、取对数(tf.math.log)和指数(tf.pow)等。
python
a=tf.constant([[3,5][4.8]])
b=tf.constant([[1,6],[2,9]])
print(tf.add(a,b))
4.2矩阵算法运算
矩阵乘法运算的实现通过调用tf.matmu
python
tf.matmu(a,b)4.3张量的数据统计
张量的数据统计主要包括:
tf.reduce_min/max/mean():求解最小值最大值和均值函数:
tf.argmaxO/tf.argmin():求最大最小值位置:
tf.equal():逐个元素判断两个张量是否相等;
tf.unique():除去张量中的重复元素。
tf.nn.in_top_k(prediction,target,K):用于计算预测值和真是值是否相等,返回一个bool类型的张量。
下面演示tf.argmax(的用法:
返回最大值所在的下标
tf.argmax(input,axis):
- input:输入张量;
- axis:按照axis维度,输出最大值。
python
argmax_sample_1=tf.constant([[1,3],[2,5],[7,5]])
print("输入张量:",argmax_sample_1.numpy(),"大小、",argmax_sample_1.shape)
max_sample_1 = tf.argmax(argmax_sample_l,axis=0)
max_sample_2 = tf.argmax(argmax_sample_l,axis=1)
print("按列寻找最大值的位置:",max_sample_1.numpy())
print("按行寻找最大值的位置:"max_sample_2.numpy())
4.4基于维度的操作
tensorflow2中,tf.reduce_*一些列操作等造成张量维度的减少,这一系列操作都可以对一个张量在维度上的元素进行操作,如按行求平均,求取张量中所有元素的乘积等
常用的包括:
tf.reduce_sum(加法)
tf.reduce_prod(乘法)
tf.reduce_min(最小)
tf.reduce_max(最大)
tf.reduce_mean(均值)
tf.reduce_all(逻辑和)
tf.reduce_any(逻辑或)
tf.reduce_logsumexp(log(sum(exp)))操作)等。
这些操作的使用方法都相似,下面只演示tf.reducesum的操作案例。
计算一个张量的各个维度上元素的总和
tf.reduce_sum(input_tensor, axis=None, keepdims=False,name=None):
- input_tensor:输入张量;
- axis:指定需要计算的轴,如果不指定,则计算所有元素的均值;
- keepdims:是否降维度,设置为True,输出的结果保持输入tensor的形状,设置为False,输出结果会降低维度;
- name:操作名称。
python
reduce_sample_1=tf.constant([1,2,3,4,5,6],shape=[2,3])
print("原始数据",reduce_sample_1.numpy(),"大小",reduce_sample_1.shape)
print("按列计算,分别计算各列的和(axis=0):",tf.reduce_sum(reduce_sample_i,axis=0).numpy())
print("按行计算,分别计算各列的和(axis=1):",tf.reduce_sum(reduce_sample_1,axis=1).numpy())
5、张量的分割与合并
5.1张量的拼接
tensorflow中,张量拼接的操作主要包括:
tf.contact():将向量按指定维连起来,其余维度不变。
tf.stack():将一组R维张量变为R+1维张量,拼接前后维度变化。
tf.concat(values,axis,name='concat'):
- values:输入张量;
- axis:指定拼接维度;
- name:操作名称。
python
concat_sample_1=tf.random.normal([4,100,100,3])
concat_sample_2=tf.random.normal([40,100,100,3])
print("拼接后数据的尺寸:",concat_sample_1.shape,concat_sample_2.shape)
concated_sample_1=tf.concat([concat_sample_1,concat_sample_2],axis=0)
print("拼接后数据的尺寸:",concated_sample_1.shape)
在原来矩阵基础上增加了一个维度,也是同样的道理,axis决定维度增加的位置
tf.stack(values,axis=o,name='stack'):
- values:输入张量;一组相同形状和数据类型的张量。
- axis:指定拼接维度;
- name:操作名称。
python
stack_sample_1=tf.random.normal([100.100.3])
stack_sample_2=tf.random.normal1([100,100,3l])
print("原始数据的尺寸分别为:",stack_sample_1.shape,stack_sample_2.shape)
进拼接后维度增加。axis=0,则在第一个维度前增加维度
stackedsample_1=tf.stack([stack_sample.lstack_sample_2],axis=0)
print("拼接后数据的尺寸:",stacked_sample_1.shape)
5.2张良的分割
tensorflow中,张量分割的操作主要包括:
- tf.unstack():将张量按照特定维度分解
- tf.split():将张量按照特定维度划分为指定的分数。
与tf.unstack()相比,tf.split)更佳灵活。
tf.unstack(value,num=None,axis=0,name='unstack'):
- value:输入张量;
- num:表示输出含有num个元素的列表,num必须和指定维度内元素的个数相等。通常可以忽略不写这个参数。
- axis:指明根据数据的哪个维度进行分割;y
- name:操作名称。
python
#按照第一个维度对数据进行分解,分解后的数据以列表形式输出
tf.unstack(stacked_sample_1,axis=0)
tf.split(value,num_or_size_splits,axis=O):
- value:输入张量;
- num_or_size_splits:准备切成几份
- axis:指明根据数据的那个维度进行分割
tf.split()的分割方式有两种
1.如果num_or_size_splits传入的是一个整数,那直接在axis=D这个维度上把张量平均切分成几个小张量。
2.如果num_or_size_splits传入的是一个向量,则在axis=D这个维度上把张量按照向量的元素值切分成几个小张量。
python
split_sample_1=tf.random.normal([10,100,100,3])
print("原始数据的尺寸为:",split_sample_1.shape)
print("当num_or_size_splits=5,分割后数据的尺寸为:",np.shape(splited_sample_1))
splited_sample_2=tf.split(split_sample_l,num_or_size_splits=[3,5,2],axis=0)
print("当num_or_size_splits=[3,5,2],分割后数据的尺寸分别为:"
np.shape(splited_sample_2[0]),
np.shape(splited_sample_2[1]),
np.shape(splited_sample_2[2]))
6、张量的排序
tensorflow中,张量排序的操作主要包括:
- tf.sort:按照升序或者降序对张量进行排序,返回排序后的张量。
- tf.argsort():按照升序或者降序对张量进行排序,但返回的是索引。
- tf.nn.top_k):返回前k个最大值。
tf.sort/argsort(input,direction,axis):
- input:输入张量;
- direction:排列顺序,可为DESCENDING降序或者ASCENDING(升序)。默认为ASCENDING(升序);
- axis:按照axis维度进行排序。默认axis=-1最后一个维度。
tf.nn.top_k(input,sorted=TRUE):
input:输入张量;
K:需要输出的前k个值及其索引。
sorted:sorted=TRUE表示升序排列;sorted=FALSE表示降序排列。
返回两个张量:
values:也就是每一行的最大的k个数字
indices:
这里的下标是在输入的张量的最后一个维度的下标
python
sort_sample_1=tf.random.shuffle(tf.range(1o))
print("输入张量:",sort_sample_1.numpyO)
sorted_sample_1=tf.sort(sort_sample_l,direction="ASCENDING")
print("生序排列后的张量:",sorted_sample_1.numpyO)
sorted_sample_2=tf.argsort(sort_sample_l,direction="ASCENDING")
print("生序排列后,元素的索引",sorted_sample_2.numpy)

yalues,index=tf.nn.top_k(sort_sample_l,5)
print("输入张量:",sort_sample_1numpy())
print("升序排列后的前5个数值:",values.numpy())
print("升序排列后的前5个数值的索引:",index.numpy())
三、Tensorflow2 Eager Execution模式
1、 eager execution模型
EagerExecution介绍:
TensorFlow的EagerExecution模式是一种命令式编程(imperativeprogramming),这和原生Python是一致的,当你执行某个操作时,可以立即返回结
果的。
Graph模式介绍:
TensorF1owl.0一直是采用Graph模式,即先构建一个计算图,然后需要开启session,喂进实际的数据才真正执行得到结果。
09087Eager Execution模式下,我们可以更容易debug代码,但是代码的执行效率更低。
python
xtf.ones((2,2),dtype=tf.dtypes.float32)
y=tf.constant([[l, 2],
[3,4]],dtype=tf.dtypes.float32)
z= tf.matmul(x, y)
print(z)
python
#在tensorf1ow2.0版本中使用1.X版本的语法o可以使用2.0中的v1兼容包来沿用1.x代码,并在代码中关闭eager运算
importtensorflow.compat.vl astf
tf.disable_eager_executionO
#创建graph,定义计算图
a=tf.ones((2,2),dtype=tf.dtypes.float32)
b=tf.constant([[,2],
[3,4]],dtype=tf.dtypes.float32)
c=tf.matmul(a,b)
#开启绘画,进行运算后,才能取出数据。
with tf.SessionO as sess:
print(sess.run(c))
Eager Execution模式的另一个优点可以使用python原生功能
python
importtensorflowastf
thre9182tf.random.uniform([],0,1)

x = tf.reshape(tf.range(0, 4), [2, 2])
print(thre_1)
ifthre_1.numpy(>0.5:
y = tf.matmul(x, x)
else:
y = tf.add(x, x)
这种动态控制流主要得益于eager执行得到Tensor可以取出numpy值,这避免了使用Graph模式下的tf.cond和tf.while等算子
2、Tensorflow2.0 AutoGraph
当使用tf.function装饰器注释函数时,可以像调用任何其他函数一样调用它。它将被编译成图,这意味看可以获得更高效地在在GPU或TPU上运行。此时函数变成了一个tensorflow中的operation。我们可以直接调用函数,输出返回值,但是函数内部是在graph模式下执行的,无法直接查看中间变量数值
python
@tf.function
def simple_nn_layer(w,x,b):
print(b)
return tf.nn.relu(tf.matmul(w,x)+b)

w=tf.random.uniform((3,3))
x=tf.random.uniform((3,3))
b=tf.constant(0.5,dtype='float32')
simple_nn_layer(w,x,b)
通过输出结果可知,无法直接查看函数内部b的数值,而返回值可以通过.numpy()查看
通过执行一层cnn计算(相同操作),比较graph和eager execution模式的性能
python
#timeit测量小段代码的执行时间
import timeit
井创建一个卷积层。
CNN_cell =tf.keras.layers.Conv2D(filters=100,kernel_size=2,strides=(1,1))

#利用@tf.function,将操作转化为graph。
@tf.function
def CNN_fn(image):
	return CNN_cell(image)

image=tf.zeros([100,200.200,3])

#比较两者的执行时间
CNN_cel1(image)
CNN_fn(image)
#调用timeit.timeit,测量代码执行10次的时间
print("eagerexecution模式下做一层CNN卷积层运算的时间:",timeit.timeit(lambda:CNN_cell(image),number=10))
print("graph模式下做一层CNN卷积层运算的时间:",timeit.timeit(lambda:CNN_fn(image),number=10))
t32')
simple_nn_layer(w,x,b)
通过输出结果可知,无法直接查看函数内部b的数值,而返回值可以通过.numpy()查看


通过执行一层cnn计算(相同操作),比较graph和eager execution模式的性能

```python
#timeit测量小段代码的执行时间
import timeit
井创建一个卷积层。
CNN_cell =tf.keras.layers.Conv2D(filters=100,kernel_size=2,strides=(1,1))

#利用@tf.function,将操作转化为graph。
@tf.function
def CNN_fn(image):
	return CNN_cell(image)

image=tf.zeros([100,200.200,3])

#比较两者的执行时间
CNN_cel1(image)
CNN_fn(image)
#调用timeit.timeit,测量代码执行10次的时间
print("eagerexecution模式下做一层CNN卷积层运算的时间:",timeit.timeit(lambda:CNN_cell(image),number=10))
print("graph模式下做一层CNN卷积层运算的时间:",timeit.timeit(lambda:CNN_fn(image),number=10))
通过比较,我们可以发现graph模式下代码执行效率要高出许多。因此我们以后可以多尝试用@tf.function功能,提高代码运行效率
日常学习总结