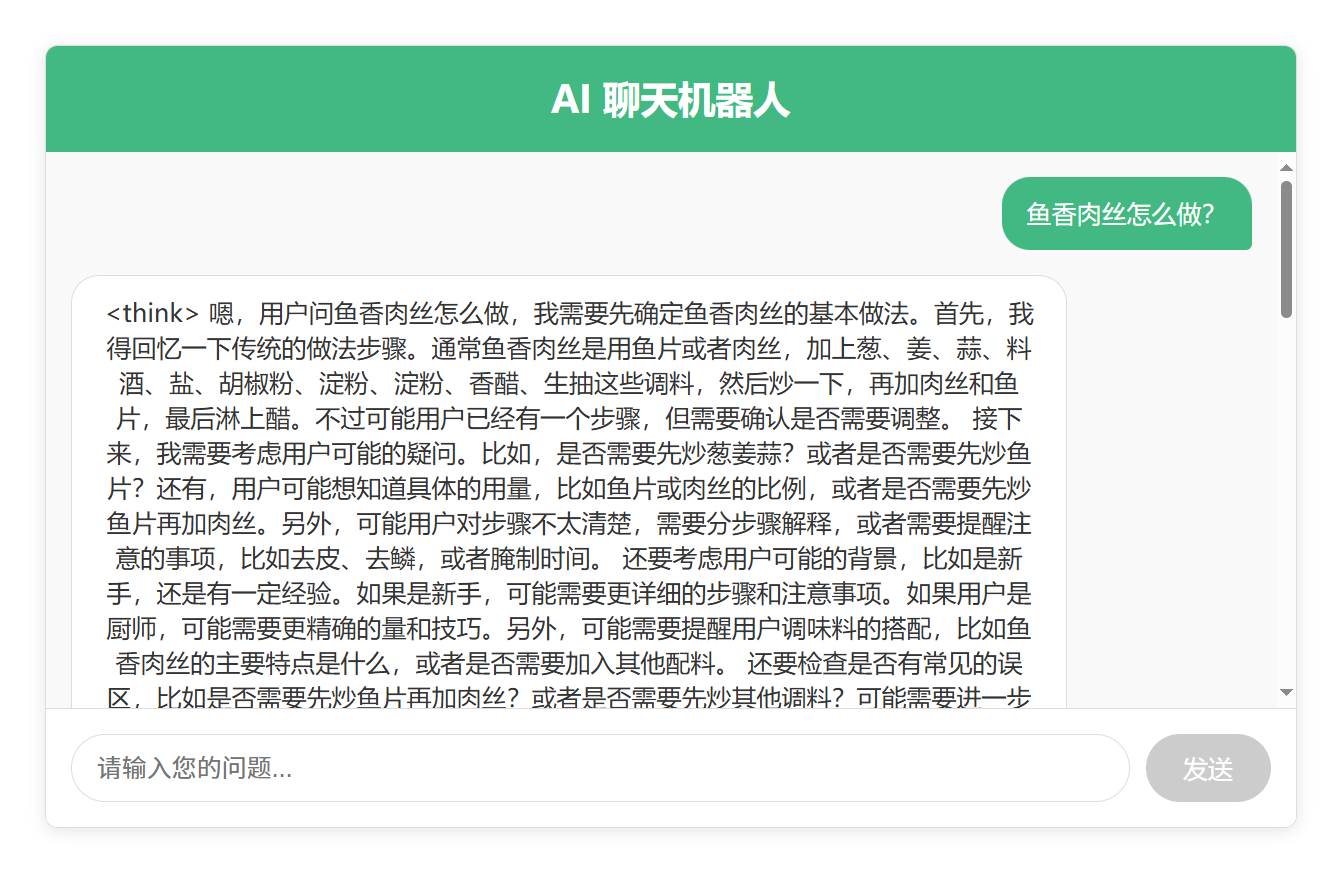
介绍
本文介绍使用 Vue + Spring Boot 框架的 Spring AI + Ollama 实现对话机器人功能。
步骤
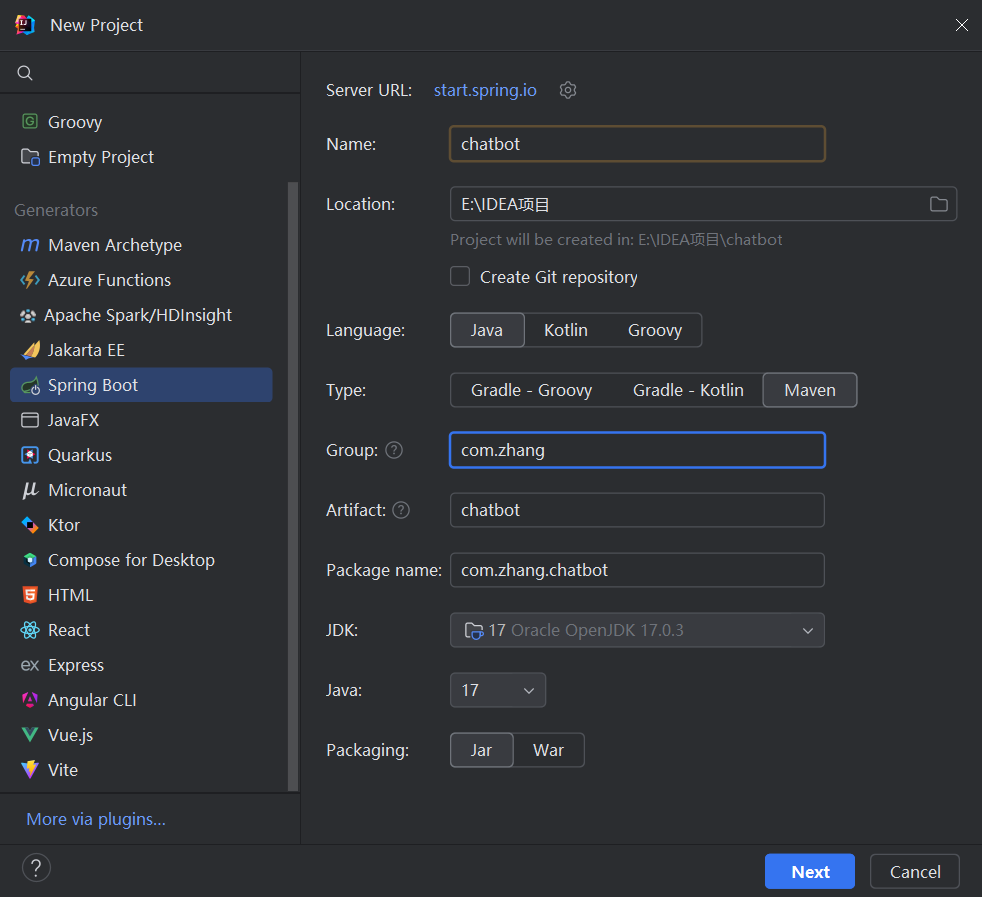
一、创建项目
创建新项目:
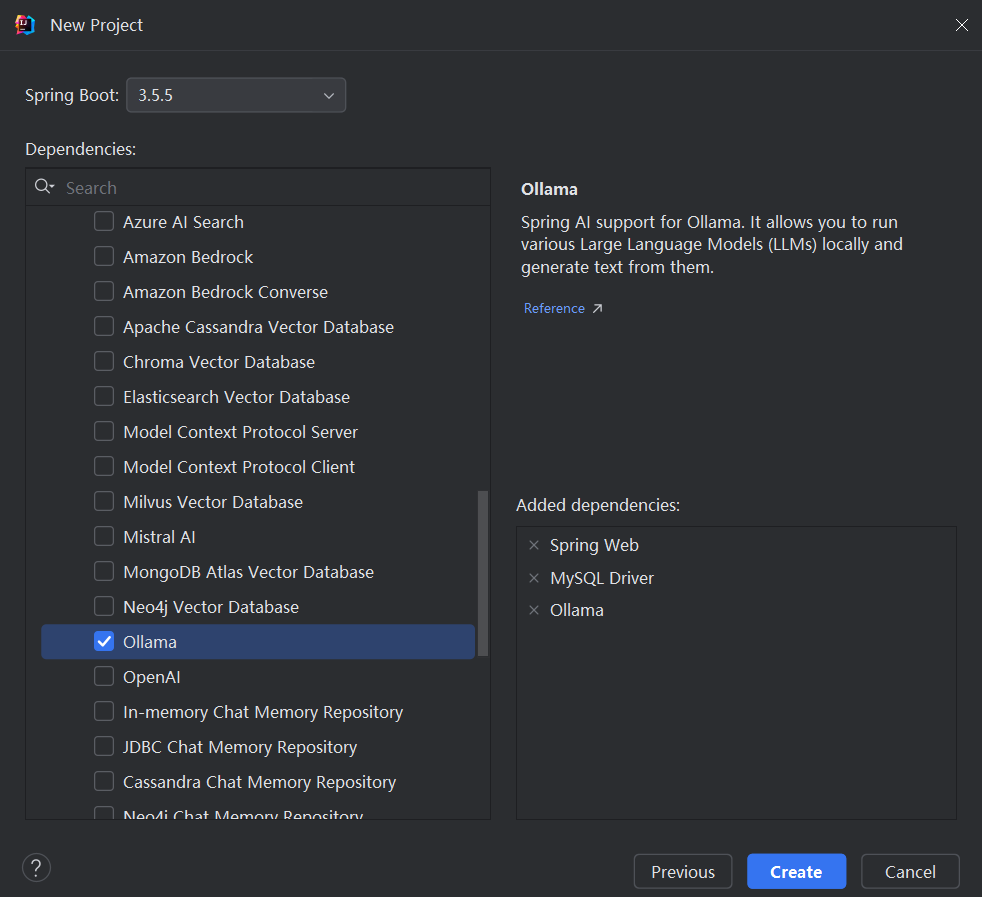
勾选相关起步依赖:( 选择本地部署的大模型类型,这里选择Ollama,可以查看之前的Ollama大模型部署流程文章 https://blog.csdn.net/2401_84926677/article/details/151109011)
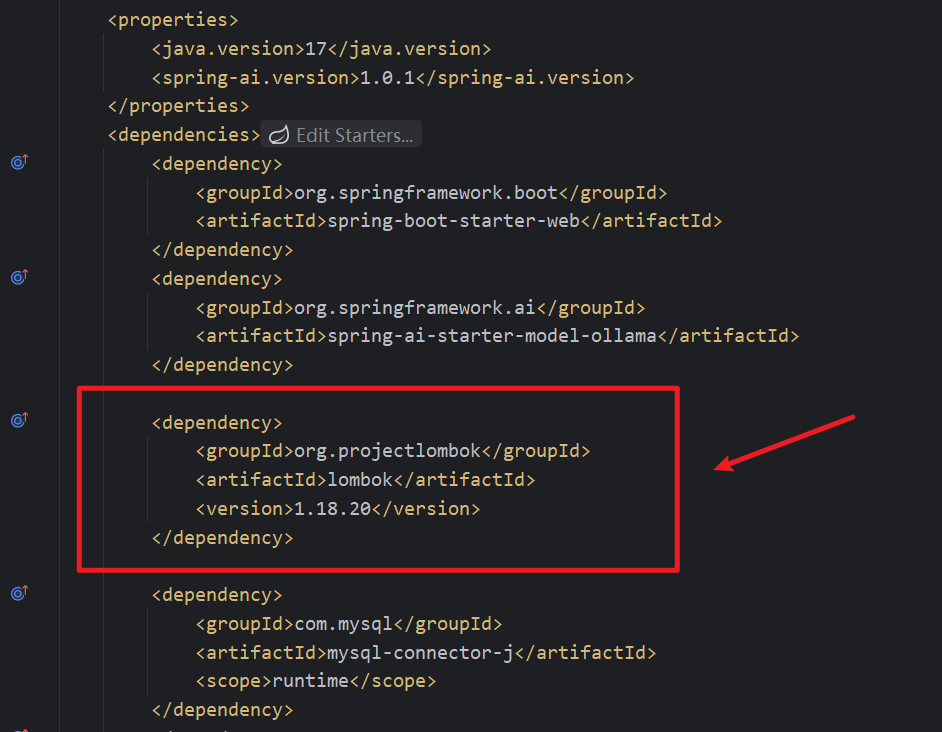
二、更新pom文件
手动引入Lombok,用于构造器自动注入:
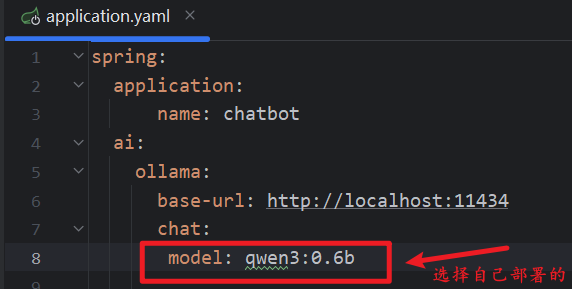
三、编写application.yaml文件
配置ollama:(ollama默认端口11434)
四、创建Config包,在Config包下创建配置类
java
import org.springframework.ai.chat.client.ChatClient;
import org.springframework.ai.ollama.OllamaChatModel;
import org.springframework.context.annotation.Bean;
import org.springframework.context.annotation.Configuration;

@Configuration  // 声明这是一个配置类
public class CommonConfiguration {
    @Bean  // 注册一个 ChatClient
    public ChatClient chatClient(OllamaChatModel model) {
        return ChatClient
                .builder(model)   // 使用模型
                .defaultSystem("你是一名资深厨师,请以厨师的身份回答我的问题")  // 设置系统角色
                .build();  // 创建一个 ChatClient
    }
}
五、创建Controller包,在包下创建控制器类:
java
import lombok.RequiredArgsConstructor;
import org.springframework.ai.chat.client.ChatClient;

import org.springframework.web.bind.annotation.RequestMapping;
import org.springframework.web.bind.annotation.RequestParam;
import org.springframework.web.bind.annotation.RestController;
import reactor.core.publisher.Flux;

@RequiredArgsConstructor  // 自动注入 ChatClient
@RestController // 声明这是一个 RESTful 控制器
@RequestMapping("/ai")  // 定义请求路径
public class ChatController {

    private final ChatClient chatClient;

    // 创建一个接口,接收用户输入,调用模型,返回流式结果
    @RequestMapping(value = "/chat", produces = "text/html;charset=utf-8")
    public Flux<String> chat(@RequestParam String prompt) {   // 接收用户输入
        return chatClient.prompt()  // 创建一个 PromptBuilder 对象
                .user(prompt)  // 设置用户输入
                .stream()  // 调用模型并启用流式输出
                .content(); // 返回流式结果
    }
}
六、在Config包下创建CorsConfig类解决跨域问题:
java
import org.springframework.context.annotation.Configuration;
import org.springframework.web.servlet.config.annotation.CorsRegistry;
import org.springframework.web.servlet.config.annotation.WebMvcConfigurer;
@Configuration
public class CorsConfig implements WebMvcConfigurer {
@Override
public void addCorsMappings(CorsRegistry registry) {
registry.addMapping("/ai/**")
.allowedOrigins("http://localhost:5173")
.allowedMethods("GET", "POST", "PUT", "DELETE", "OPTIONS")
.allowedHeaders("*")
.allowCredentials(true);
}
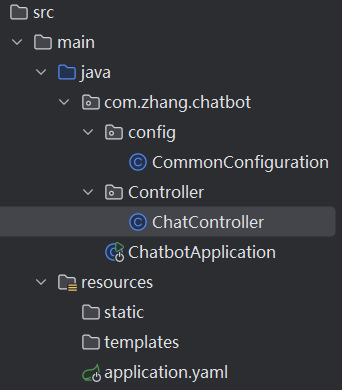
}项目结构:
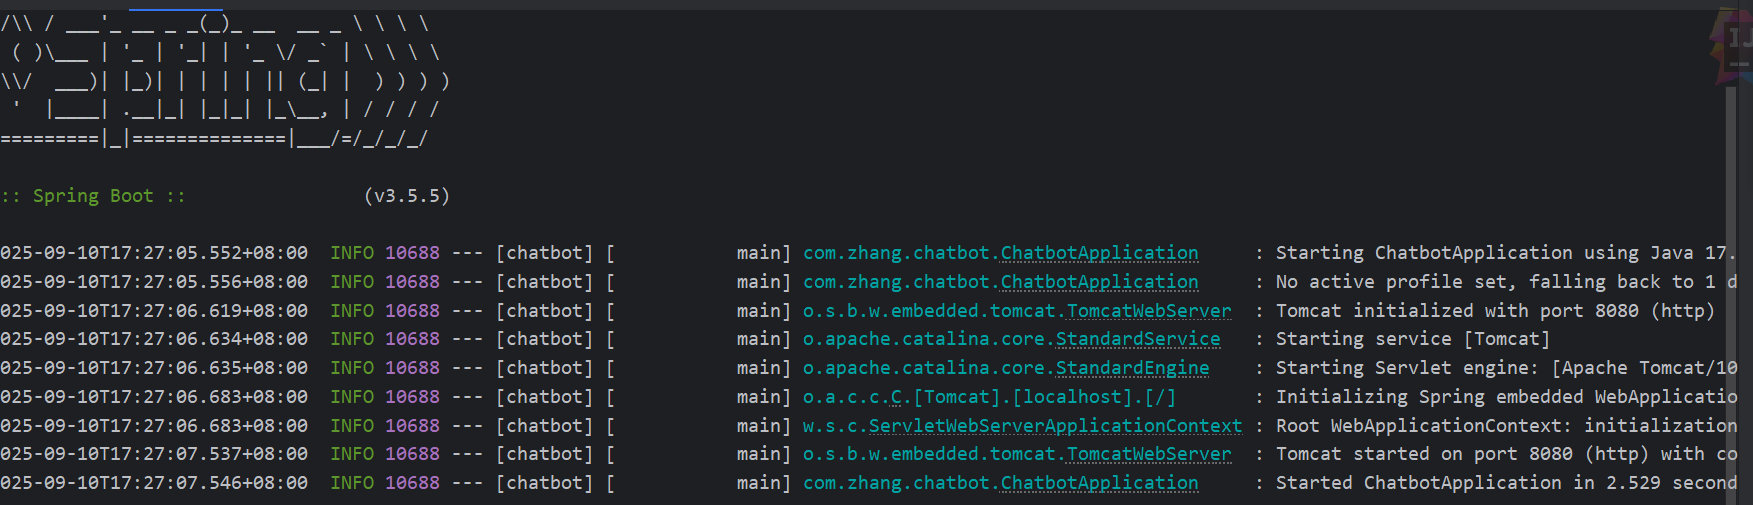
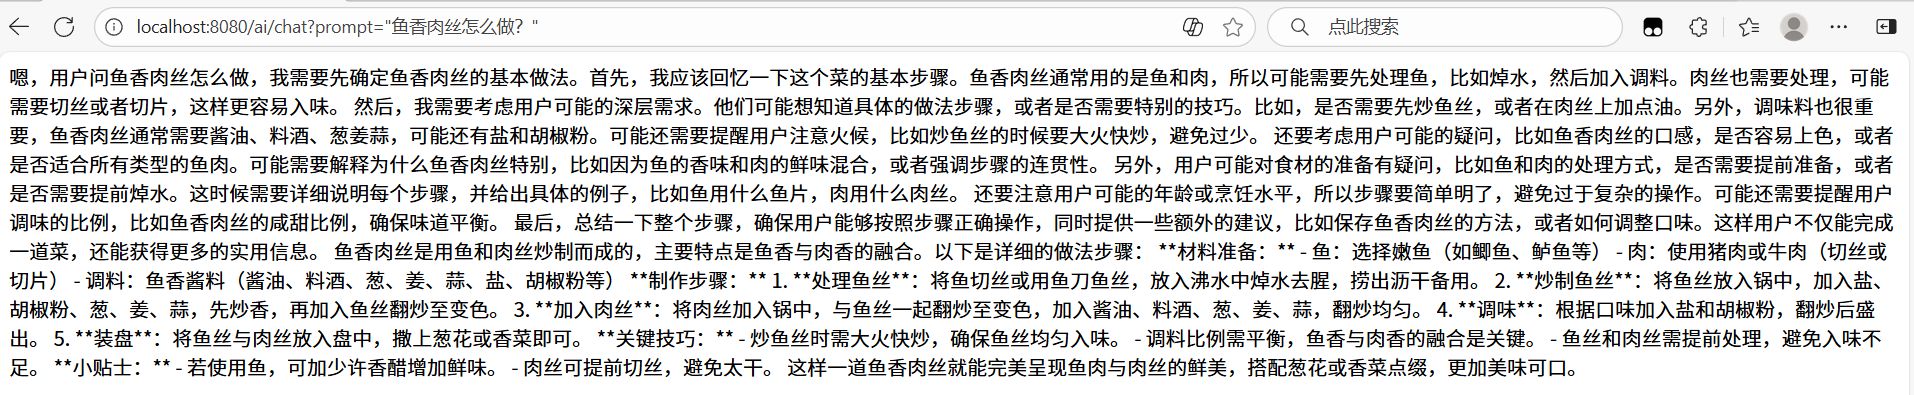
六、运行项目验证结果
浏览器输入请求路径并发送
会话日志
一、配置类新增日志记录器
java
import org.springframework.ai.chat.client.ChatClient;
import org.springframework.ai.chat.client.advisor.SimpleLoggerAdvisor;
import org.springframework.ai.ollama.OllamaChatModel;
import org.springframework.context.annotation.Bean;
import org.springframework.context.annotation.Configuration;

@Configuration
public class CommonConfiguration {
    @Bean  // 注册一个 ChatClient
    public ChatClient chatClient(OllamaChatModel model) {
        return ChatClient
                .builder(model)   // 使用模型
                .defaultAdvisors(new SimpleLoggerAdvisor())  // 启用日志
                .build();  // 创建一个 ChatClient
    }
}
二、application.yaml文件新增日志配置
javascript
logging:
  level:
    org.springframework.ai.chat.client.advisor: debug
    com.zhang.chatbot: debug
三、运行结果日志查看
浏览器发送请求后,控制台:

前端代码实现
javascript
<template>
  <!-- 聊天界面容器,使用flex布局实现自适应高度 -->
  <div class="chat-container">
    <!-- 聊天界面头部,显示标题 -->
    <div class="chat-header">
      <h2>AI 聊天机器人</h2>
    </div>

    <!-- 消息显示区域,使用ref引用以便控制滚动 -->
    <div class="chat-messages" ref="messagesContainer">
      <!-- 使用v-for循环渲染所有消息 -->
      <div v-for="(message, index) in messages" :key="index" :class="['message', message.type]">
        <!-- 每条消息的内容区域 -->
        <div class="message-content">
          {{ message.content }}
        </div>
      </div>
    </div>

    <!-- 输入区域,包含输入框和发送按钮 -->
    <div class="chat-input">
      <!-- 用户输入框,绑定userInput响应式数据 -->
      <input v-model="userInput" @keyup.enter="sendMessage" placeholder="请输入您的问题..." :disabled="isLoading" />
      <!-- 发送按钮,点击触发sendMessage方法 -->
      <button @click="sendMessage" :disabled="isLoading || !userInput.trim()">
        <!-- 根据加载状态显示不同文本 -->
        {{ isLoading ? '发送中...' : '发送' }}
      </button>
    </div>
  </div>
</template>

<!-- 使用组合式API语法 -->
<script setup>
import { ref, nextTick } from 'vue'

// 定义响应式数据
// 消息列表,存储用户和AI的所有对话记录
const messages = ref([])
// 用户输入的内容
const userInput = ref('')
// 是否正在加载AI响应的标志
const isLoading = ref(false)
// 消息容器的引用,用于控制滚动
const messagesContainer = ref(null)

/**
 * 发送消息到后端AI接口的异步函数
 * 处理用户输入、调用API并流式显示响应
 */
const sendMessage = async () => {
  // 如果输入为空或正在加载,则不执行任何操作
  if (!userInput.value.trim() || isLoading.value) return

  // 创建用户消息对象并添加到消息列表
  const userMessage = {
    type: 'user',      // 消息类型:用户消息
    content: userInput.value  // 消息内容:用户输入
  }
  messages.value.push(userMessage)

  // 保存用户输入内容并清空输入框
  const prompt = userInput.value
  userInput.value = ''

  // 创建AI消息对象(初始为空)并添加到消息列表
  const aiMessage = {
    type: 'ai',        // 消息类型:AI消息
    content: ''        // 消息内容:将逐步填充
  }
  messages.value.push(aiMessage)
  // 设置加载状态为true,禁用输入和按钮
  isLoading.value = true

  try {
    // 等待DOM更新后滚动到底部
    await scrollToBottom()

    // 调用后端AI接口,发送用户输入
    const response = await fetch(`http://localhost:8080/ai/chat?prompt=${encodeURIComponent(prompt)}`)

    // 检查浏览器是否支持ReadableStream
    if (!response.body) {
      throw new Error('ReadableStream not supported in this browser.')
    }

    // 创建读取器和解码器以处理流式响应
    const reader = response.body.getReader()
    const decoder = new TextDecoder('utf-8')

    // 逐步读取流式响应数据
    while (true) {
      // 读取下一个数据块
      const { done, value } = await reader.read()
      // 如果读取完成则退出循环
      if (done) break

      // 解码接收到的数据块
      const chunk = decoder.decode(value, { stream: true })

      // 将解码后的内容追加到AI消息中
      aiMessage.content += chunk

      // 每次更新后滚动到底部以显示最新内容
      await scrollToBottom()
    }
  } catch (error) {
    // 错误处理:在控制台输出错误并在AI消息中显示错误提示
    console.error('Error:', error)
    aiMessage.content = '抱歉,发生了一些错误,请稍后重试。'
  } finally {
    // 无论成功或失败,都将加载状态设为false并最后滚动一次
    isLoading.value = false
    await scrollToBottom()
  }
}

/**
 * 滚动到聊天记录底部的辅助函数
 * 确保最新消息始终可见
 */
const scrollToBottom = async () => {
  // 等待DOM更新完成
  await nextTick()
  // 如果消息容器存在,则将其滚动到底部
  if (messagesContainer.value) {
    messagesContainer.value.scrollTop = messagesContainer.value.scrollHeight
  }
}
</script>
最终效果