目录
- [1. 构建](#1. 构建)
- [2. 运行](#2. 运行)
- [3. 参数说明](#3. 参数说明)
- 参考
本插件基于Livox官方代码修改的,特点如下:
- 支持ROS Noetic
- 支持Gazebo 11
- 独立运行
- 无需安装Livox ROS驱动程序
- 无需安装Livox SDK
- 支持自定义消息格式
- 修正了点云的畸变
- 在插件中添加了自体滤波,避免扫到无人机
- 添加了搭载Mid360的无人机模型
测试环境:
| OS | COMPILER | Cmake version |
|---|---|---|
| Ubuntu 20.04(WSL2) | GCC >= 9.4 | > 3.16.3 |
1. 构建
必须提前安装好ROS1、PX4 基础仿真环境
- 下载代码
bash
cd ~/catkin_ws/src
git clone https://github.com/Tfly6/Mid360_px4_sim_plugin.git- 编译
bash
cd ~/catkin_ws
catkin build
2. 运行
- 为验证插件是否正常工作,你可以运行这个最小化示例:
bash
source ~/catkin_ws/devel/setup.bash
roslaunch livox_laser_simulation test_pattern.launch
你应该能在 RViz 中看到一个点云,并且在 Gazebo 窗口中看到一个旋转的激光。
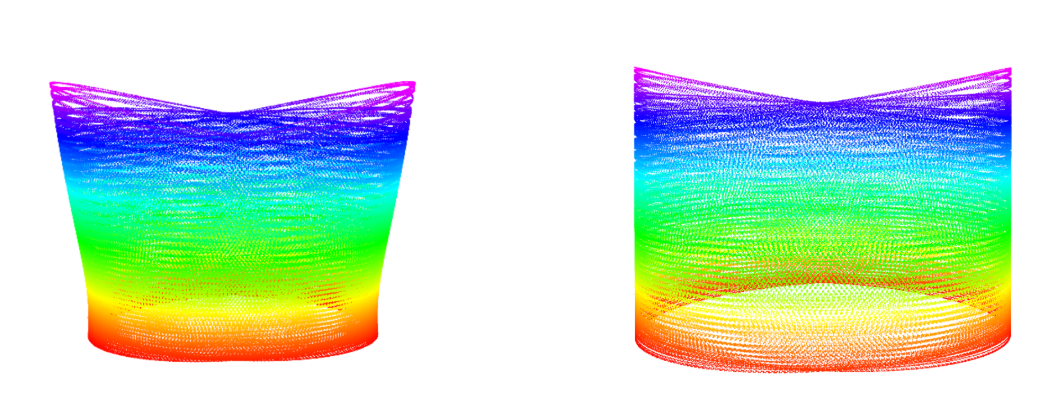
在左侧,你可以看到原始插件生成的点云;在右侧,则是此插件生成的点云。左侧图像中的畸变清晰可见。
- iris_mid360
带Mid360的无人机Gazebo仿真运行流畅度,跟电脑性能和World里面的环境有关
- 复制必要文件到 px4 的目录中。${YOUR_PX4_PATH} 替换成你自己的PX4目录路径
bash
cd ~/catkin_ws
cp ./src/Mid360_px4_sim_plugin/livox_laser_simulation/launch/mavros_posix_sitl_mid360.launch ${YOUR_PX4_PATH}/launch/

# PX4 版本 < 1.14.0
cp ./devel/lib/liblivox_laser_simulation.so ${YOUR_PX4_PATH}/build/px4_sitl_default/build_gazebo/
cp -r ./src/Mid360_px4_sim_plugin/livox_laser_simulation/models/Mid360 ${YOUR_PX4_PATH}/Tools/sitl_gazebo/models/
cp -r ./src/Mid360_px4_sim_plugin/livox_laser_simulation/models/iris_mid360 ${YOUR_PX4_PATH}/Tools/sitl_gazebo/models/

# PX4 版本 >= 1.14.0
cp ./devel/lib/liblivox_laser_simulation.so ${YOUR_PX4_PATH}/build/px4_sitl_default/build_gazebo-classic/
cp -r ./src/Mid360_px4_sim_plugin/livox_laser_simulation/models/Mid360 ${YOUR_PX4_PATH}/Tools/simulation/gazebo-classic/sitl_gazebo-classic/models/
cp -r ./src/Mid360_px4_sim_plugin/livox_laser_simulation/models/iris_mid360 ${YOUR_PX4_PATH}/Tools/simulation/gazebo-classic/sitl_gazebo-classic/models/- 测试
bash
source ~/.bashrc
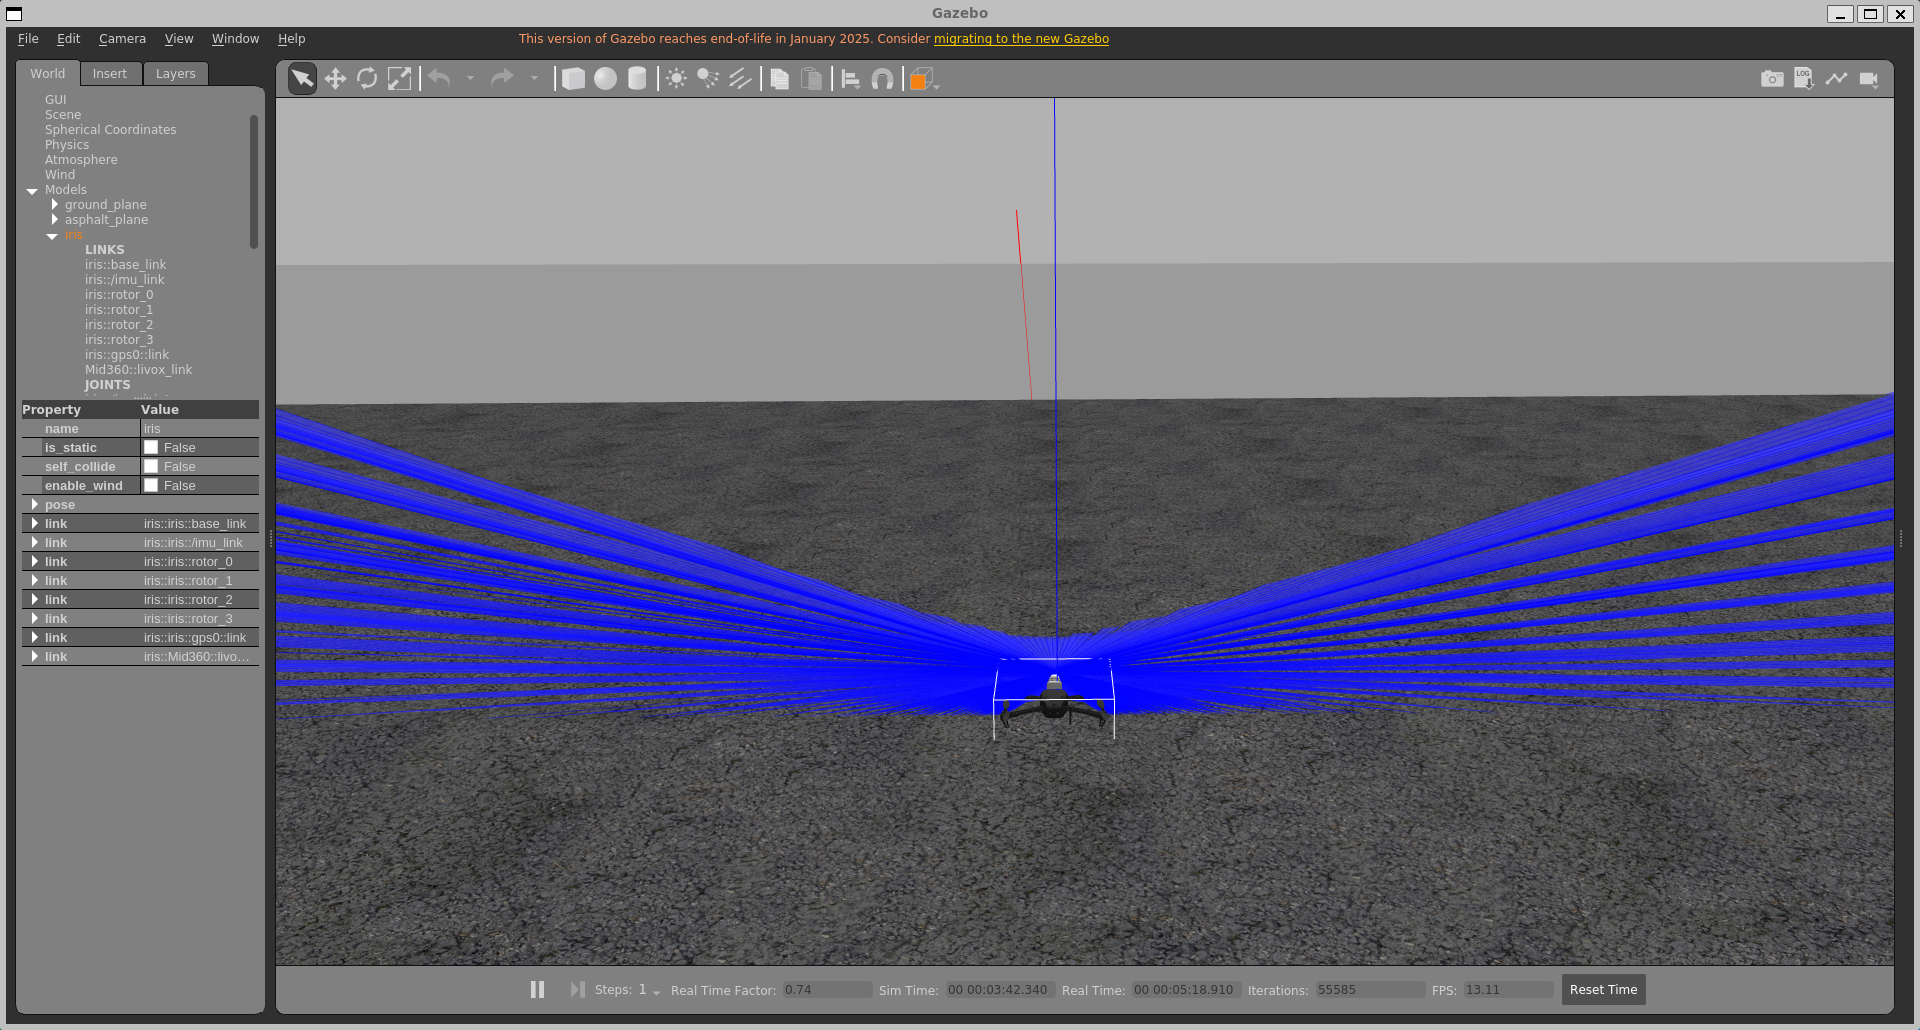
roslaunch px4 mavros_posix_sitl_mid360.launch效果如下图,雷达默认斜向下装,垂直和水平扫描范围非360°
3. 参数说明
要将该插件添加到你的机器人模型中,需在你的 SDF 文件中添加以下几行代码:
xml
<sensor type="ray" name="laser_livox">
        <pose>0 0 0.05 0 0 0</pose>
        <visualize>true</visualize>
        <always_on>True</always_on>
        <update_rate>10</update_rate>
        <!-- This ray plgin is only for visualization. -->
        <plugin name="gazebo_ros_laser_controller" filename="liblivox_laser_simulation.so">
        <ray>
        <scan>
           <horizontal> <!--水平扫描范围 -->
            <samples>100</samples>
            <resolution>1</resolution>
            <min_angle>-3.1415926535897931</min_angle>
            <max_angle>3.1415926535897931</max_angle>
          </horizontal>
          <vertical> <!--垂直扫描范围 -->
            <samples>50</samples>
            <resolution>1</resolution>
            <min_angle>-3.1415926535897931</min_angle>
            <max_angle>3.1415926535897931</max_angle>
          </vertical>
        </scan>
        <range>
          <min>0.1</min>
          <max>40</max>
          <resolution>1</resolution>
        </range>
        <noise>
          <type>gaussian</type>
          <mean>0.0</mean>
          <stddev>0.0</stddev>
        </noise>
        </ray>
        <visualize>True</visualize>
        <samples>20000</samples>
        <downsample>1</downsample>
        <csv_file_name>mid360-real-centr.csv</csv_file_name>
        <publish_pointcloud_type>2</publish_pointcloud_type>
        <ros_topic>/livox/lidar</ros_topic>
        <frameName>livox_link</frameName>
        <!-- self-filter -->
        <enable_self_filter>false</enable_self_filter>
        <debug>false</debug>
        </plugin>
      </sensor>
主要参数如下:
enable_self_filter: 如果设置为true,插件将开启自体滤波,避免点云打在机身上。debug: 如果设置为true,插件将输出一些debug消息。visualize:如果设置为true,插件将在Gazebo中可视化激光,这对调试很有用,但你可以考虑关闭它以提高性能。downsample:下采样因子越高,生成的点数就越少。此参数有助于减轻模拟的计算负担。publish_pointcloud_type:这会改变点云发布的格式:-
0:点云将以sensor_msgs::PointCloud消息的形式发布 -
1:点云将以sensor_msgs::pointcloud2消息的形式发布,其字段为x、y、z -
2(默认值):点云将以sensor_msgs::pointcloud2消息的形式发布,其字段为x、y、z、intensity、tag、line、timestamp。 -
3:点云将以Livox自定义消息格式发布。offset_time:
x:
y:
z:
reflectivity:
tag:
line:
-
参考
Tfly6/Mid360_px4_sim_plugin: Plugin for the simulation of the Livox Mid-360 in Gazebo
fratopa/Mid360_simulation_plugin: Plugin for the simulation of the Livox Mid-360
Livox-SDK/livox_laser_simulation: A package to provide plug-in for Livox Series LiDAR.
如有其他问题,或者发现文章有错误,请在评论区留言,或进入QQ群(961297255) 交流
Keep learning!