1、服务器配置:
三台服务器,IP地址分别为:192.168.1.100、192.168.1.101、192.168.1.102
配置均为:
内存:64GB
CPU:32核
磁盘:1T
操作系统:Ubuntu 24.04.3 LTS
2、前提:已安装Nginx、docker、docker compose

3、服务器节点计划:
| 序号 | IP地址 | 角色及用途 |
|---|---|---|
| 1 | 192.168.1.100 | elasticsearch、kibana | master、data |
| 2 | 192.168.1.101 | elasticsearch | master、data |
| 3 | 192.168.1.102 | elasticsearch | master、data |
部署目录规划:
1)/data/elasticsearch/
ES目录(所有节点)
sudo mkdir -p /data/elasticsearch/{data,logs,config}
2)/data/kibana/
Kibana目录(仅100节点)
sudo mkdir -p /data/kibana/{config,logs}
3)授权
授权(容器内ES UID=1000,Kibana UID=1000)
sudo chown -R 1000:1000 /data/elasticsearch /data/kibana
sudo chmod -R 755 /data/elasticsearch /data/kibana
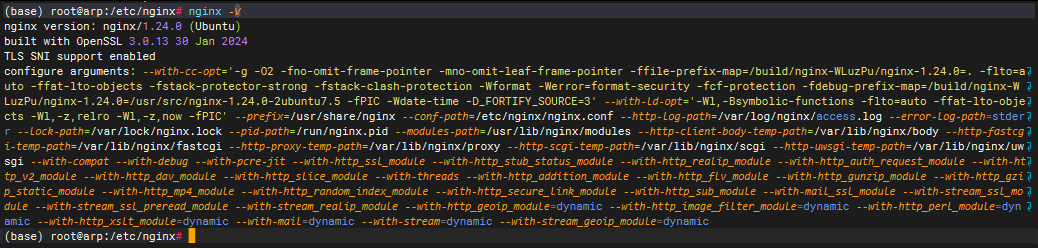
4、Nginx配置nginx.conf:
user www-data;
worker_processes auto; # 自动匹配CPU核心数
worker_cpu_affinity auto; # 自动绑定工作进程到CPU核心(多核优化)
worker_rlimit_nofile 1000000; # 每个worker进程的最大文件描述符数
pid /run/nginx.pid;
error_log /var/log/nginx/error.log;
include /etc/nginx/modules-enabled/*.conf;
events {
worker_connections 65535;
multi_accept on;
use epoll;
}
http {
Basic Settings
sendfile on; # 启用零拷贝(减少磁盘IO)
send_timeout 30s;
tcp_nopush on; # 配合sendfile,一次性发送数据
tcp_nodelay on; # 禁用Nagle算法(低延迟)
types_hash_max_size 2048;
server_tokens off;
server_names_hash_bucket_size 64;
server_name_in_redirect off;
include /etc/nginx/mime.types;
default_type application/octet-stream;
SSL Settings
ssl_protocols TLSv1 TLSv1.1 TLSv1.2 TLSv1.3; # Dropping SSLv3, ref: POODLE
ssl_prefer_server_ciphers on;
Logging Settings
日志优化(减少IO)
log_format main 'remote_addr - remote_user $time_local "$request" '
'status body_bytes_sent "$http_referer" '
'"http_user_agent" "http_x_forwarded_for"';
access_log /var/log/nginx/access.log main buffer=32k flush=5s; # 缓冲日志,5s刷盘
open_log_file_cache max=1000 inactive=20s min_uses=2 valid=1m; # 日志文件缓存
keepalive_timeout 65;
keepalive_requests 10000; # 单个长连接最大请求数(默认100)
client_body_in_file_only clean;
client_body_buffer_size 32K;
client_max_body_size 100M;
client_header_timeout 15s; # 客户端请求头读取超时
client_body_timeout 15s; # 客户端请求体读取超时
Gzip Settings
gzip on;
#限流(可选,防过载)
limit_conn_zone $binary_remote_addr zone=conn_limit_per_ip:10m;
limit_req_zone $binary_remote_addr zone=req_limit_per_ip:10m rate=10r/s;
limit_conn conn_limit_per_ip 100; # 单IP最大并发连接
limit_req zone=req_limit_per_ip burst=20 nodelay; # 单IP限流(10r/s,突发20)
es 集群后端节点池(所有数据节点)
upstream es-node-list {
server 192.168.1.100:9200;
server 192.168.1.101:9200;
server 192.168.1.102:9200;ip_hash; # IP哈希
least_conn; # 最少连接
啥也不也就是轮询
}
server {
listen 80 default_server;
listen :::80 default_server;
root /var/www/html;
index index.html index.htm index.nginx-debian.html;
server_name 192.168.1.100;
location / {
First attempt to serve request as file, then
as directory, then fall back to displaying a 404.
try_files uri uri/ =404;
}
#查看nginx的状态
location /status {
stub_status on;
allow 127.0.0.1;
allow 192.168.1.10;
deny all;
}
es集群配置
location /es-cluster {
proxy_pass http://es-node-list/;
proxy_ssl_verify off; # 忽略ES的SSL证书验证(生产需配置CA证书)
proxy_set_header Host host; proxy_set_header X-Real-IP remote_addr;
proxy_set_header X-Forwarded-For $proxy_add_x_forwarded_for;
proxy_pass_request_headers on;
proxy_connect_timeout 60s;
proxy_send_timeout 60s;
proxy_read_timeout 60s;支持流式调用
proxy_http_version 1.1;
chunked_transfer_encoding off;
proxy_buffering off;
proxy_cache off;
}}
}
5、生产环境配置准备建议:
1. 调整虚拟内存(ES必需,永久生效)
sudo sysctl -w vm.max_map_count=262144
echo "vm.max_map_count=262144" | sudo tee -a /etc/sysctl.conf
2. 提升文件句柄/线程数限制(永久生效)
echo "* soft nofile 65535" | sudo tee -a /etc/security/limits.conf
echo "* hard nofile 65535" | sudo tee -a /etc/security/limits.conf
echo "* soft nproc 65535" | sudo tee -a /etc/security/limits.conf
echo "* hard nproc 65535" | sudo tee -a /etc/security/limits.conf
3. 禁用SWAP(ES性能杀手,永久禁用)
sudo swapoff -a
sudo sed -i '/swap/s/^/#/' /etc/fstab
4. 放行端口(Ubuntu 24.04用ufw,替代firewalld)
启动防火墙:sudo ufw enable
禁用防火墙:sudo ufw disable
查看配置规则:sudo ufw status verbose
100上多开放 80和5601,其他都是:22、9200、9300
sudo ufw allow 80/tcp
sudo ufw allow 22/tcp
sudo ufw allow 9200/tcp
sudo ufw allow 9300/tcp
sudo ufw allow 5601/tcp
sudo ufw reload
5. 关闭AppArmor(避免拦截ES目录权限,可选但推荐)
sudo systemctl stop apparmor
sudo systemctl disable apparmor
6、192.168.1.100 节点1
1)/data/elasticsearch/docker-compose.yml
version: '3.8'
services:
es-node-100:
image: docker.elastic.co/elasticsearch/elasticsearch:8.14.0
container_name: es-node-100
privileged: true
restart: always
资源最大化限制(匹配32核/64G内存,Ubuntu cgroup v2适配)
deploy:
resources:
limits:
cpus: '32'
memory: 60G
reservations:
cpus: '32'
memory: 60G
#ports:
- "9200:9200"
- "9300:9300"
volumes:
./data:/usr/share/elasticsearch/data
./logs:/usr/share/elasticsearch/logs
./config/elasticsearch.yml:/usr/share/elasticsearch/config/elasticsearch.yml
./config/jvm.options:/usr/share/elasticsearch/config/jvm.options
/etc/localtime:/etc/localtime:ro
environment:
TZ=Asia/Shanghai
ES_JAVA_OPTS=-Xms31g -Xmx31g
MAX_LOCKED_MEMORY=unlimited
主机网络(Ubuntu下规避端口映射性能损耗)
network_mode: host
资源限制(匹配Ubuntu ulimits)
ulimits:
memlock:
soft: -1
hard: -1
nofile:
soft: 655350
hard: 655350
Ubuntu下禁用apparmor(避免权限拦截)
security_opt:
- apparmor:unconfined
Kibana(仅100节点部署)
kibana-node-100:
image: docker.elastic.co/kibana/kibana:8.14.0
container_name: kibana-node-100
privileged: true
restart: always
deploy:
resources:
limits:
cpus: '4' # 分配4核足够,不抢占ES资源
memory: 8G # 8G内存满足高并发可视化
reservations:
cpus: '2'
memory: 4G
volumes:
/data/kibana/config/kibana.yml:/usr/share/kibana/config/kibana.yml
/data/kibana/logs:/usr/share/kibana/logs
/etc/localtime:/etc/localtime:ro
Host网络,Kibana默认端口5601
network_mode: host
environment:
TZ=Asia/Shanghai
NODE_OPTIONS=--max-old-space-size=8192 # 匹配内存限制
depends_on:
- es-node-100 # 依赖ES节点启动
security_opt:
- apparmor:unconfined
2)/data/elasticsearch/config/elasticsearch.yml
集群基础配置
cluster.name: es-cluster-prod
node.name: es-node-100
network.host: 0.0.0.0
http.port: 9200
transport.port: 9300
discovery.seed_hosts: "192.168.1.100:9300", "192.168.1.101:9300", "192.168.1.102:9300"
cluster.initial_master_nodes: "es-node-100", "es-node-101", "es-node-102"
性能最大化核心配置(Ubuntu 24.04适配)
bootstrap.memory_lock: true # 锁定内存,禁用swap
http.max_content_length: 100mb # 支持大请求体
action.destructive_requires_name: true # 禁止通配符删除索引
内存缓存优化(最大化利用31G堆内存)
indices.memory.index_buffer_size: 30% # 索引缓冲区(默认10%)
indices.fielddata.cache.size: 25% # fielddata缓存
线程池优化(匹配32核CPU,Ubuntu调度更高效)
thread_pool.write:
size: 32 # 写线程池=CPU核心数
queue_size: 1000
thread_pool.search:
size: 64 # 搜索线程池=2*CPU核心数
queue_size: 1000
thread_pool.analyze:
size: 16
queue_size: 100
磁盘水位(适配1T磁盘)
cluster.routing.allocation.disk.watermark.low: 85%
cluster.routing.allocation.disk.watermark.high: 90%
cluster.routing.allocation.disk.watermark.flood_stage: 95%
查询优化
indices.query.bool.max_clause_count: 4096
压缩优化(降低网络/磁盘IO)
http.compression: true
transport.compress: true
禁用安全认证(核心)
xpack.security.enabled: false
xpack.security.enrollment.enabled: false
xpack.security.http.ssl.enabled: false
xpack.security.transport.ssl.enabled: false
3)/data/elasticsearch/config/jvm.options
堆内存:64G物理内存设31G(规避32G Compressed Oops失效)
-Xms31g
-Xmx31g
G1GC优化(适配Ubuntu 24.04内核,降低GC停顿)
-XX:+UseG1GC
-XX:G1ReservePercent=20
-XX:G1HeapRegionSize=16m
-XX:+HeapDumpOnOutOfMemoryError
-XX:HeapDumpPath=/usr/share/elasticsearch/logs/heapdump.hprof
-XX:+DisableExplicitGC
-XX:+AlwaysPreTouch
Ubuntu 24.04专属JVM优化
-server
-Xss1m
-Djava.awt.headless=true
-Dfile.encoding=UTF-8
-Djna.nosys=true
-Dio.netty.noUnsafe=true
-Dio.netty.noKeySetOptimization=true
-Dio.netty.recycler.maxCapacityPerThread=0
-Dlog4j.shutdownHookEnabled=false
-Dlog4j2.disable.jmx=true
4)/data/kibana/config/kibana.yml
集群名称
server.name: kibana-node-100
绑定地址(Host网络下0.0.0.0)
server.host: 0.0.0.0
连接ES集群(多个节点提高容错)
elasticsearch.hosts: "http://192.168.1.100:9200", "http://192.168.1.101:9200", "http://192.168.1.102:9200"
禁用安全认证
xpack.security.enabled: false
性能优化
elasticsearch.requestTimeout: 300000 # 长查询超时(5分钟)
elasticsearch.shardTimeout: 300000
====== 8.14.0标准日志配置 ======
logging:
日志输出类型:file(文件)+ console(控制台)
appenders:
file:
type: file
fileName: /usr/share/kibana/logs/kibana.log # 日志文件路径
layout:
type: json
console:
type: console
layout:
type: json
#pattern: "%d %t %-5p %c - %m%n"
日志级别
root:
level: info # 生产环境用info,调试用debug
appenders: file, console
7、192.168.1.101 节点2
/data/elasticsearch/docker-compose.yml ,仅修改container_name=es-node-101,删除kibana相关配置,其余和节点 1 一致;
/data/elasticsearch/config/elasticsearch.yml,仅修改node.name=es-node-101,其余和节点1一致;
/data/elasticsearch/config/jvm.options和节点1一致;
8、192.168.1.102 节点3
/data/elasticsearch/docker-compose.yml ,仅修改container_name=es-node-102,删除kibana相关配置,其余和节点 1 一致;
/data/elasticsearch/config/elasticsearch.yml,仅修改node.name=es-node-102,其余和节点1一致;
/data/elasticsearch/config/jvm.options和节点1一致;
9、启动集群(所有节点执行)
1)先启动 节点1:cd /data/elasticsearch/ && docker-compose up -d
bash(base) root@arp:/data/elasticsearch# docker compose up -d WARN[0000] /data/elasticsearch/docker-compose.yml: the attribute `version` is obsolete, it will be ignored, please remove it to avoid potential confusion [+] up 2/2 ✔ Container es-node-100 Created 0.0s ✔ Container kibana-node-100 Created 0.1s (base) root@arp:/data/elasticsearch#2)等节点1启动完成后,启动另外两个节点2、节点3:
cd /data/elasticsearch/ && docker-compose up -d
101:
bash(base) root@arp:/data/elasticsearch# docker compose up -d WARN[0000] /data/elasticsearch/docker-compose.yml: the attribute `version` is obsolete, it will be ignored, please remove it to avoid potential confusion [+] up 1/1 ✔ Container es-node-101 Created 0.1s (base) root@arp:/data/elasticsearch#102:
bash(base) root@arp:/data/elasticsearch# docker compose up -d WARN[0000] /data/elasticsearch/docker-compose.yml: the attribute `version` is obsolete, it will be ignored, please remove it to avoid potential confusion [+] up 1/1 ✔ Container es-node-102 Created 0.1s (base) root@arp:/data/elasticsearch#
10、相关访问地址:
1)Nginx访问地址:http://192.168.1.100/es-cluster
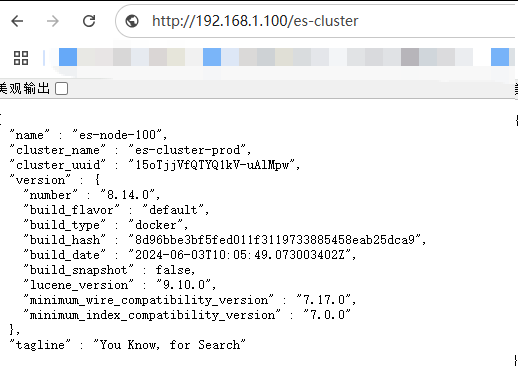
2)elasticsearch访问地址(其他节点类似):192.168.1.100:9200
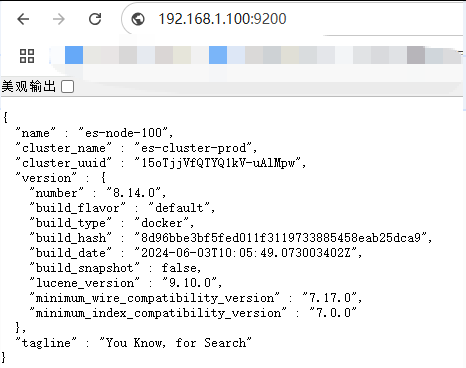
http://192.168.1.100:9200/_cluster/health?pretty
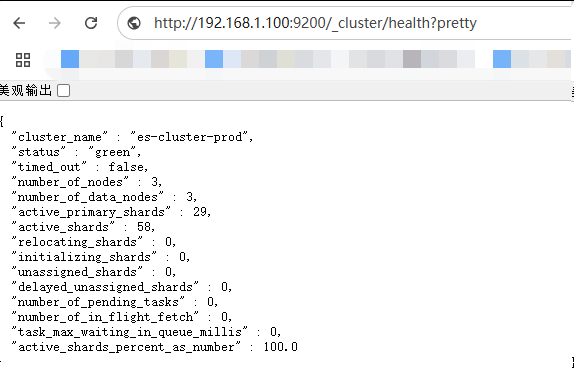
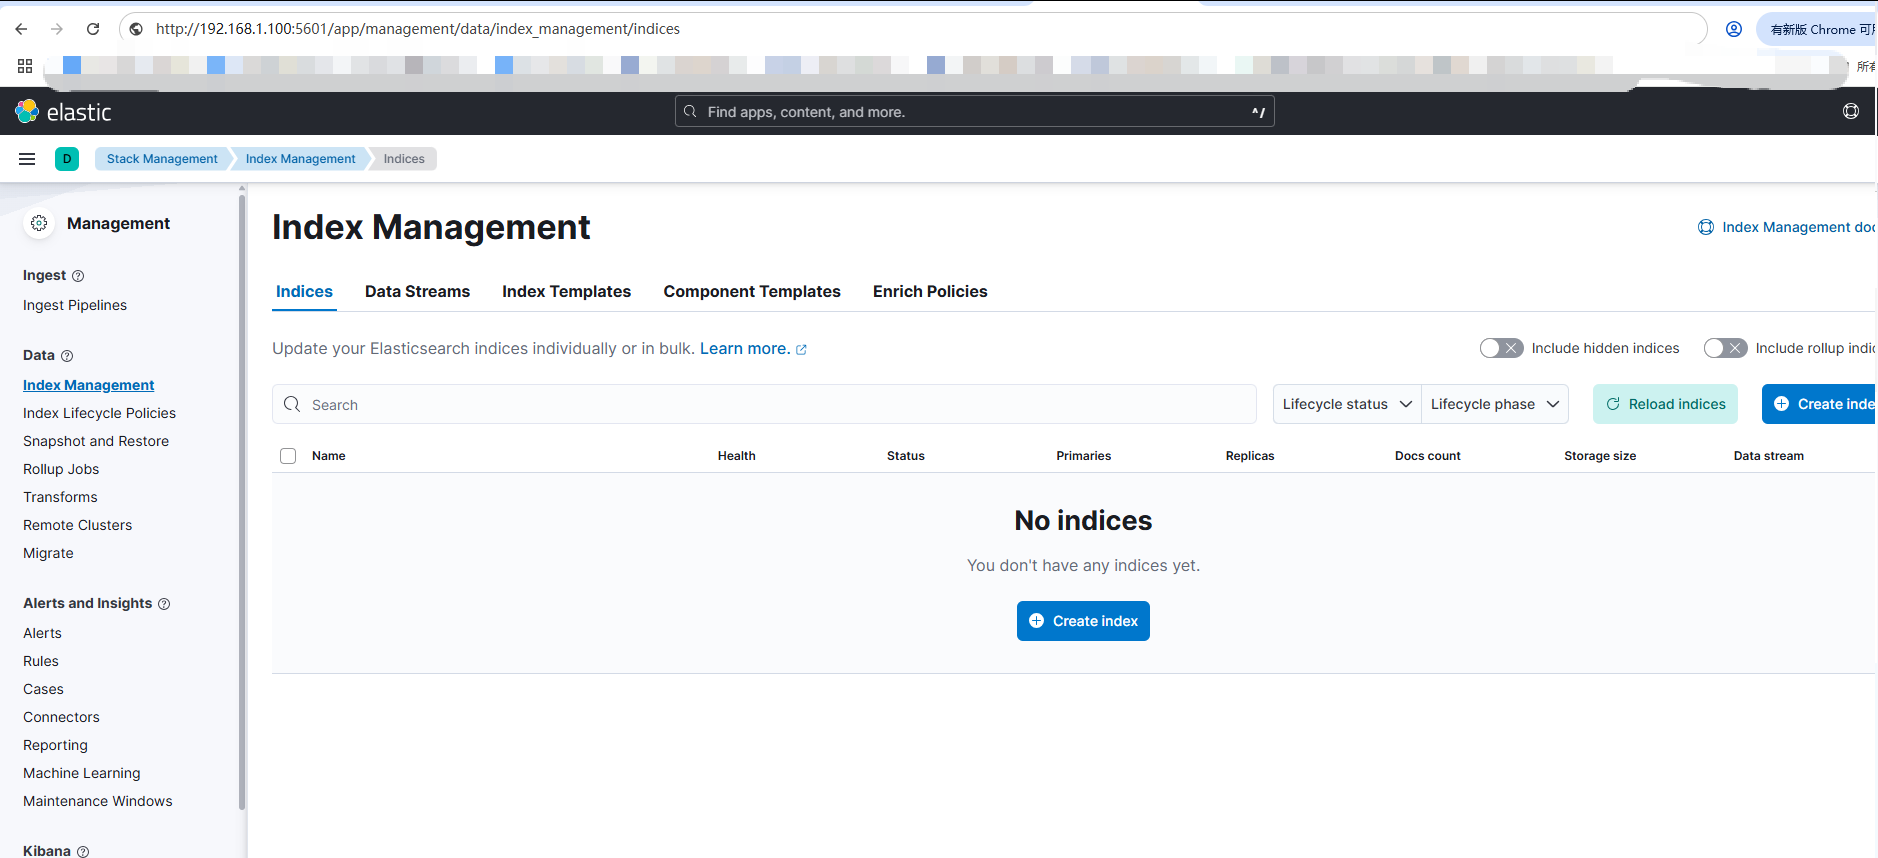
3)kibana访问地址:http://192.168.1.100:5601/app/management/data/index_management/indices