在之前的文章 "使用 LocalAI 和 Elasticsearch 构建本地 RAG 个人知识助手",它提到了一种方法就是使用 LocalAI 来部署本地大模型。在我之前的文章,我使用了不同方法来部署大模型,比如 Ollama 及 LM Studio。对于有兴趣的开发者,你们可以参阅如下的文章:
-
在本地电脑中部署阿里 Qwen3 大模型及连接到 Elasticsearch - LM Studio
在今天的文章中,我们来详述如何使用 LocalAI 来部署 QWen3 大模型,并构建 RAG 应用。
前置条件
- Docker
- Python 3.10+
安装 Elasticsearch 及 Kibana
如果你还没有安装好自己的 Elasticsearch 及 Kibana,那么我们可以参考如下的文章来进行安装:
特别值得注意的是,我们选择 "Elastic Stack 8.x/9.x 安装" 安装指南。在本次的练习中,我们将使用最新的 Elastic Stack 9.0.1。
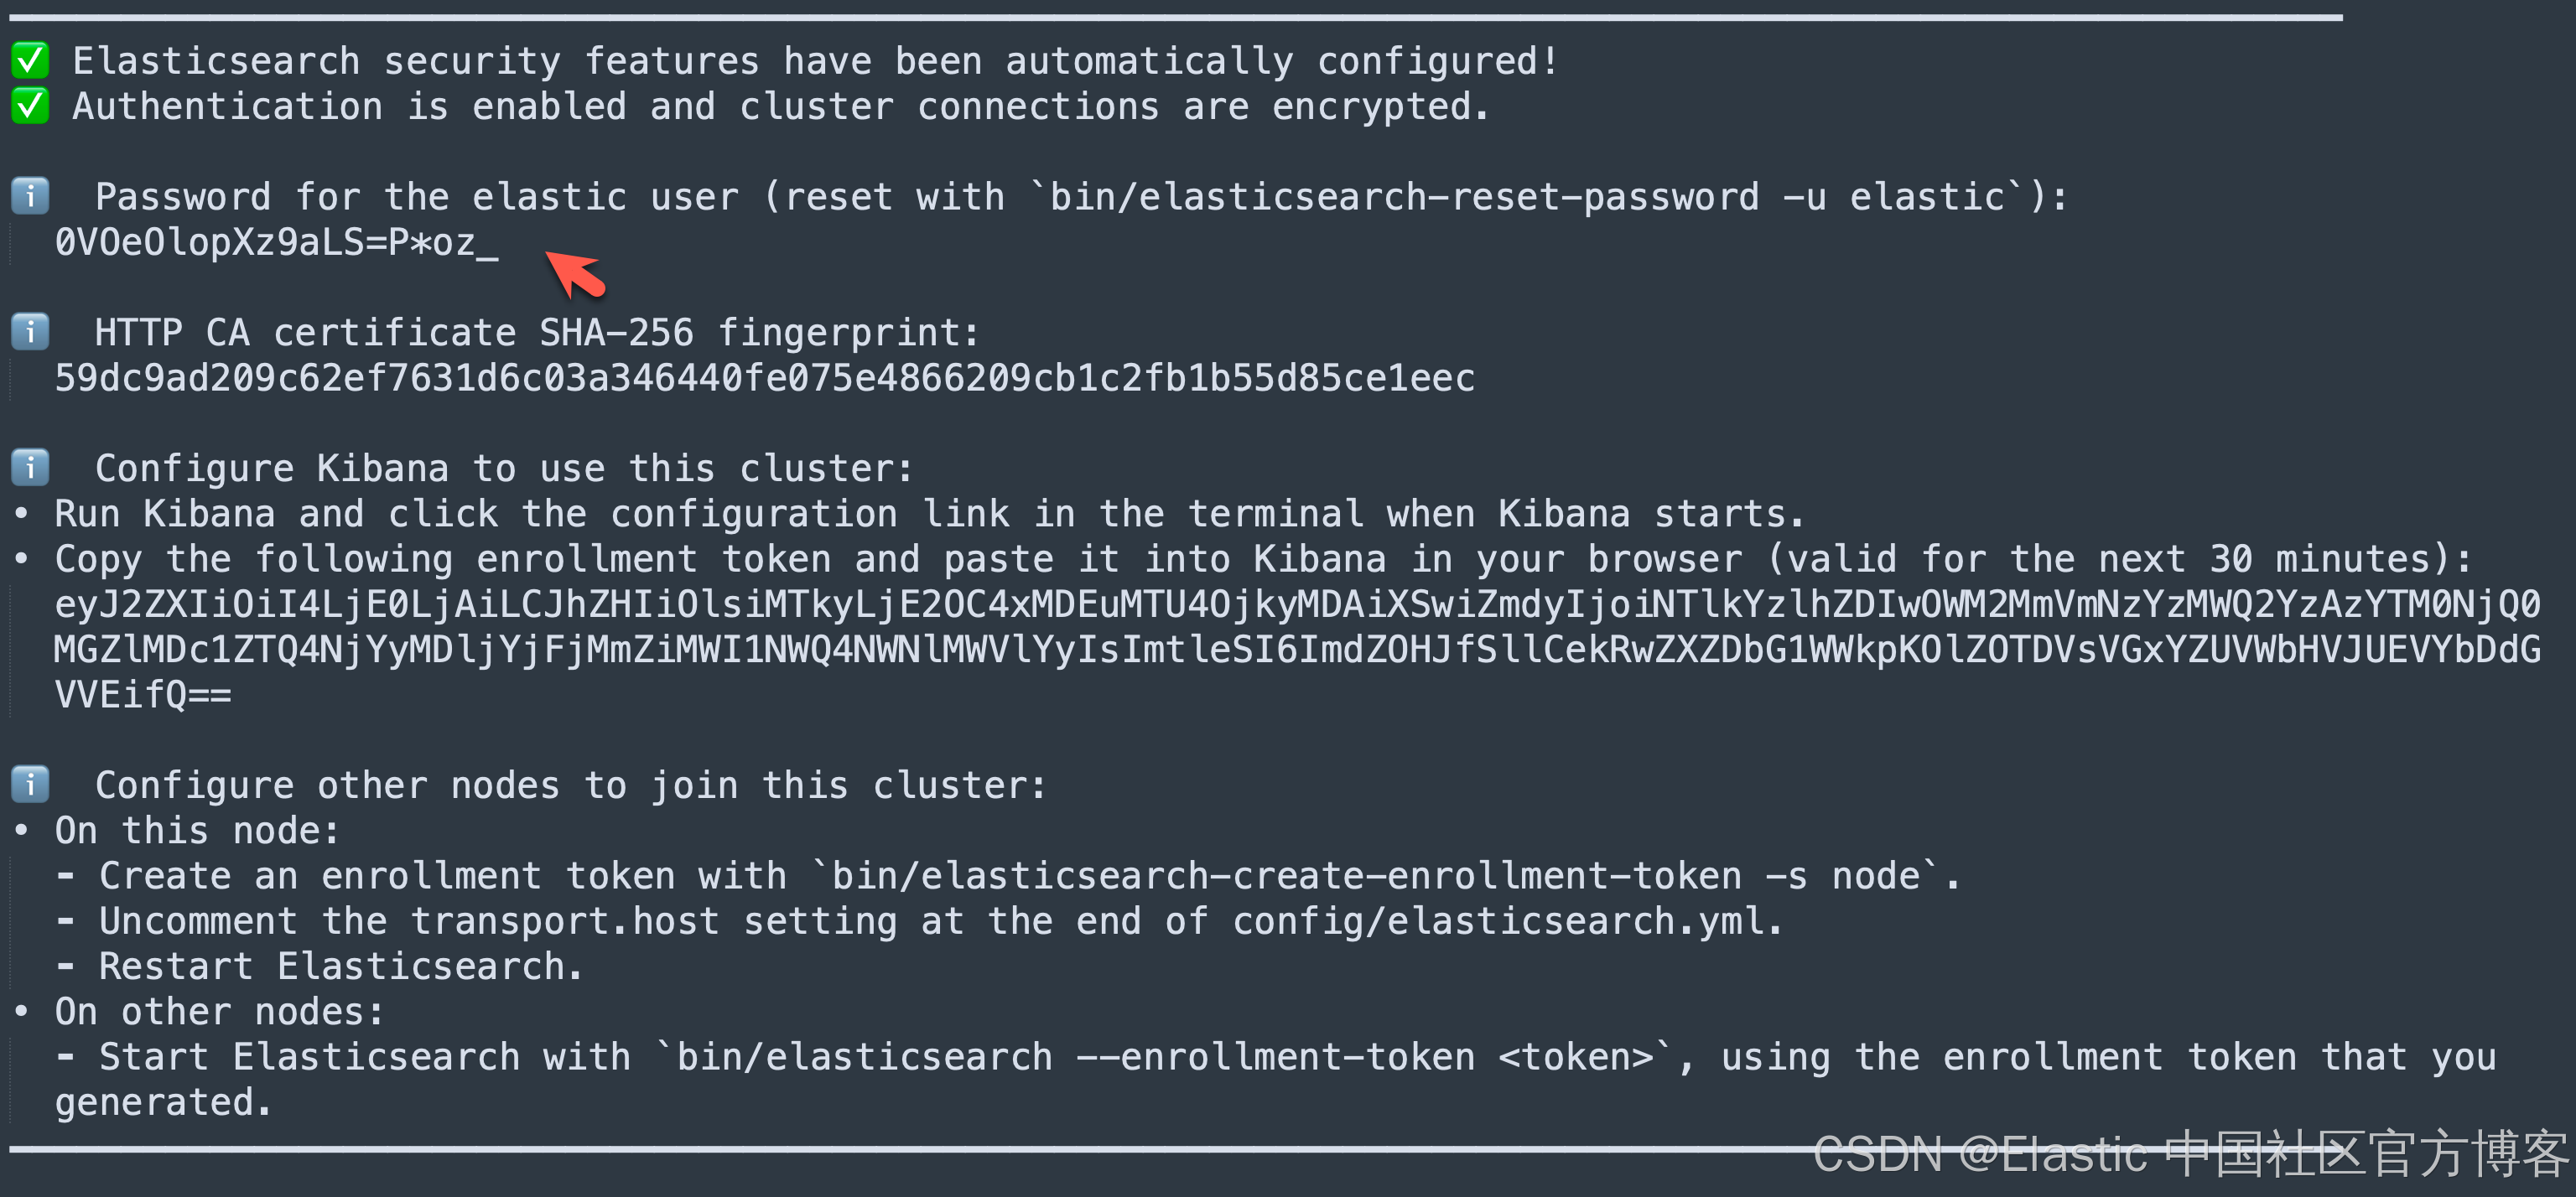
我们记下上面的密码,并在下面的代码中进行使用。
另外,为了能够使得我们避免警告,我们在 Kibana 中针对 xpack.encryptedSavedObjects.encryptionKey 进行设置。这个也是我们需要使用 Playground 所必须的。详细布置也可以参考文章 "Elasticsearch:使用 Playground 与你的 PDF 聊天"。 我们在 terminal 中打入如下的命令:
bin/kibana-encryption-keys generate

$ pwd
/Users/liuxg/elastic/kibana-9.0.1
$ bin/kibana-encryption-keys generate
## Kibana Encryption Key Generation Utility

The 'generate' command guides you through the process of setting encryption keys for:

xpack.encryptedSavedObjects.encryptionKey
    Used to encrypt stored objects such as dashboards and visualizations
    https://www.elastic.co/guide/en/kibana/current/xpack-security-secure-saved-objects.html#xpack-security-secure-saved-objects

xpack.reporting.encryptionKey
    Used to encrypt saved reports
    https://www.elastic.co/guide/en/kibana/current/reporting-settings-kb.html#general-reporting-settings

xpack.security.encryptionKey
    Used to encrypt session information
    https://www.elastic.co/guide/en/kibana/current/security-settings-kb.html#security-session-and-cookie-settings


Already defined settings are ignored and can be regenerated using the --force flag.  Check the documentation links for instructions on how to rotate encryption keys.
Definitions should be set in the kibana.yml used configure Kibana.

Settings:
xpack.encryptedSavedObjects.encryptionKey: 6f1fdc6da9e4cdb8558fc8b4d3fe1048
xpack.reporting.encryptionKey: a22c866f356cda8097ad1b9befc56a25
xpack.security.encryptionKey: f4d6361ebd74b385c6ed722244985321
我们必须把正在运行的 Kibana 停止再运行上面的命令。我们把上面最后面显示的设置拷贝到 config/kibana.yml 文件的最后面,并保存。然后重新启动 Kibana。
启动白金试用功能
为了能够创建 OpenAI 连接器,我们需要打开白金版试用功能:


这样我们的白金版试用功能就设置好了。有了这个我们在下面就可以创建 OpenAI 的连接器了。
安装 ES 向量模型
在我们的搜索中,我们需要使用一个嵌入向量模型来针对数据进行向量化。在本次练习中,我们使用 ES。这也是 Elasticsearch 自带的模型。我们需要对它进行配置:


从上面的显示中,我们已经成功地把 .multilingual-e5-small 模型部署到我们的 Elasticsearch 中了。
我们可以在 Kibana 中进行查看:
GET _inference
我们可以看到一个叫做 .multilingual-e5-small-elasticsearch 的 inference id 已经生成。
LocalAI REST API
LocalAI 的主要功能之一是能够通过 HTTP 请求以 OpenAI API 兼容格式提供模型服务。这个功能在后续步骤中会非常有用。我们可以参考链接来进行安装。我们可以选择使用 docker 来进行安装:
docker run -p 8080:8080 --name local-ai -ti localai/localai:latest

$ docker run -p 8080:8080 --name local-ai -ti localai/localai:latest
Unable to find image 'localai/localai:latest' locally
latest: Pulling from localai/localai
0ec3d8645767: Pull complete
14c1b984084f: Pull complete
a030a9ff1c51: Pull complete
cc1bf155d5a2: Pull complete
4f4fb700ef54: Pull complete
fc265573f892: Pull complete
71d9481defc6: Pull complete
7dc775e087c4: Pull complete
Digest: sha256:29c0965e27ac450cd79a13d2fa3e1679413283211de045ea01727ebe681a2dca
Status: Downloaded newer image for localai/localai:latest
CPU info:
CPU: no AVX    found
CPU: no AVX2   found
CPU: no AVX512 found
WARNING: failed to determine nodes: open /sys/devices/system/node: no such file or directory
WARNING: failed to determine nodes: open /sys/devices/system/node: no such file or directory
WARNING: failed to PCI device database: pcidb: No pci-ids DB files found (and network fetch disabled)
Dec 27 00:26:08 INFO  Starting LocalAI threads=12 modelsPath="//models"
Dec 27 00:26:08 INFO  LocalAI version version="v3.9.0 (aadec0b8cb2a7c608981823e7b8a003551662205)"
Dec 27 00:26:08 INFO  AgentJobService started retention_days=30
Dec 27 00:26:08 INFO  Using forced capability run file capabilityRunFile="/run/localai/capability" capability="default\n" env=""
Dec 27 00:26:08 INFO  Preloading models path="//models"
Dec 27 00:26:08 INFO  core/startup process completed!
Dec 27 00:26:08 INFO  LocalAI is started and running address=":8080"
Dec 27 00:27:08 INFO  HTTP request method="GET" path="/readyz" status=200
这将启动 LocalAI。API 将可在 http://localhost:8080 访问。有关带预配置 models 的 images,请参见 All-in-One images。
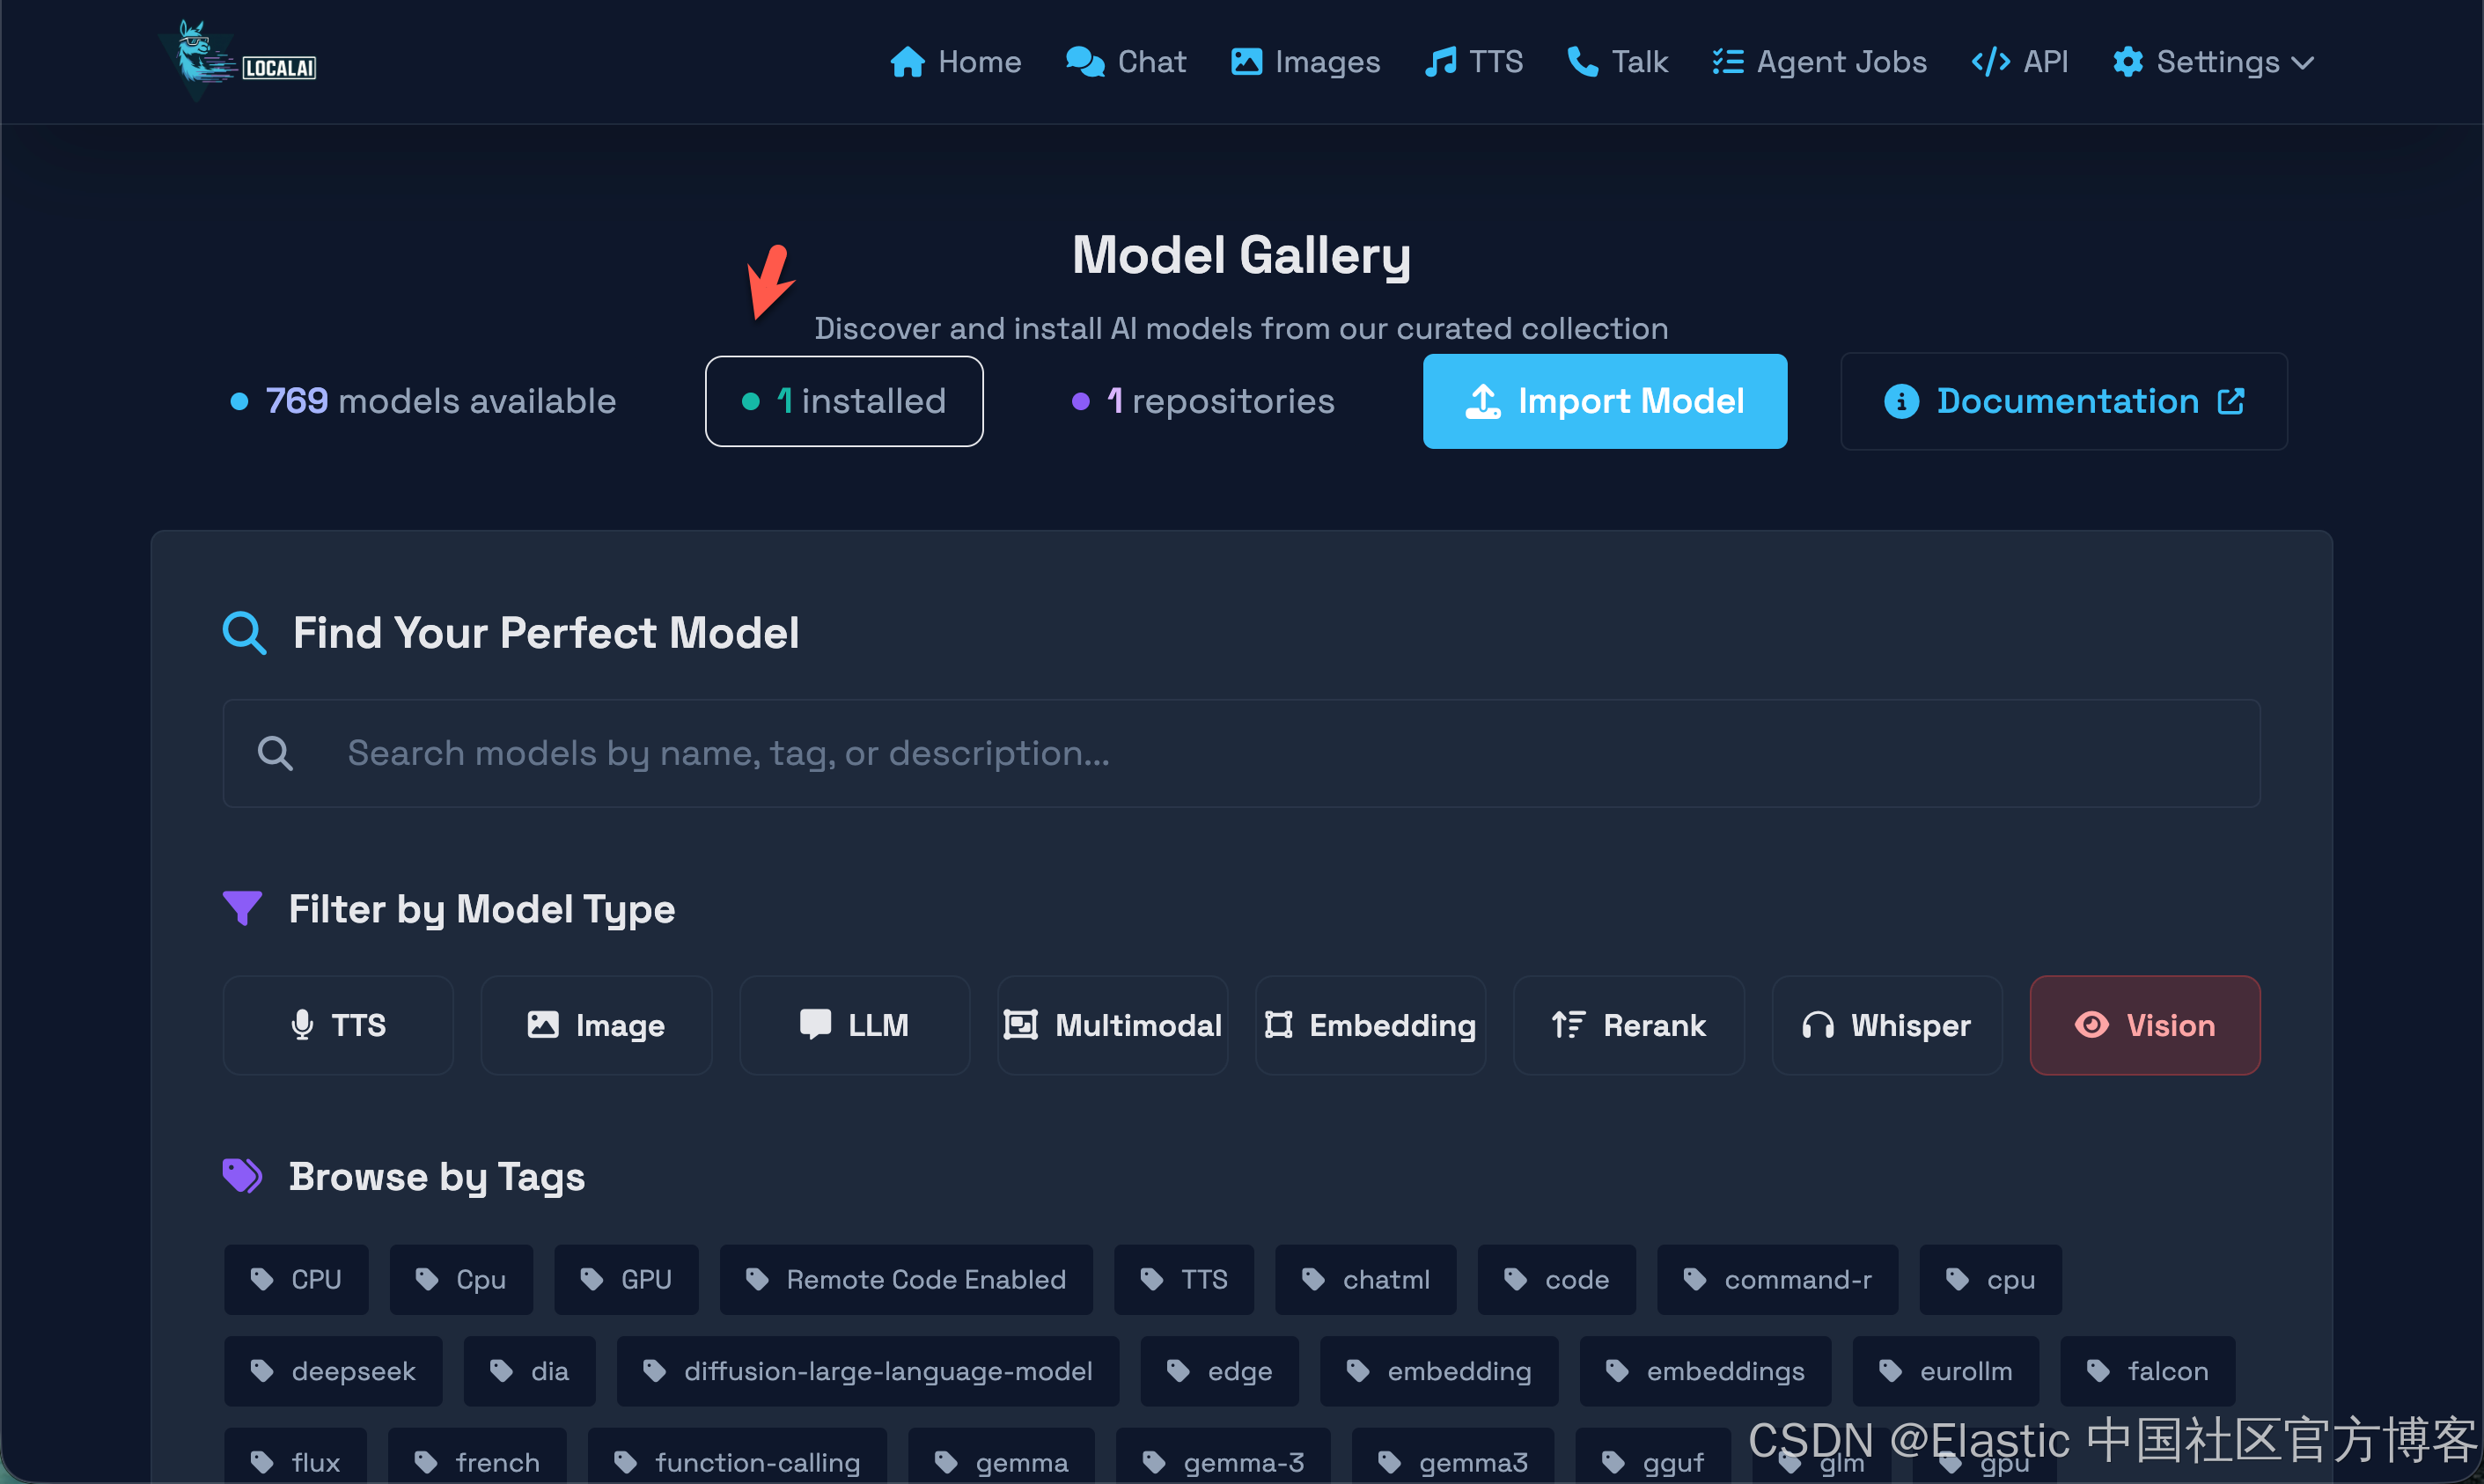
我们可以在地址 https://localai.io/gallery.html 查看目前已经被支持的 769 个模型。我们选择其中的:
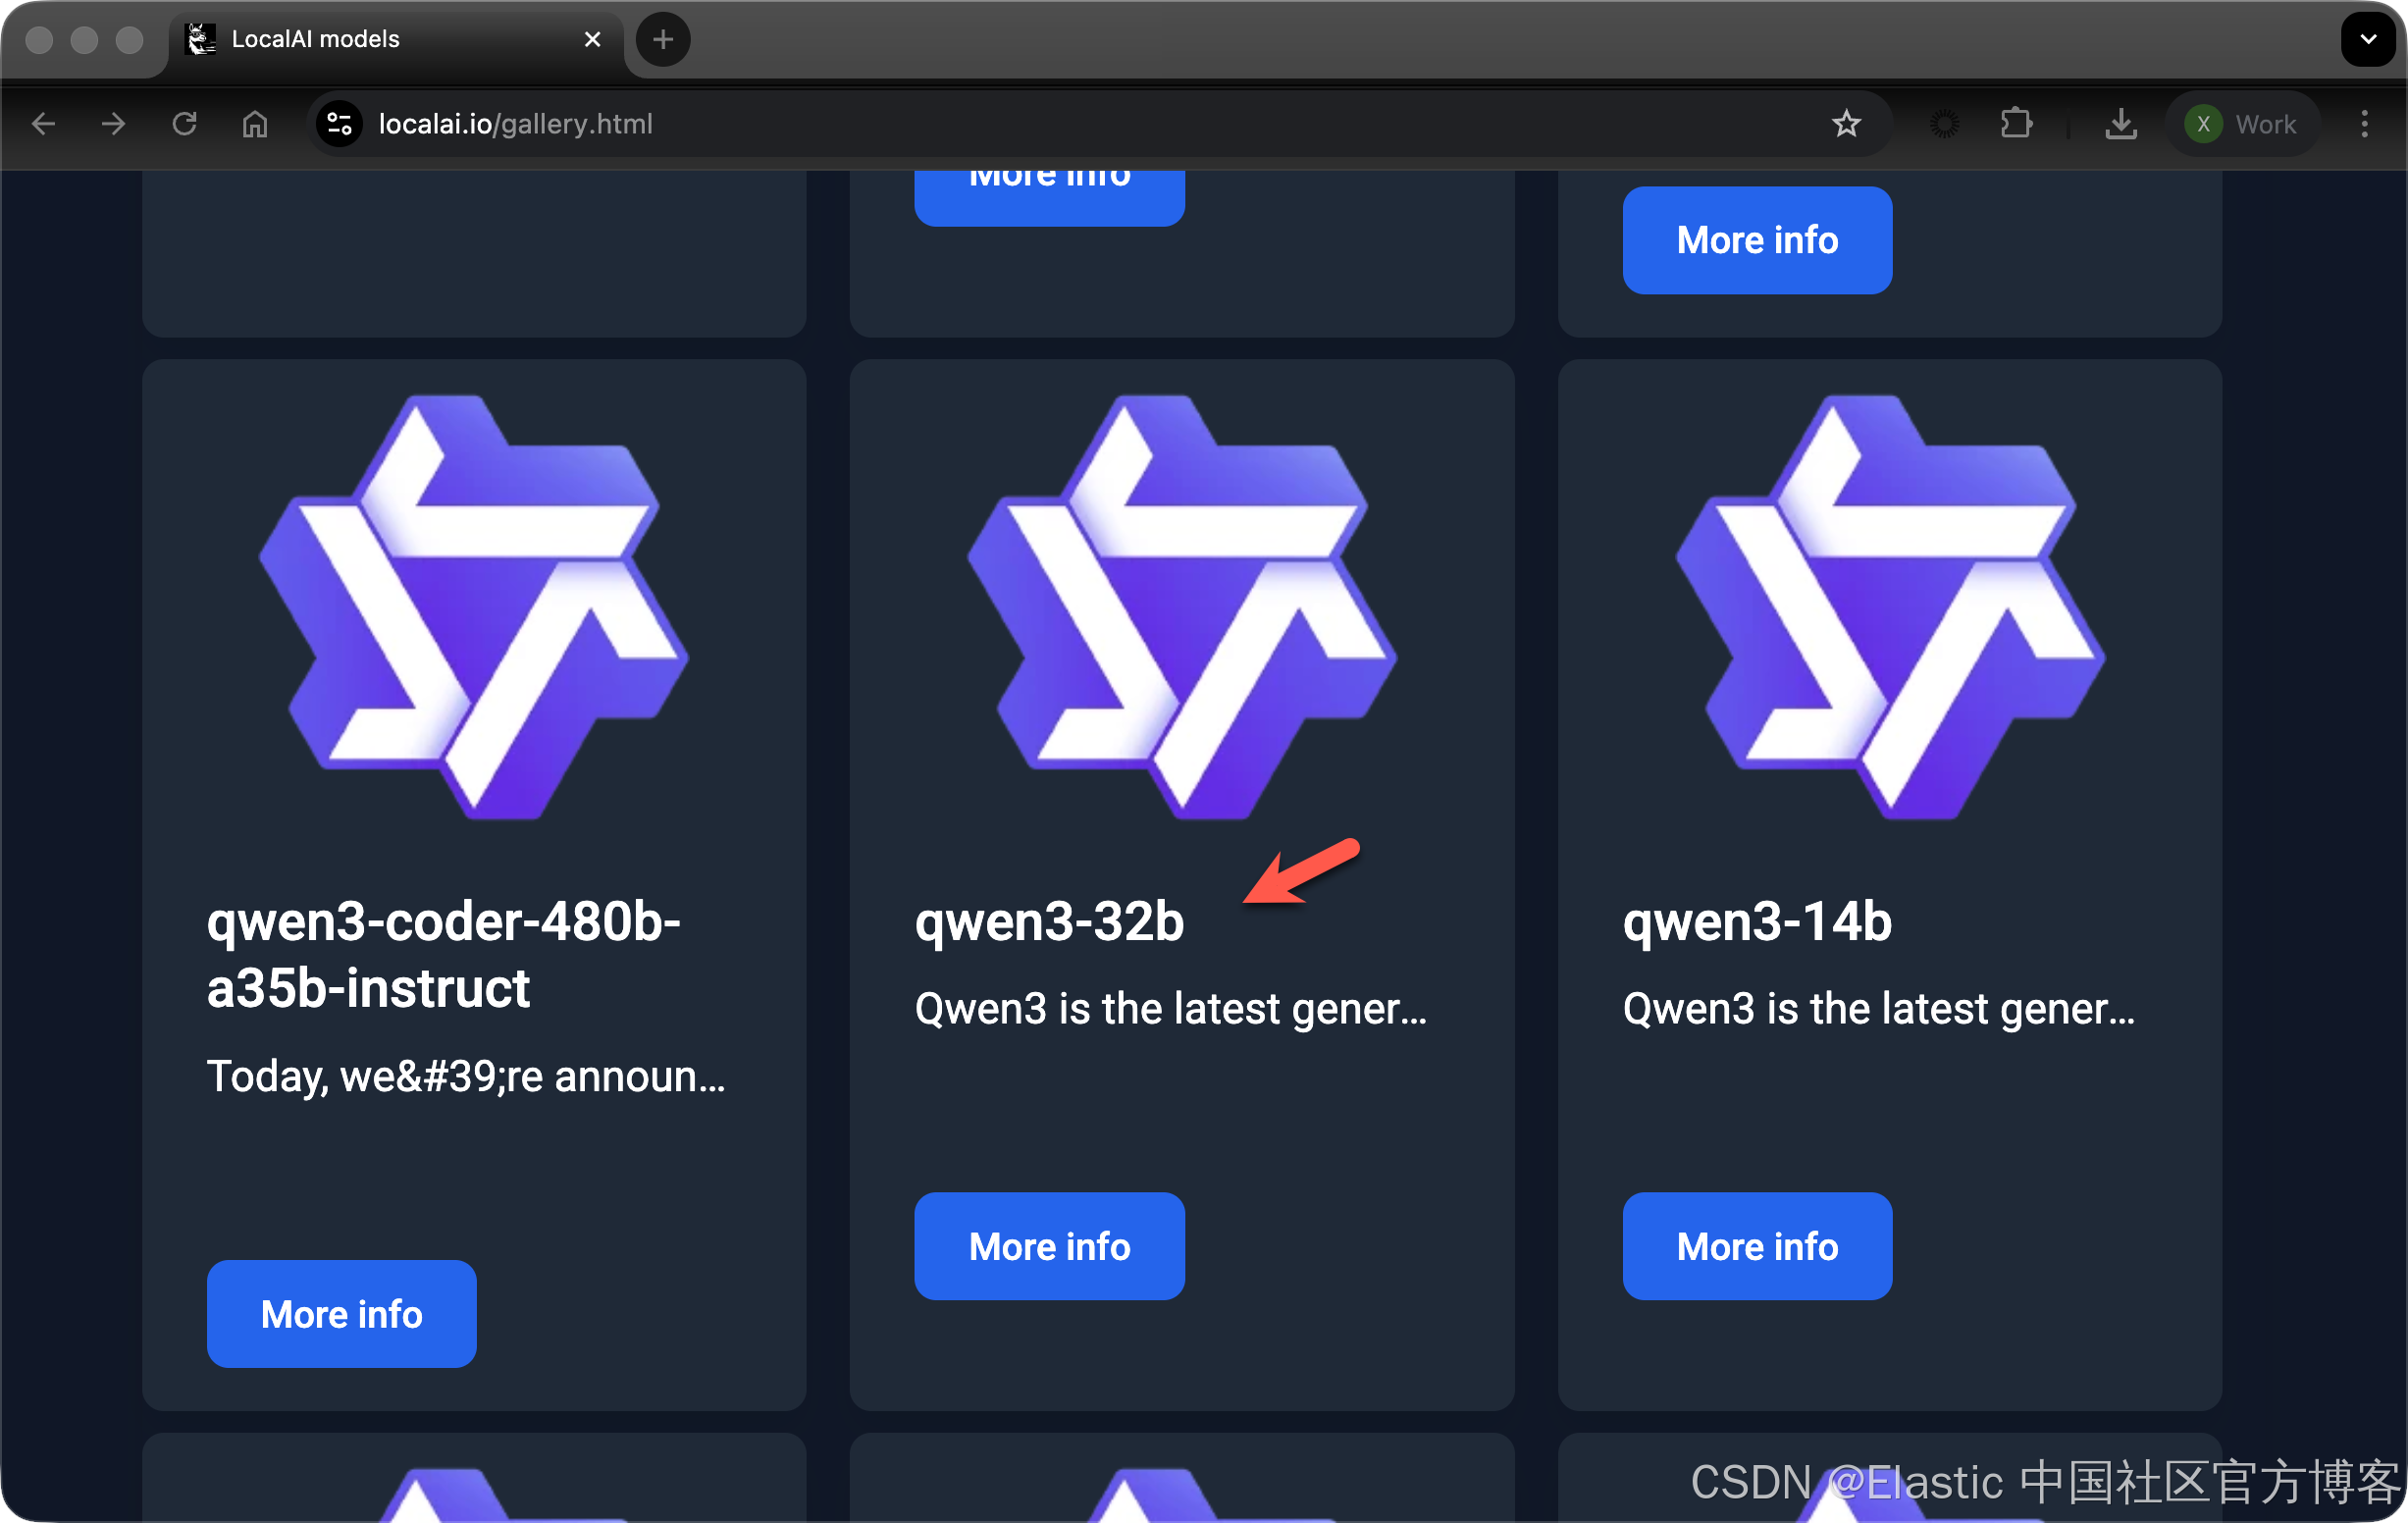
事实上,我们可以使用如下的命令来获得所有的支持的模型:
curl http://localhost:8080/models/available

curl http://localhost:8080/models/available | jq '.[] | .name | select(contains("qwen3-32b"))'

$ curl http://localhost:8080/models/available | jq '.[] | .name | select(contains("qwen3-32b"))'
  % Total    % Received % Xferd  Average Speed   Time    Time     Time  Current
                                 Dload  Upload   Total   Spent    Left  Speed
100 1018k    0 1018k    0     0  19.5M      0 --:--:-- --:--:-- --:--:-- 19.8M
"qwen3-32b"
"openbuddy_openbuddy-r1-0528-distill-qwen3-32b-preview0-qat"
"yanfei-v2-qwen3-32b"
"zhi-create-qwen3-32b-i1"
jq: error (at <stdin>:0): null (null) and string ("qwen3-32b") cannot have their containment checked
LocalAI 服务将在 8080 端口可访问,我们将在这里发送 HTTP 请求。让我们发送一个请求来下载 qwen3-32b 模型:
curl -X POST http://localhost:8080/models/apply \
  -H "Content-Type: application/json" \
  -d '{"id": "qwen3-32b"}'

$ curl -X POST http://localhost:8080/models/apply \
>   -H "Content-Type: application/json" \
>   -d '{"id": "qwen3-32b"}'
{"uuid":"c19a4409-e2bc-11f0-9c2b-66e8344d6f9d","status":"http://localhost:8080/models/jobs/c19a4409-e2bc-11f0-9c2b-66e8344d6f9d"}
我们可以使用上一步生成的 ID 来检查下载状态:
curl -s http://localhost:8080/models/jobs/c19a4409-e2bc-11f0-9c2b-66e8344d6f9d
$ curl -s http://localhost:8080/models/jobs/c19a4409-e2bc-11f0-9c2b-66e8344d6f9d | jq .
{
"deletion": false,
"file_name": "/models/Qwen_Qwen3-32B-Q4_K_M.gguf.partial",
"error": null,
"processed": false,
"message": "processing file: /models/Qwen_Qwen3-32B-Q4_K_M.gguf.partial. Total: 18.4 GiB. Current: 990.1 MiB",
"progress": 5.253431797503979,
"file_size": "18.4 GiB",
"downloaded_size": "990.1 MiB",
"gallery_element_name": "",
"cancelled": false,
"cancellable": true
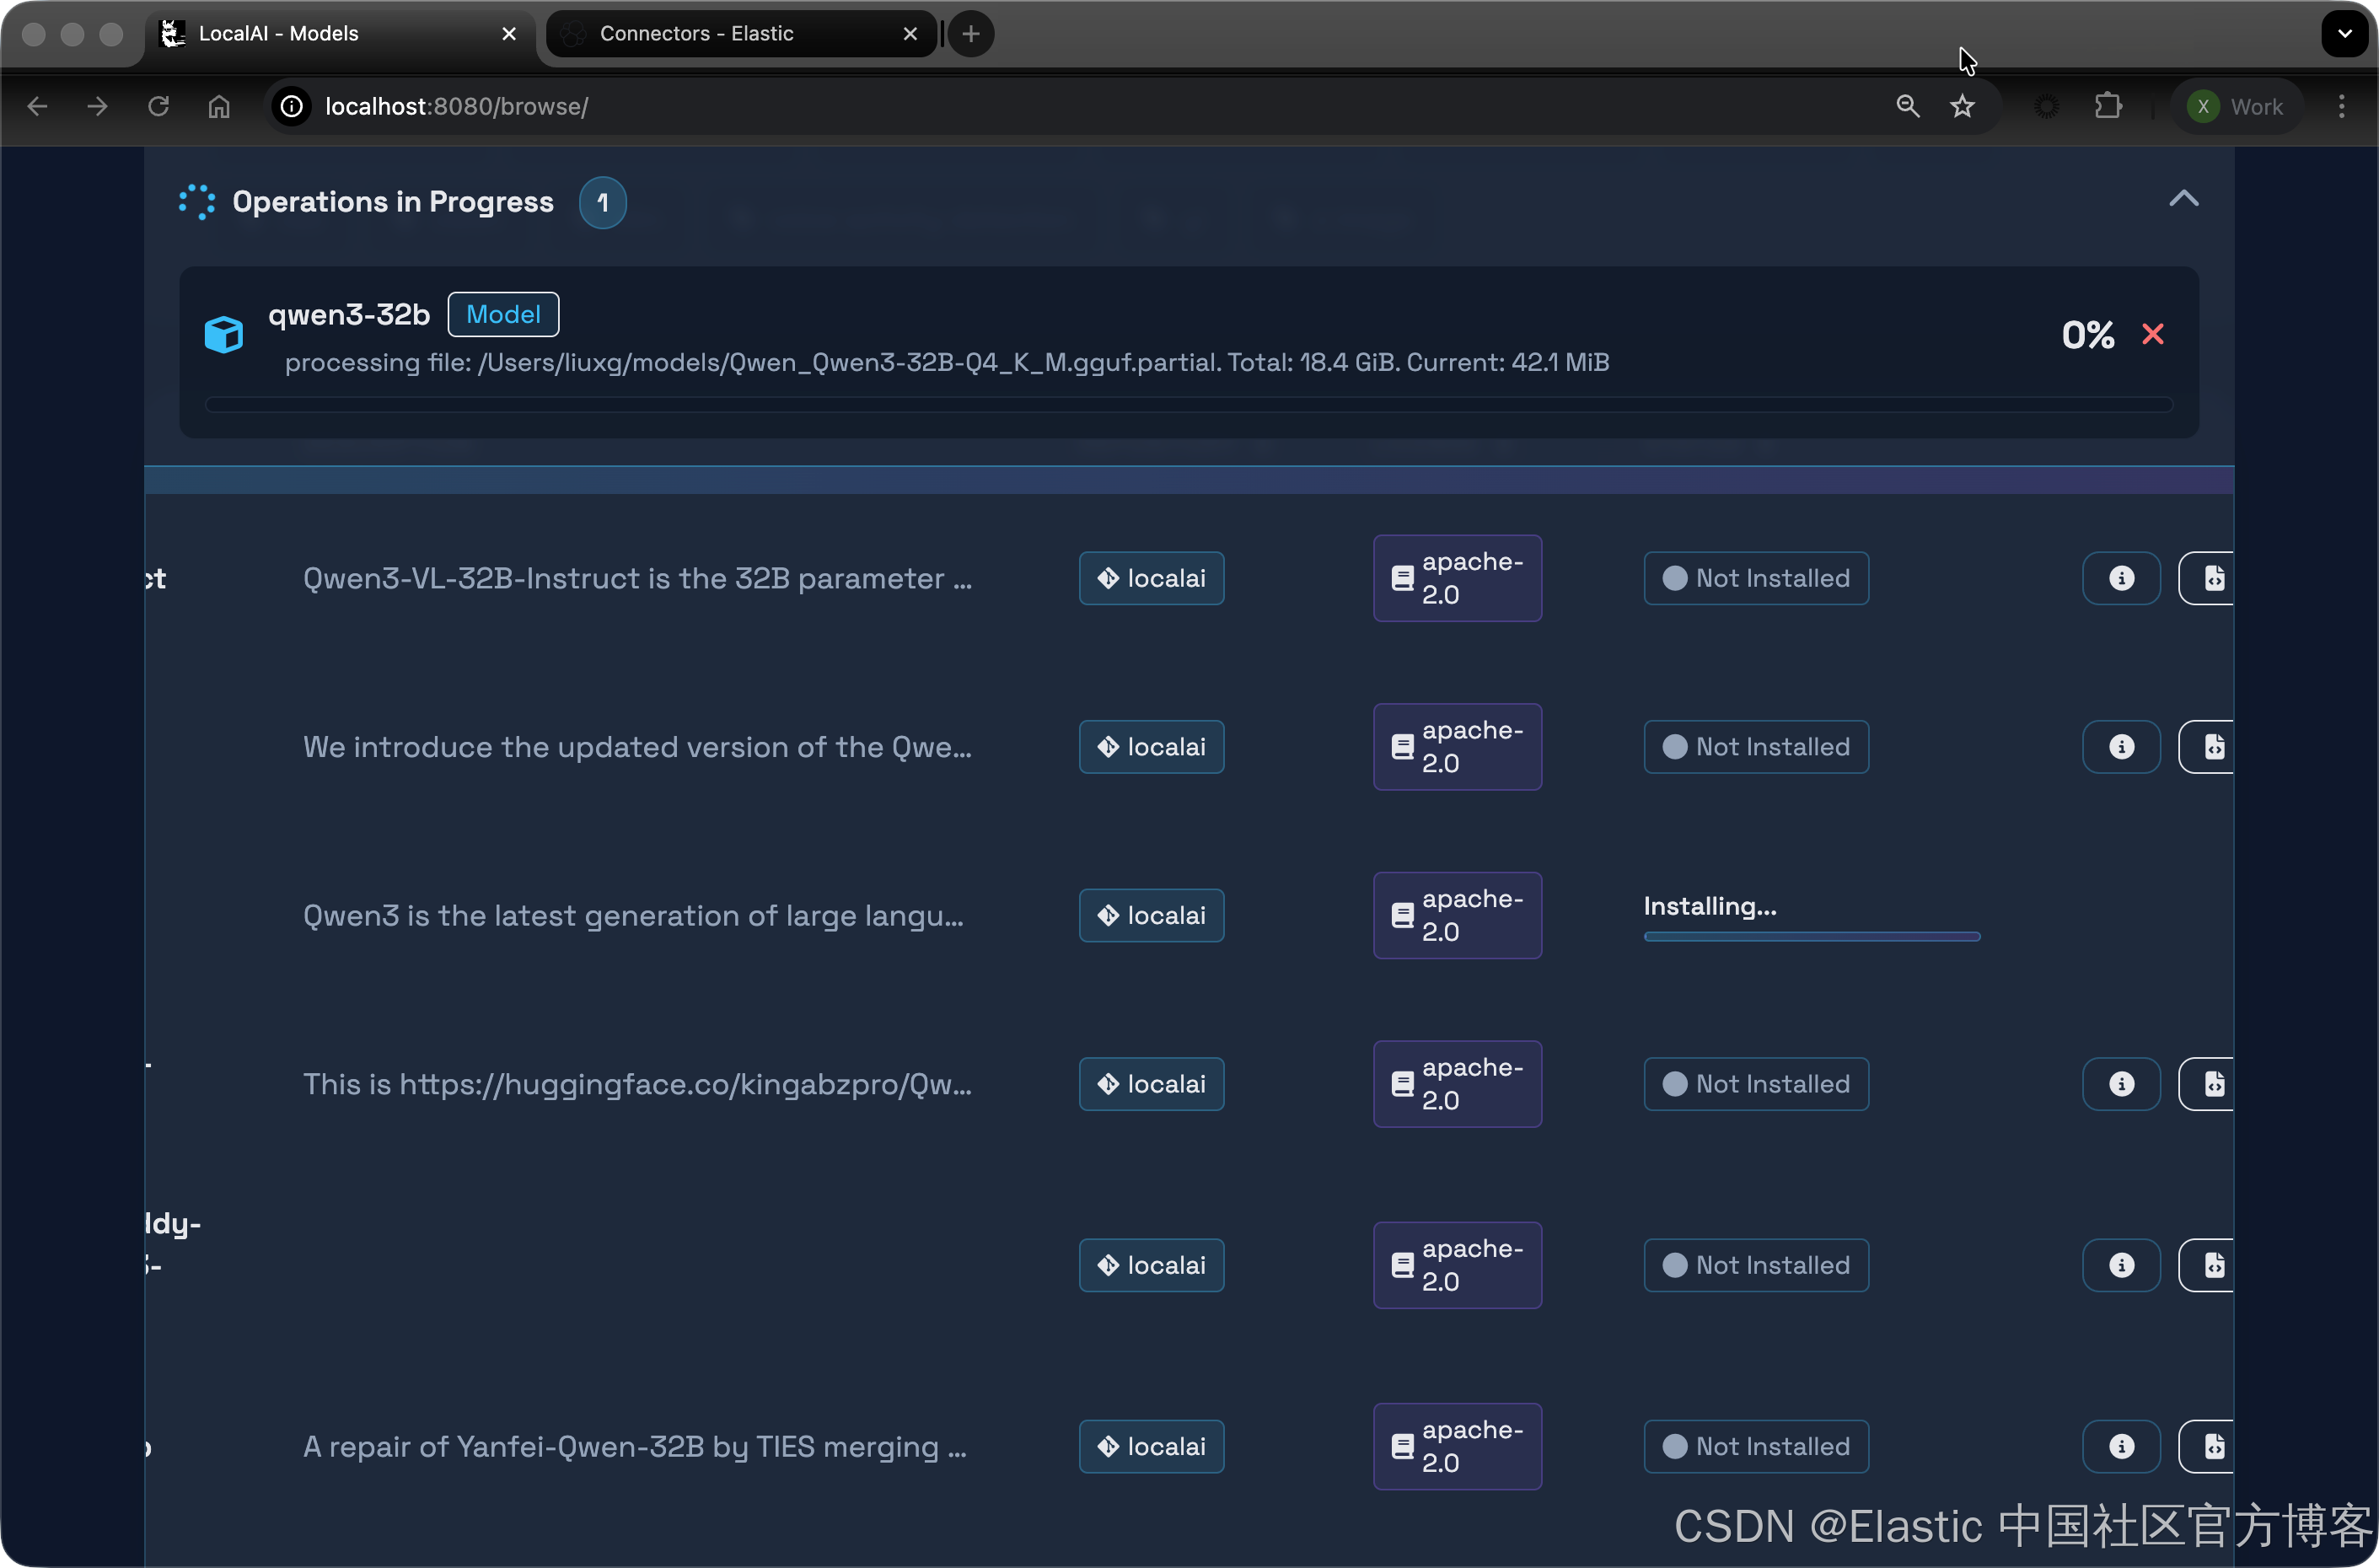
}progress 字段表示当前下载的百分比;我们需要等待它完成。一旦完成,我们可以创建一个测试以确保一切正常运行:

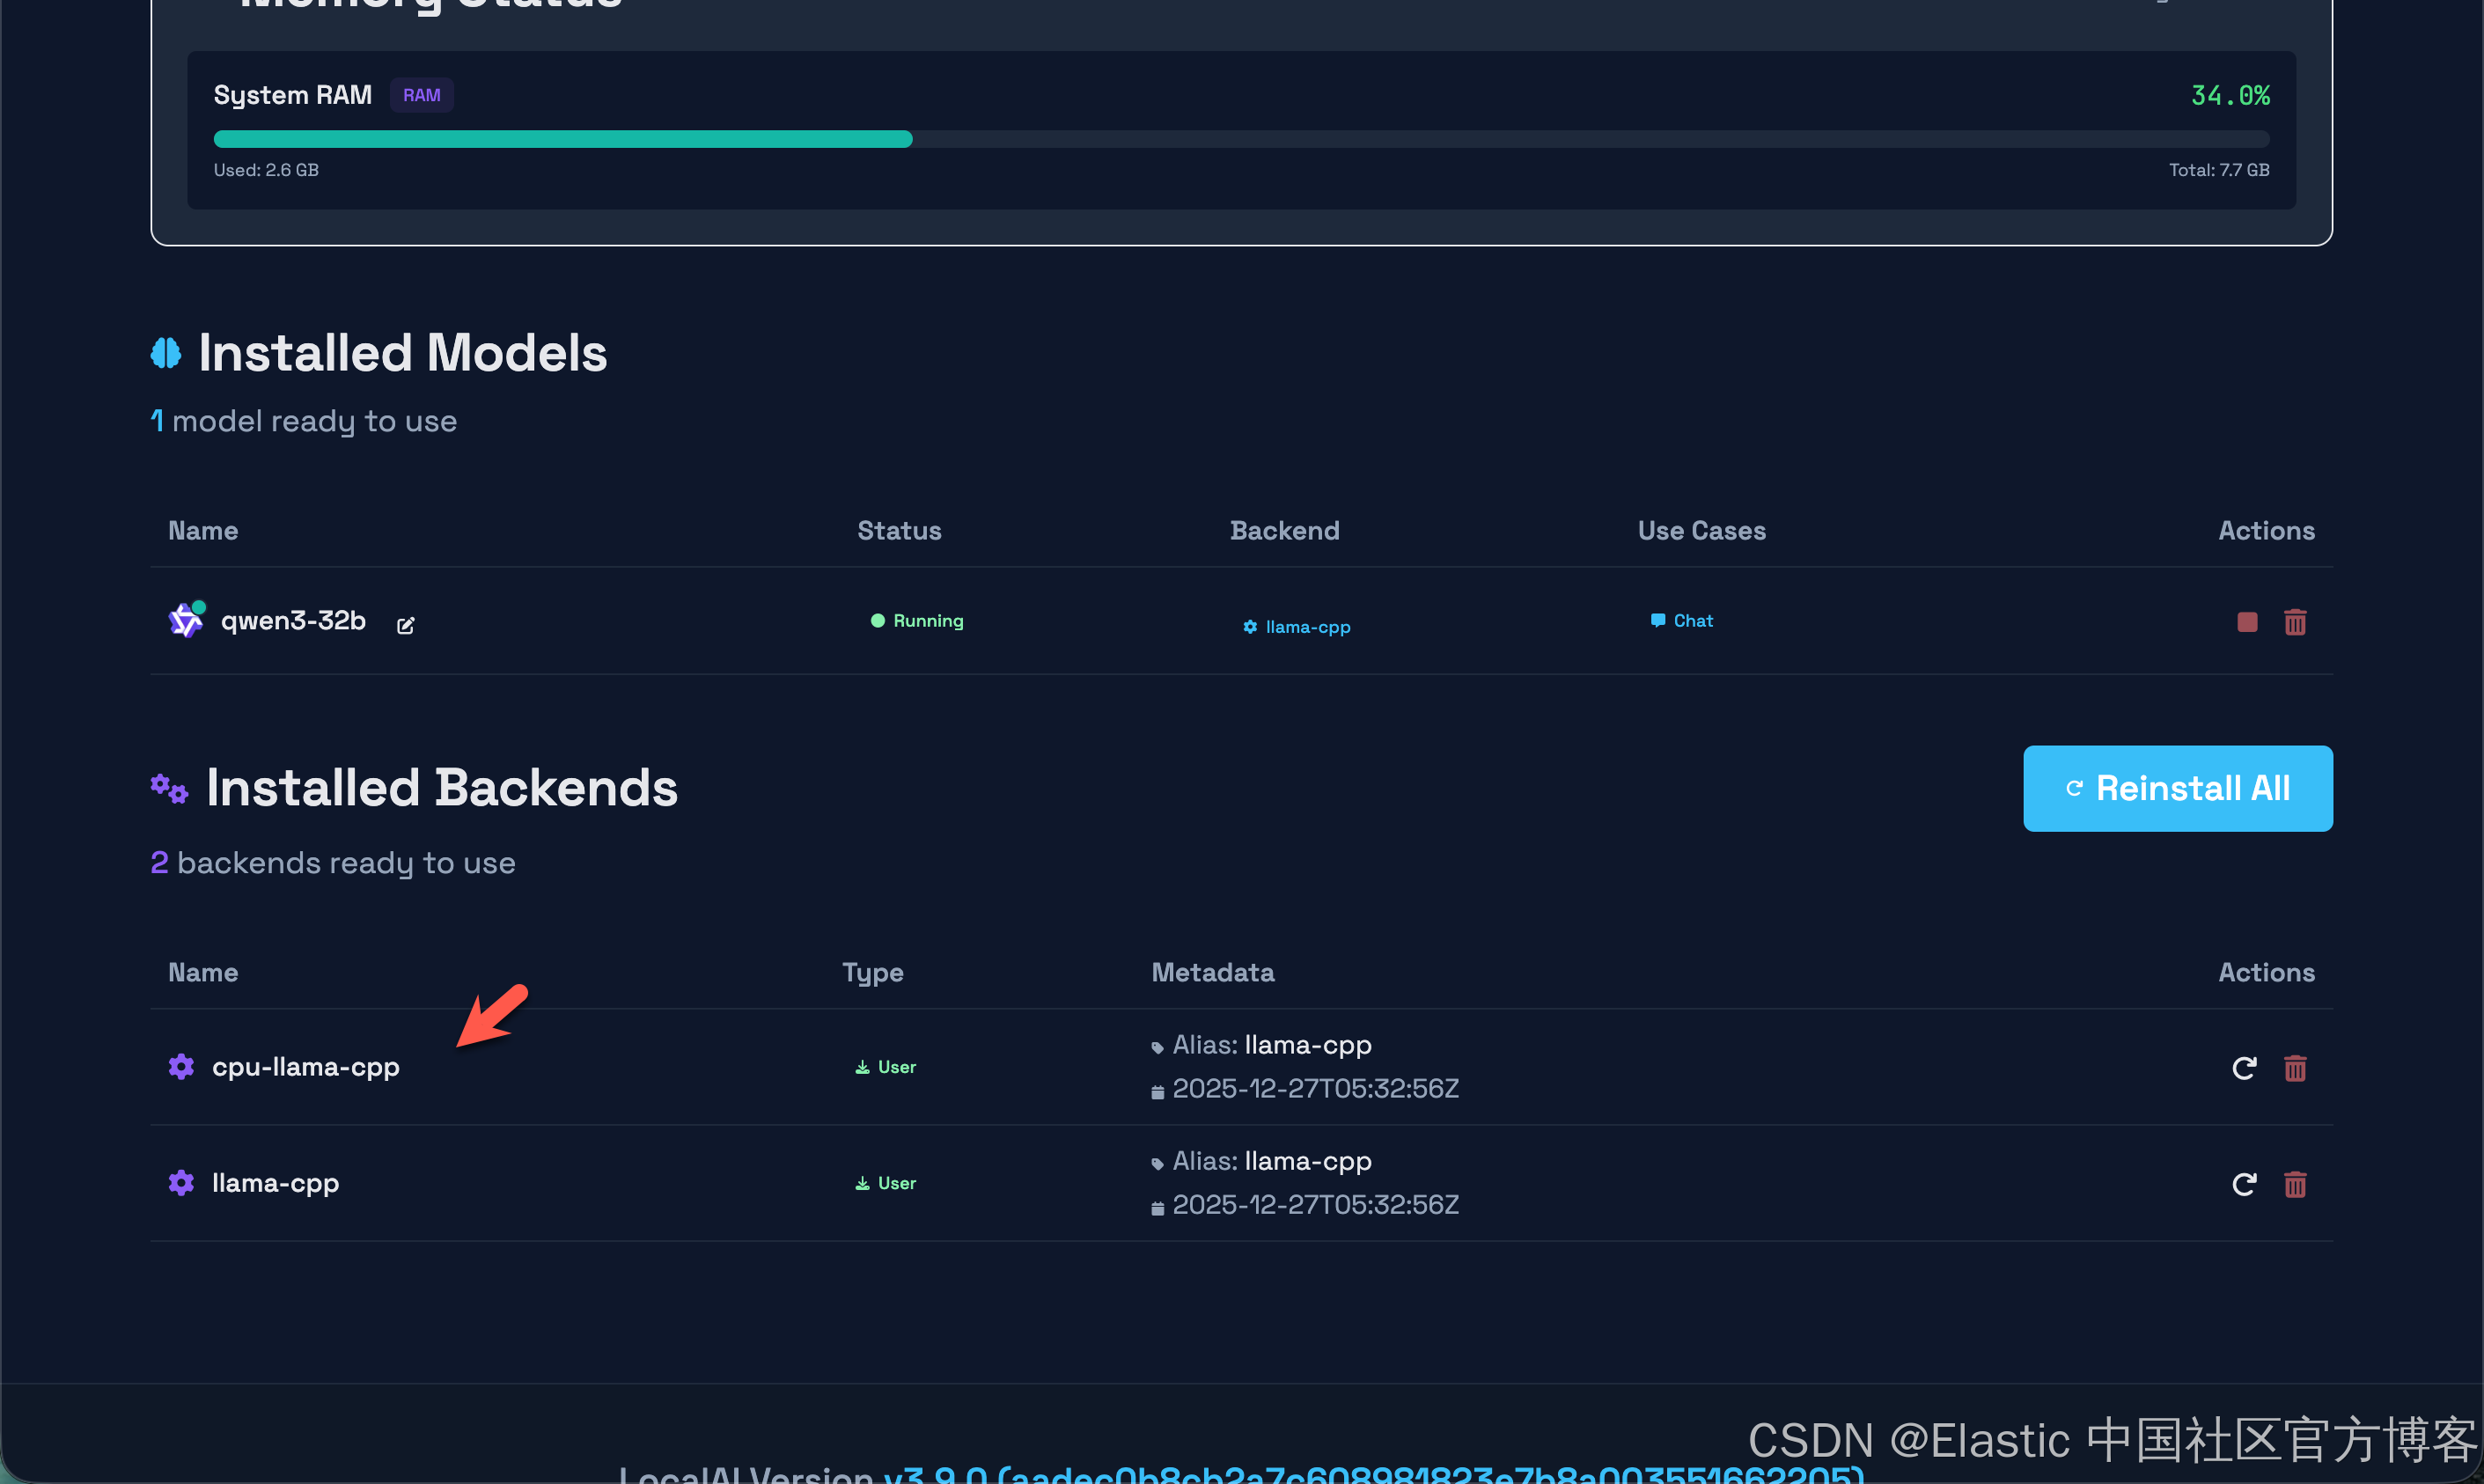
 从上面的输出中,我们可以看到模型已经成功地被下载。我们也可以直接打开网页:http://localhost:8080/
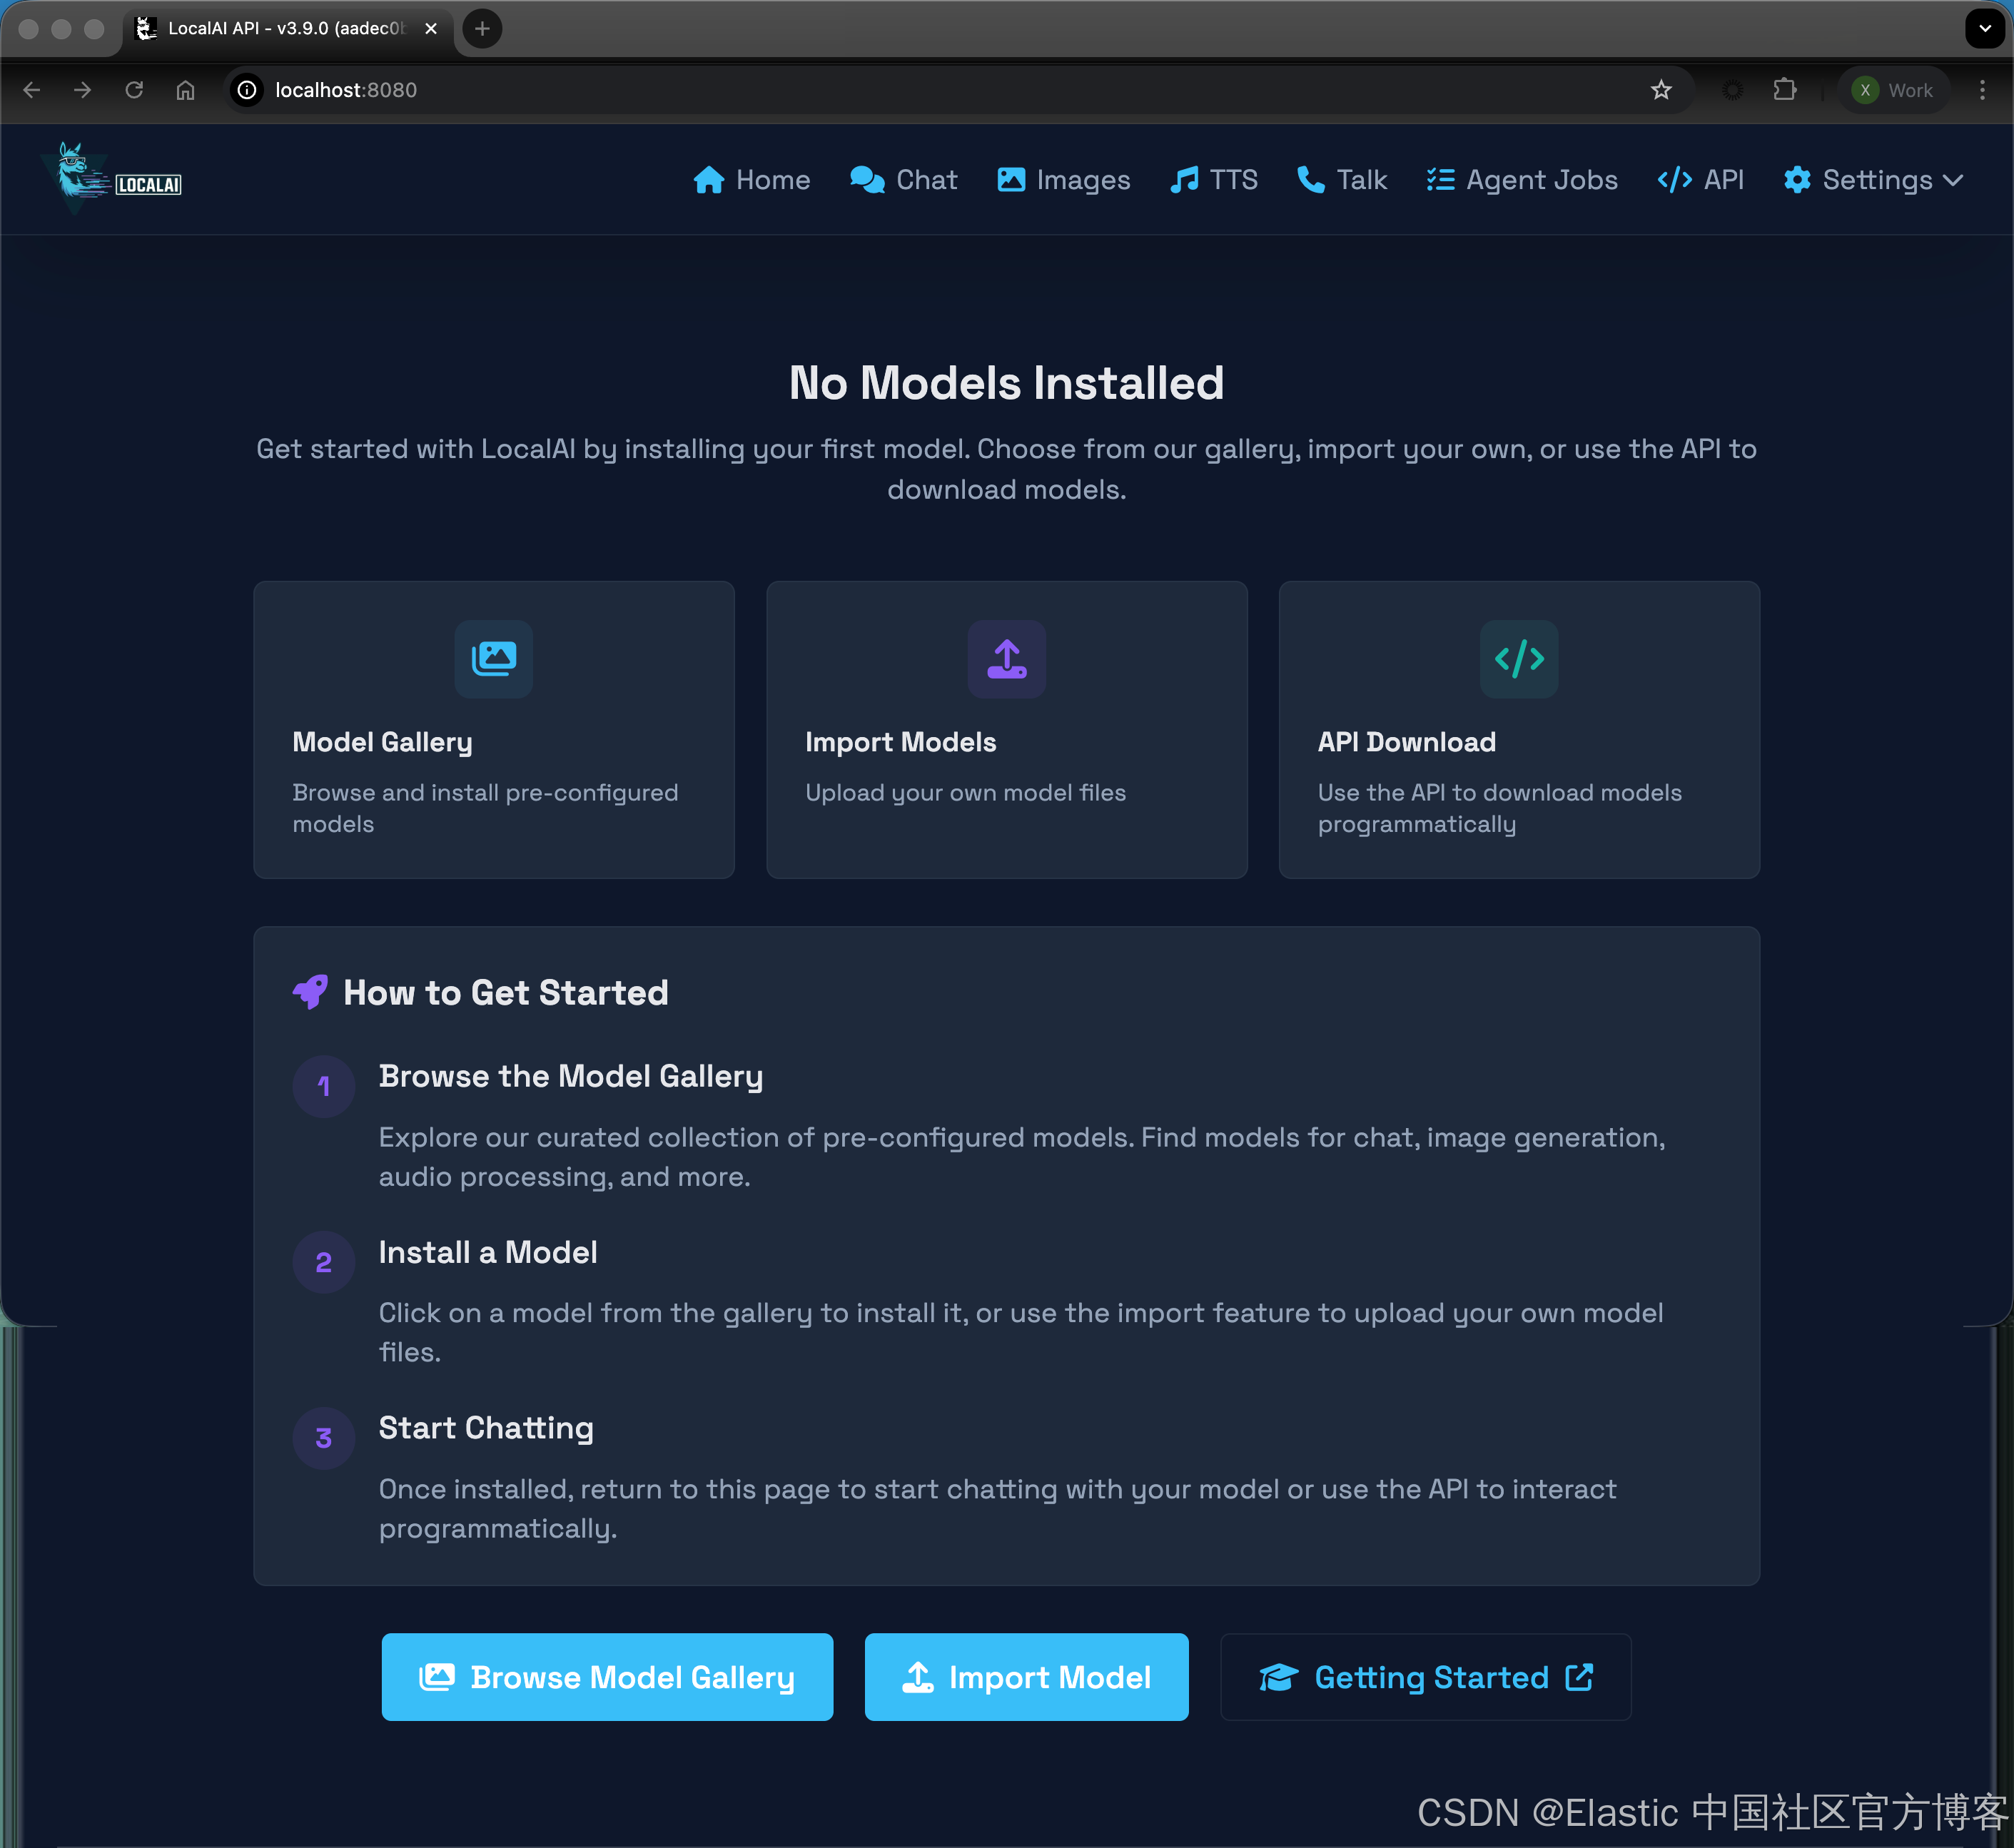
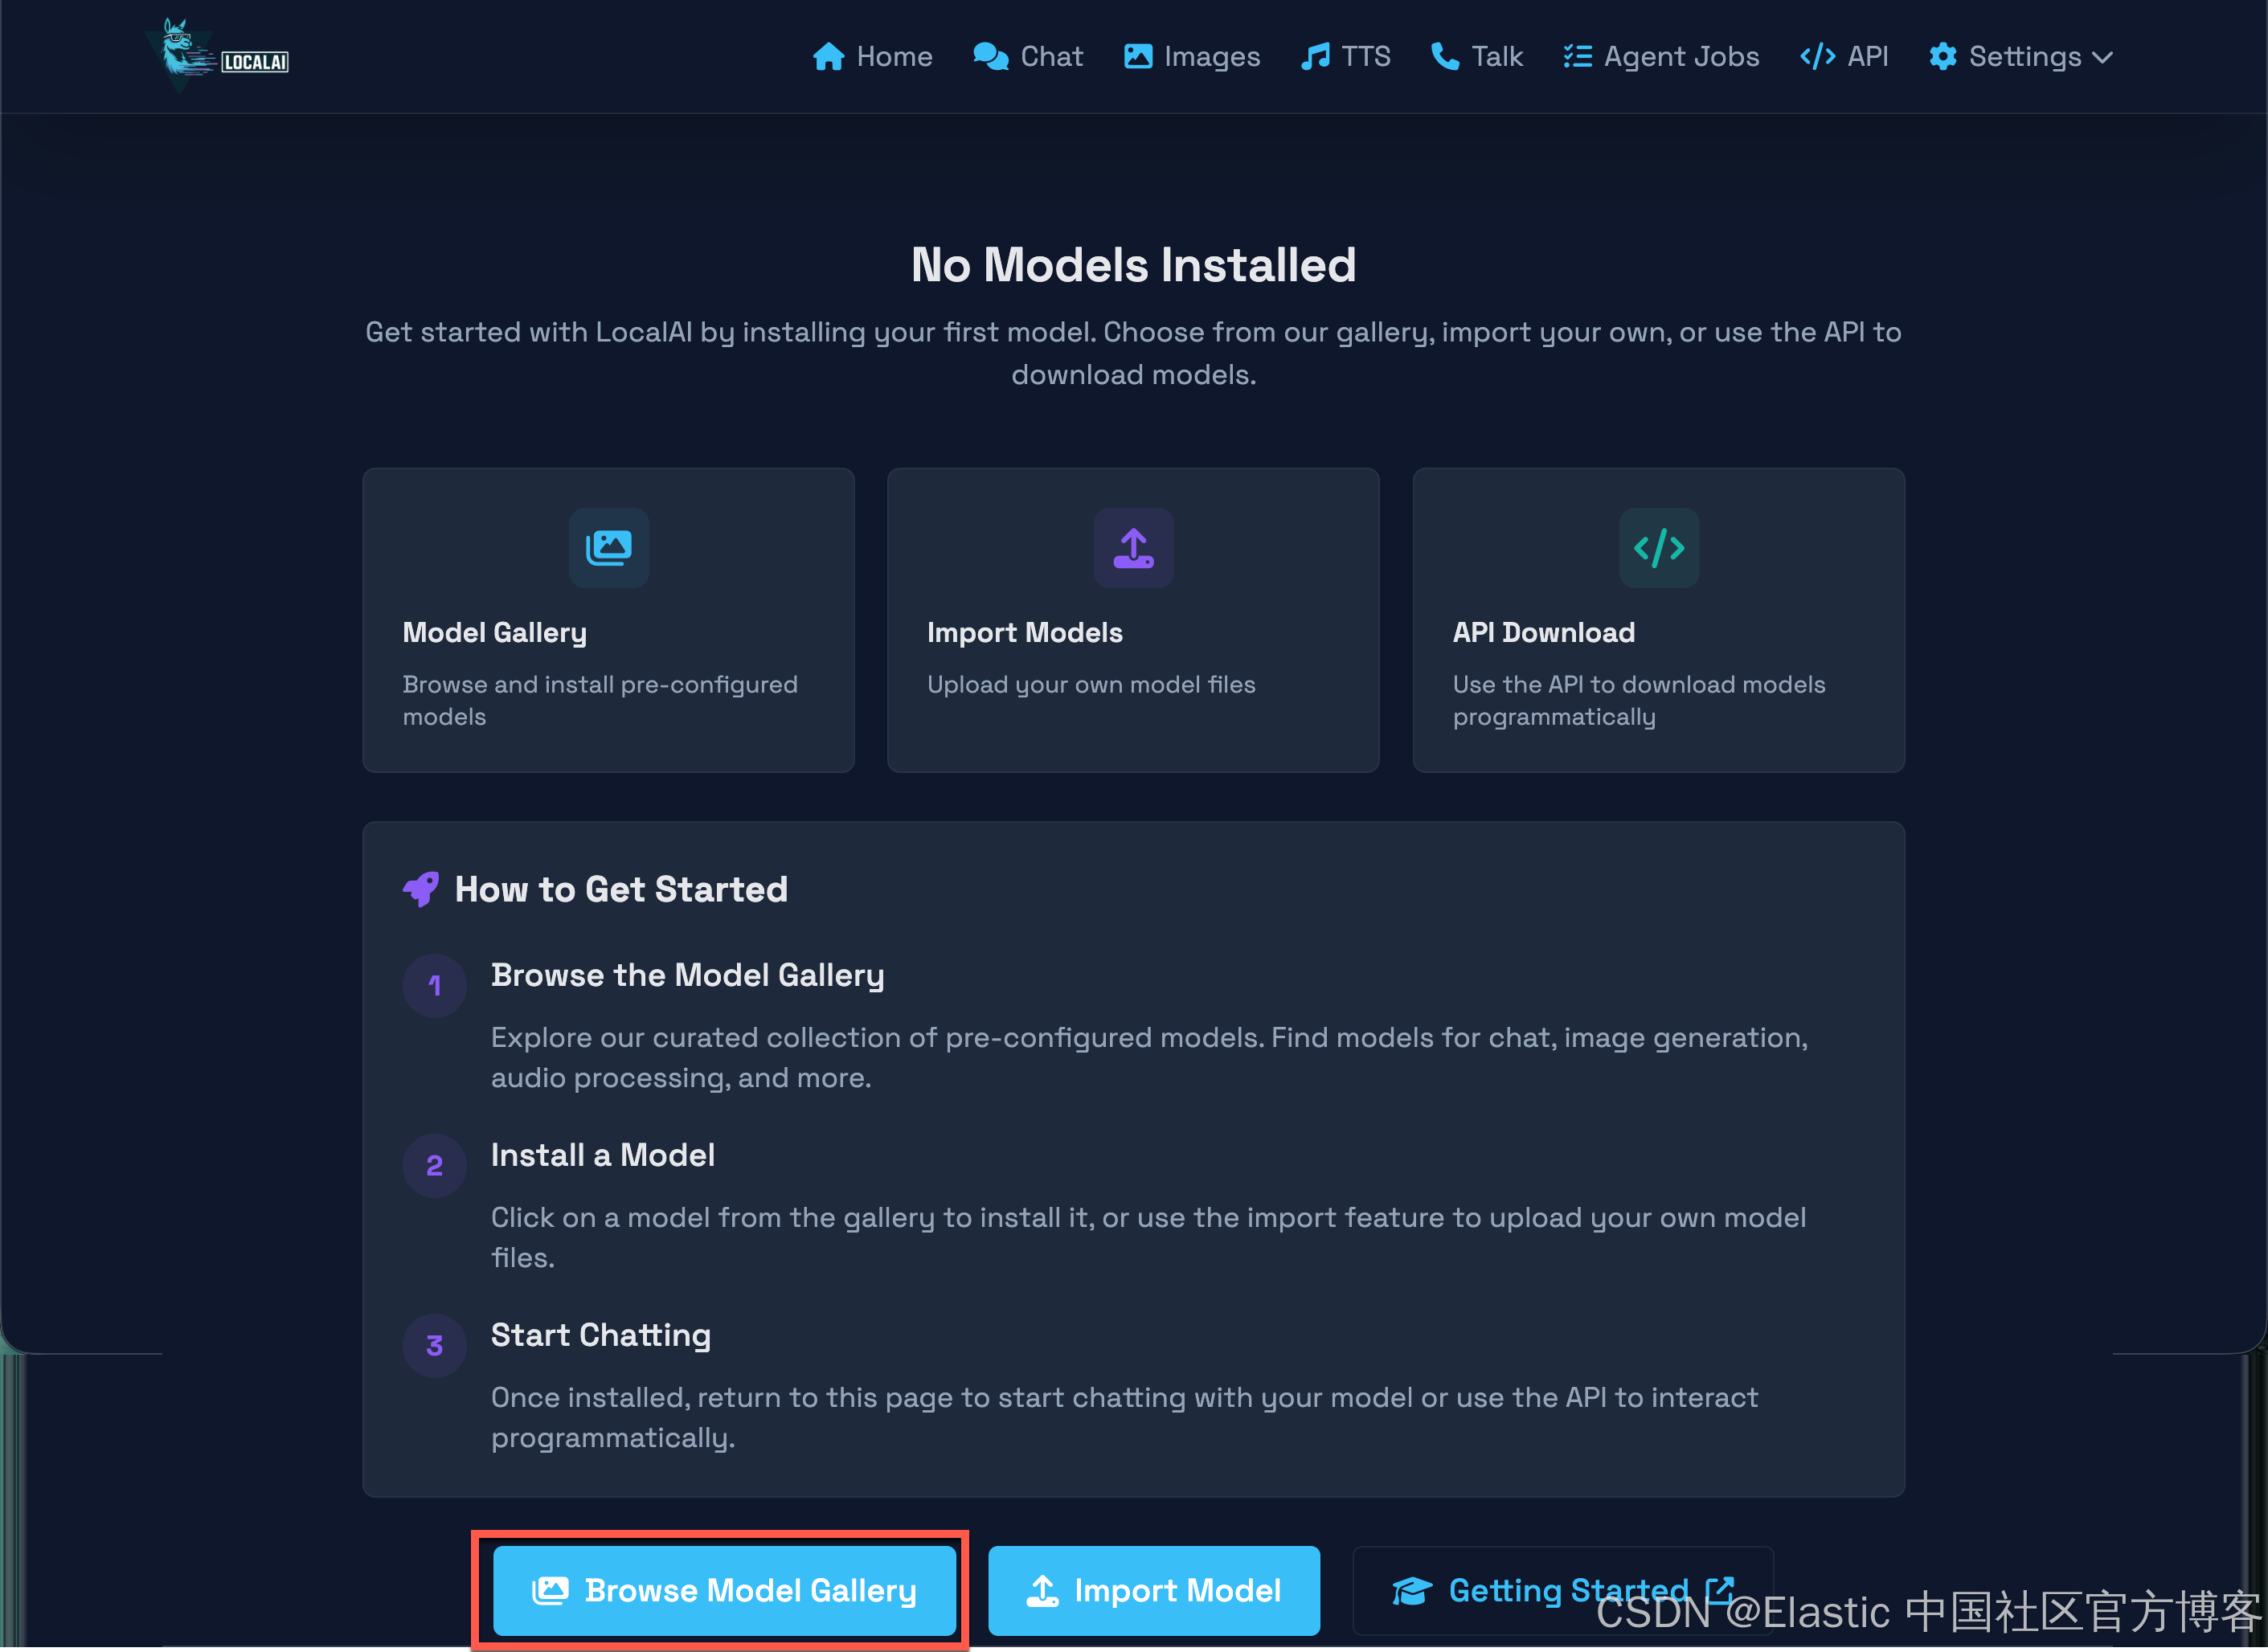
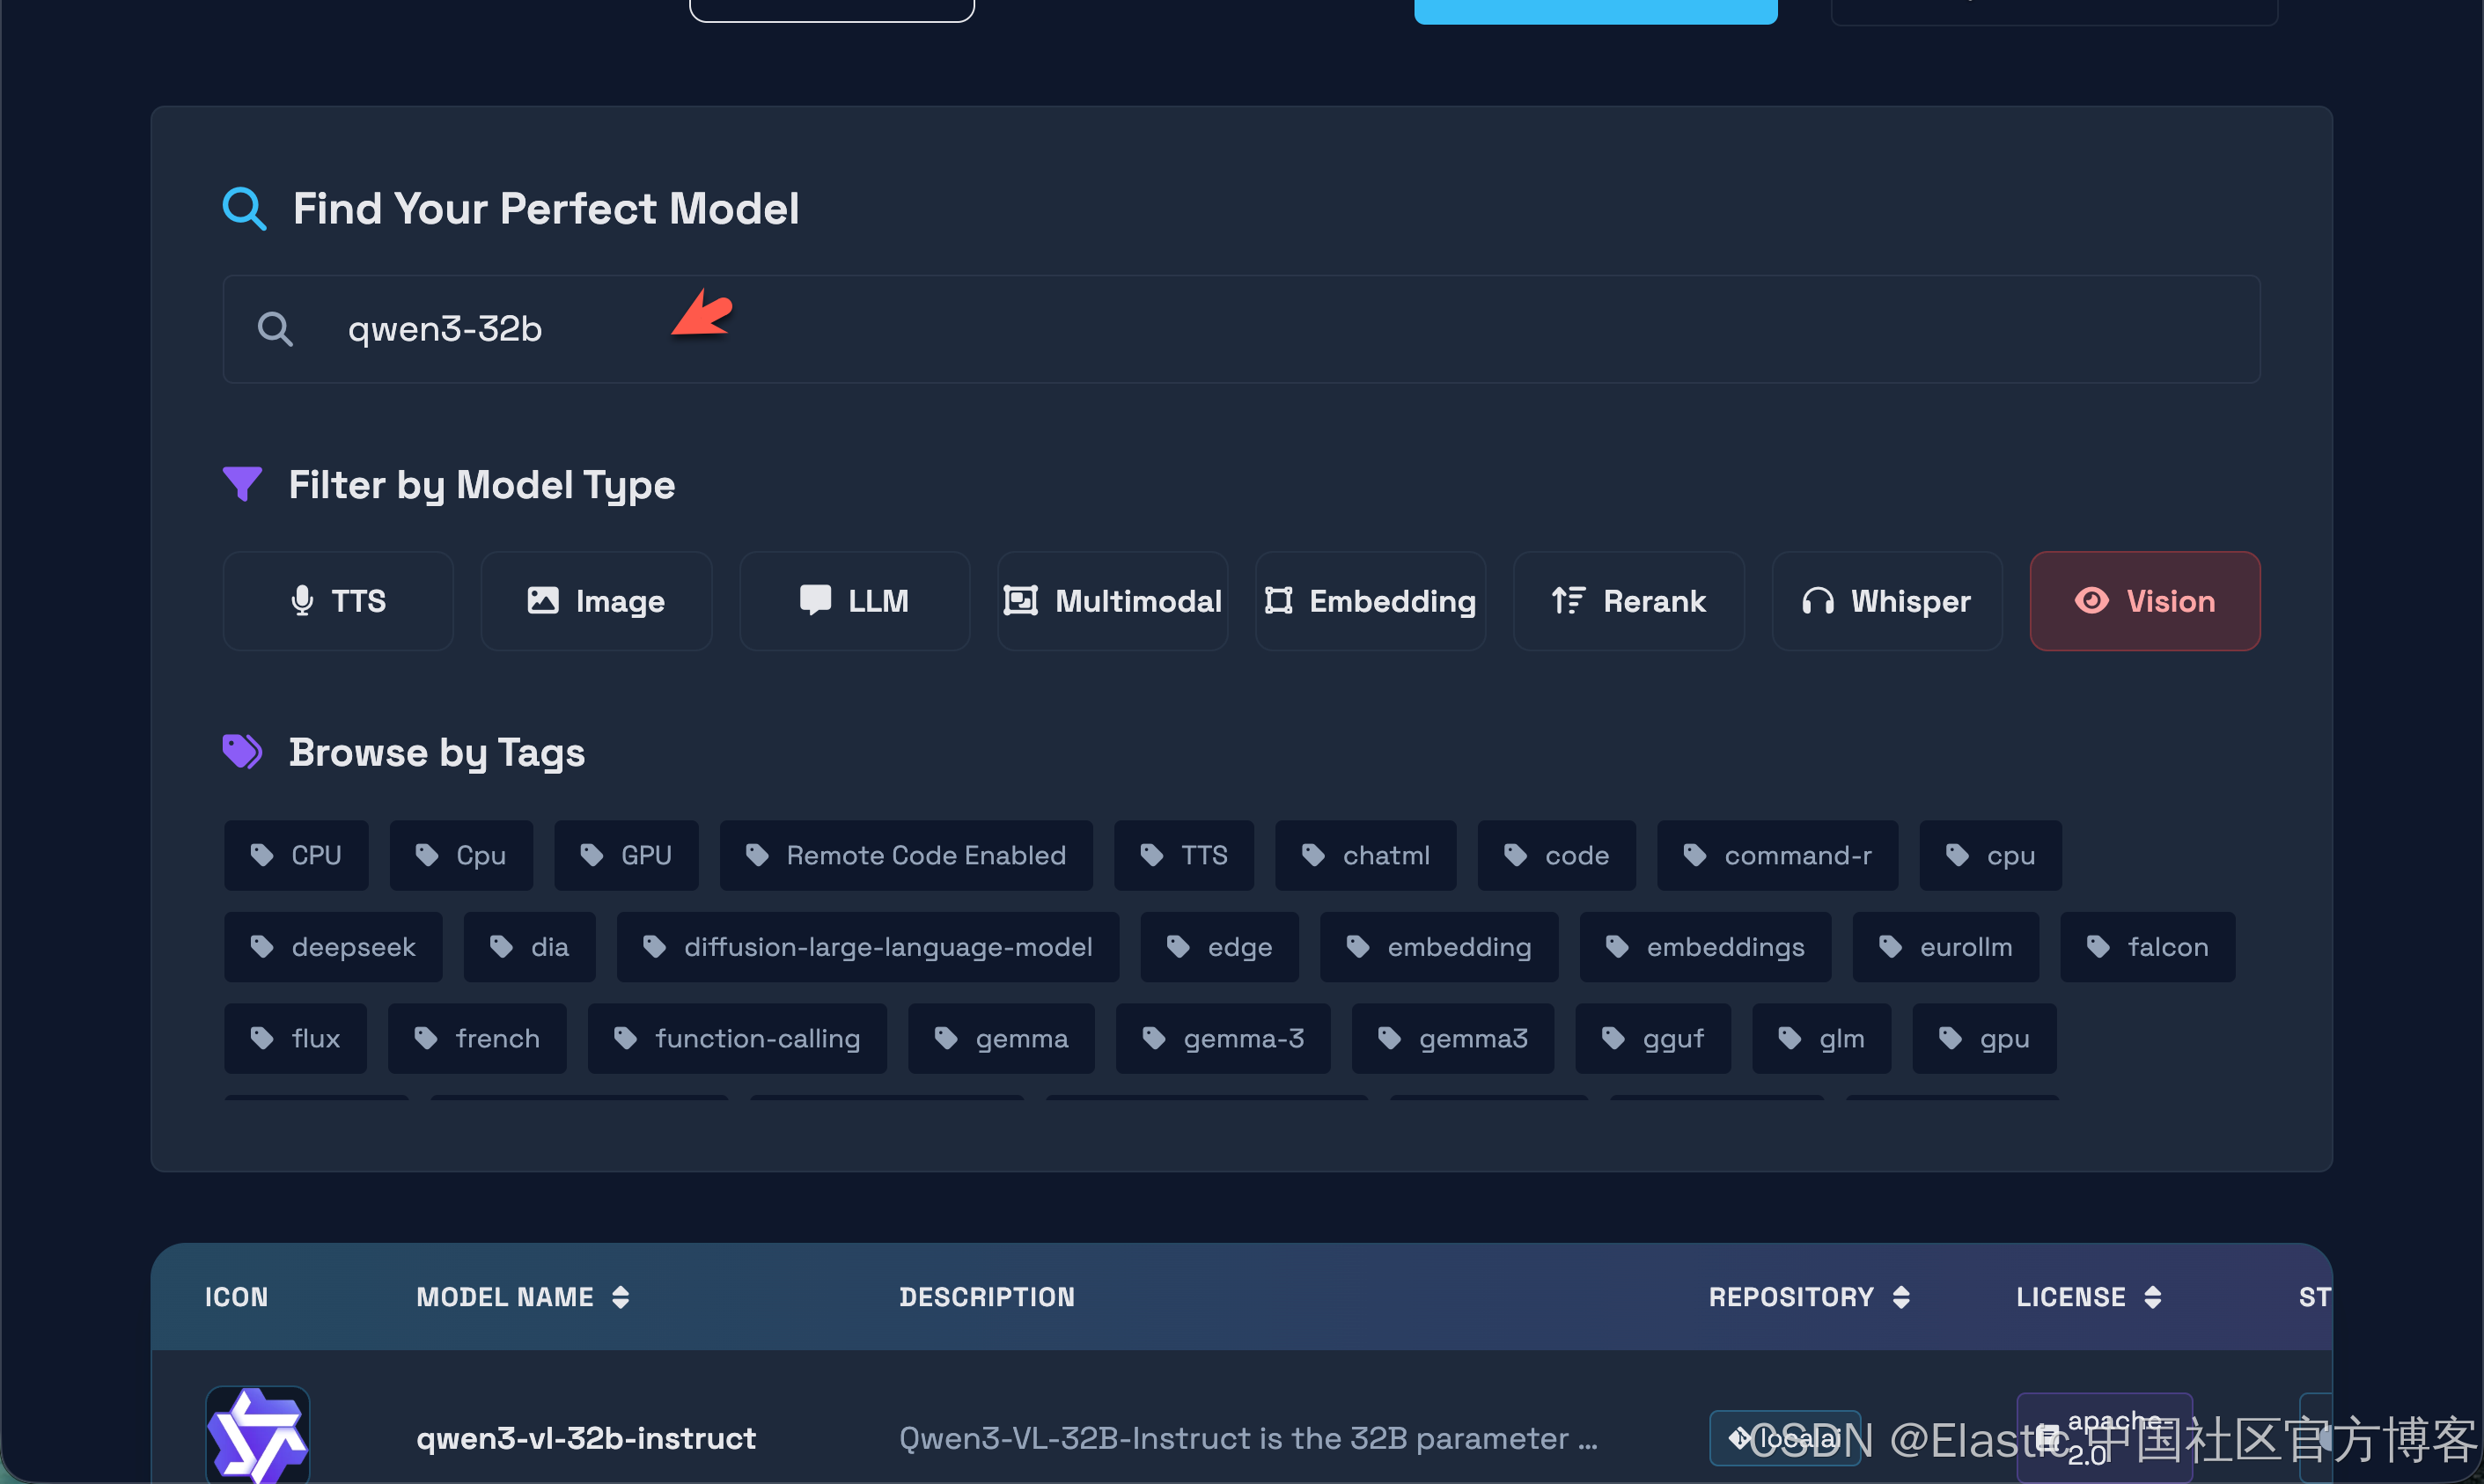
我们可以安装上面的步骤来安装所需要的模型。点击 Browse Model Gallary:
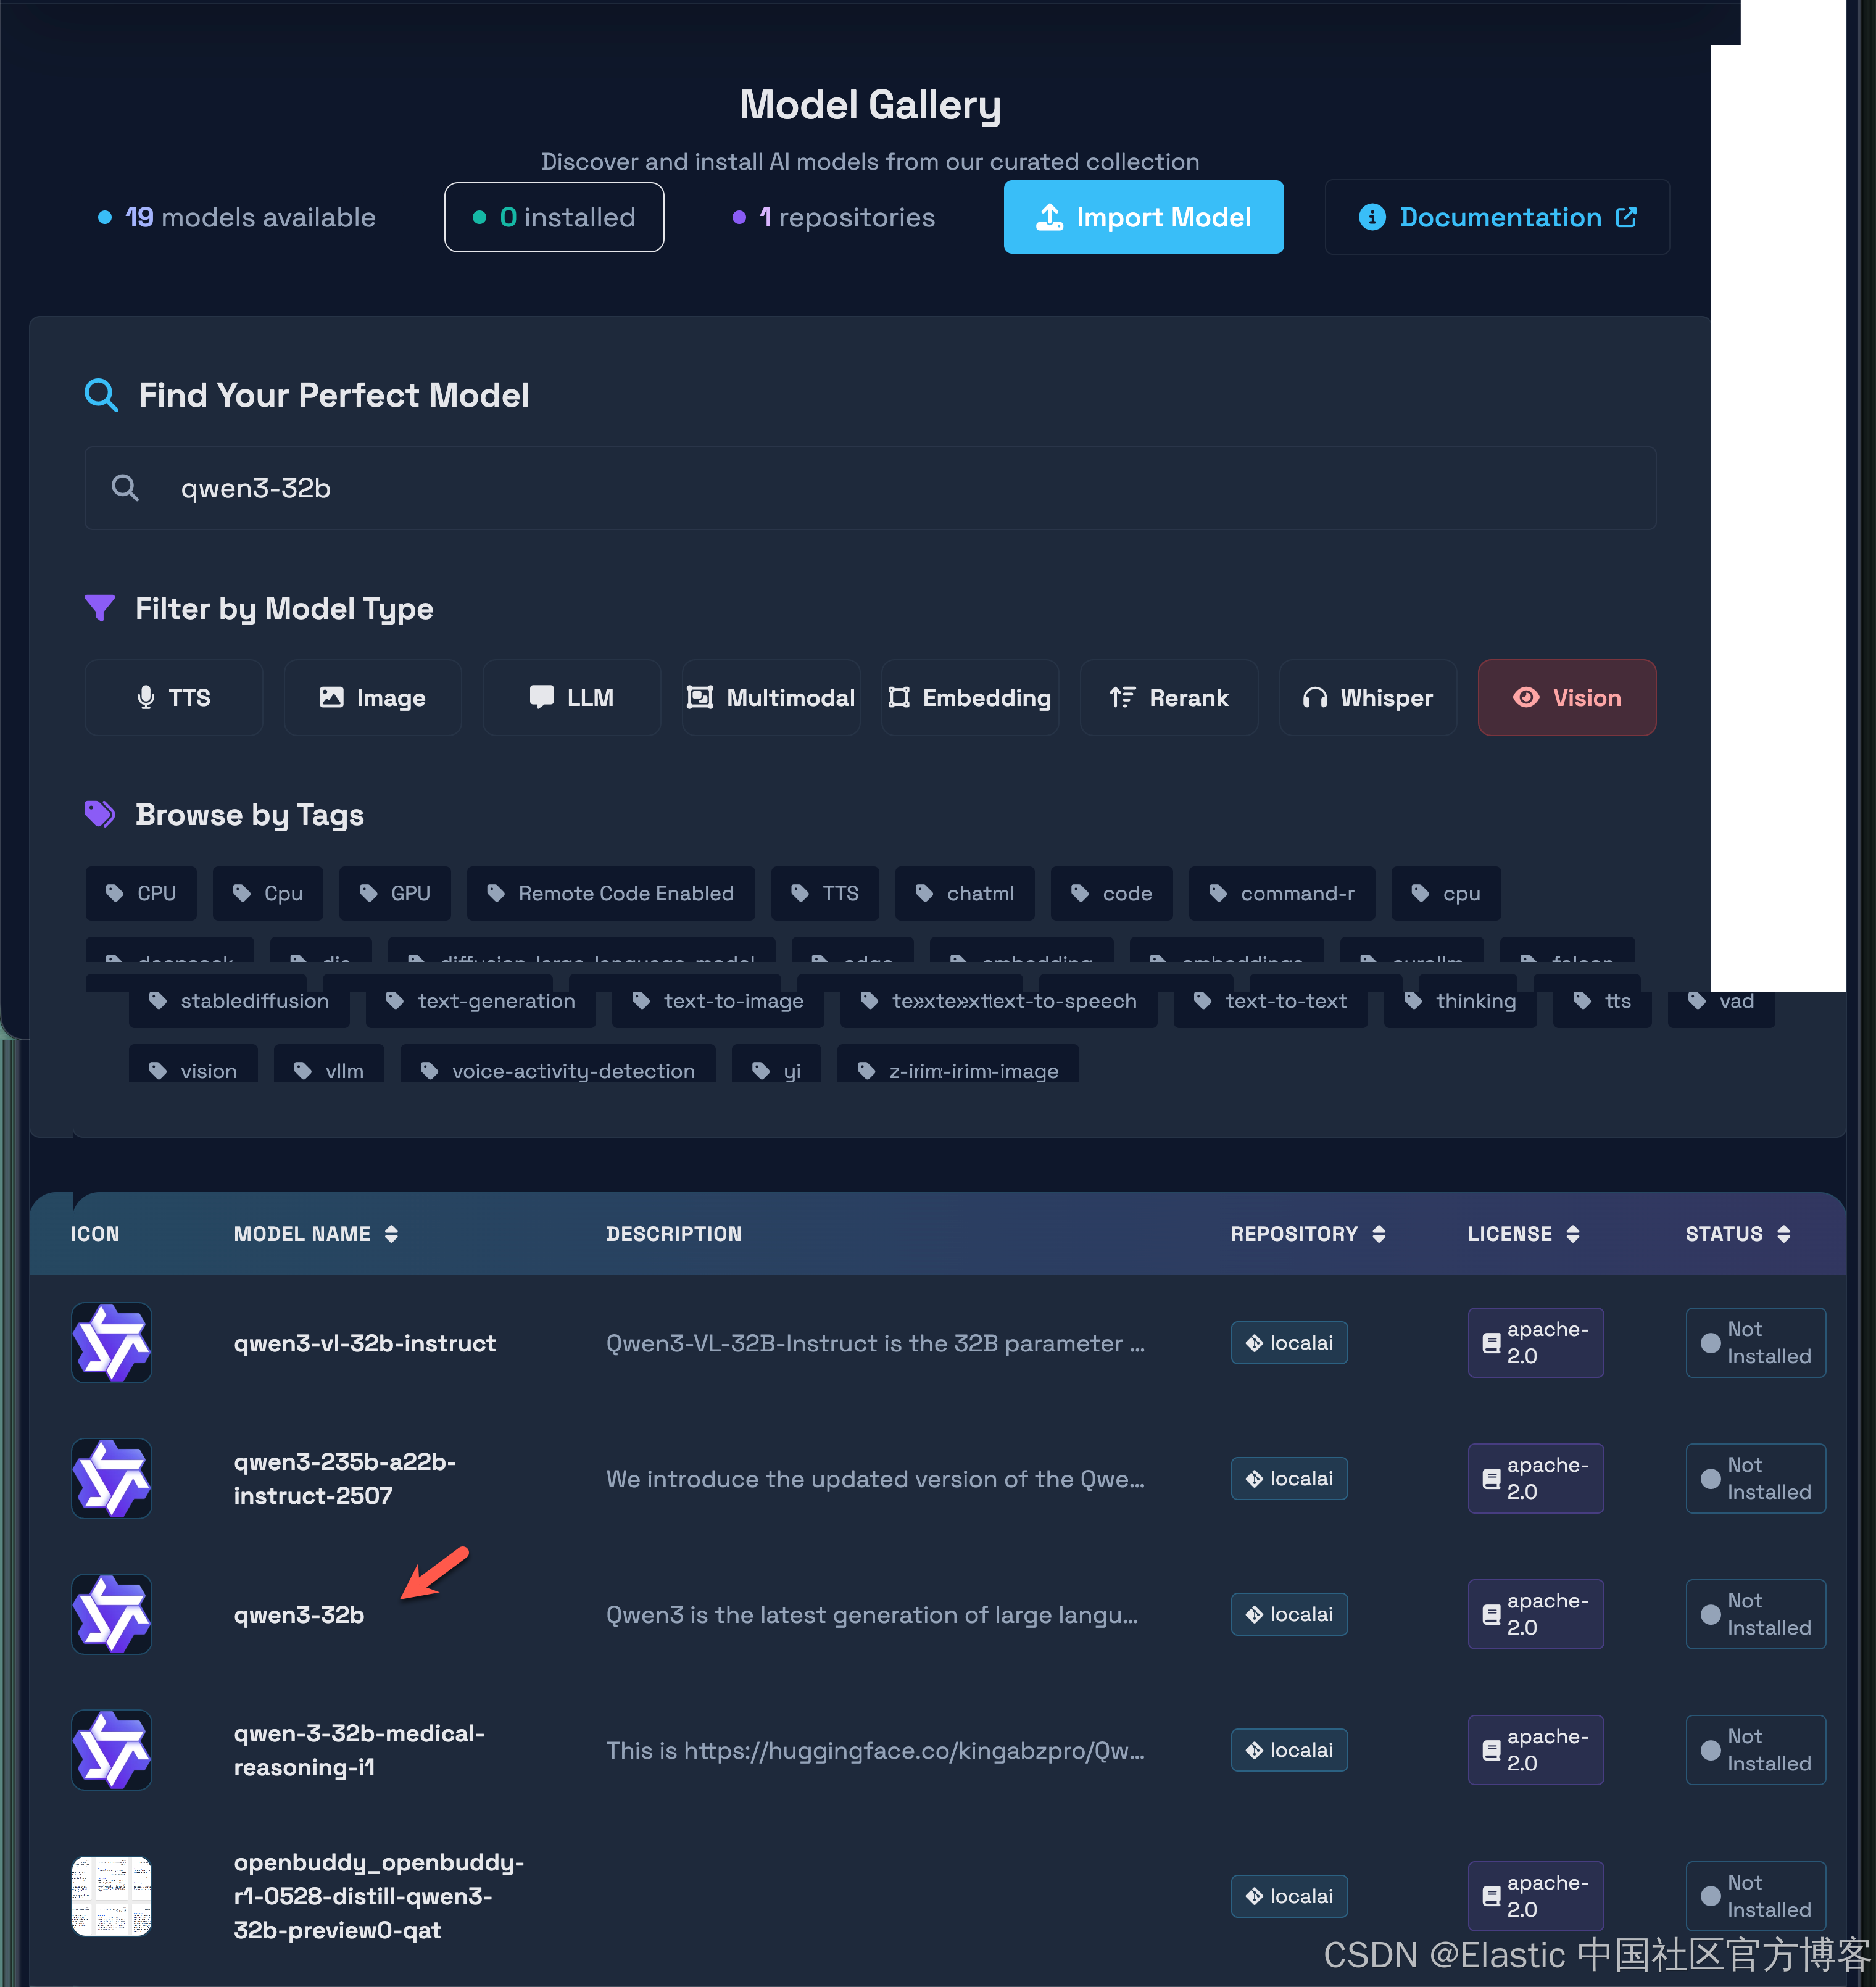
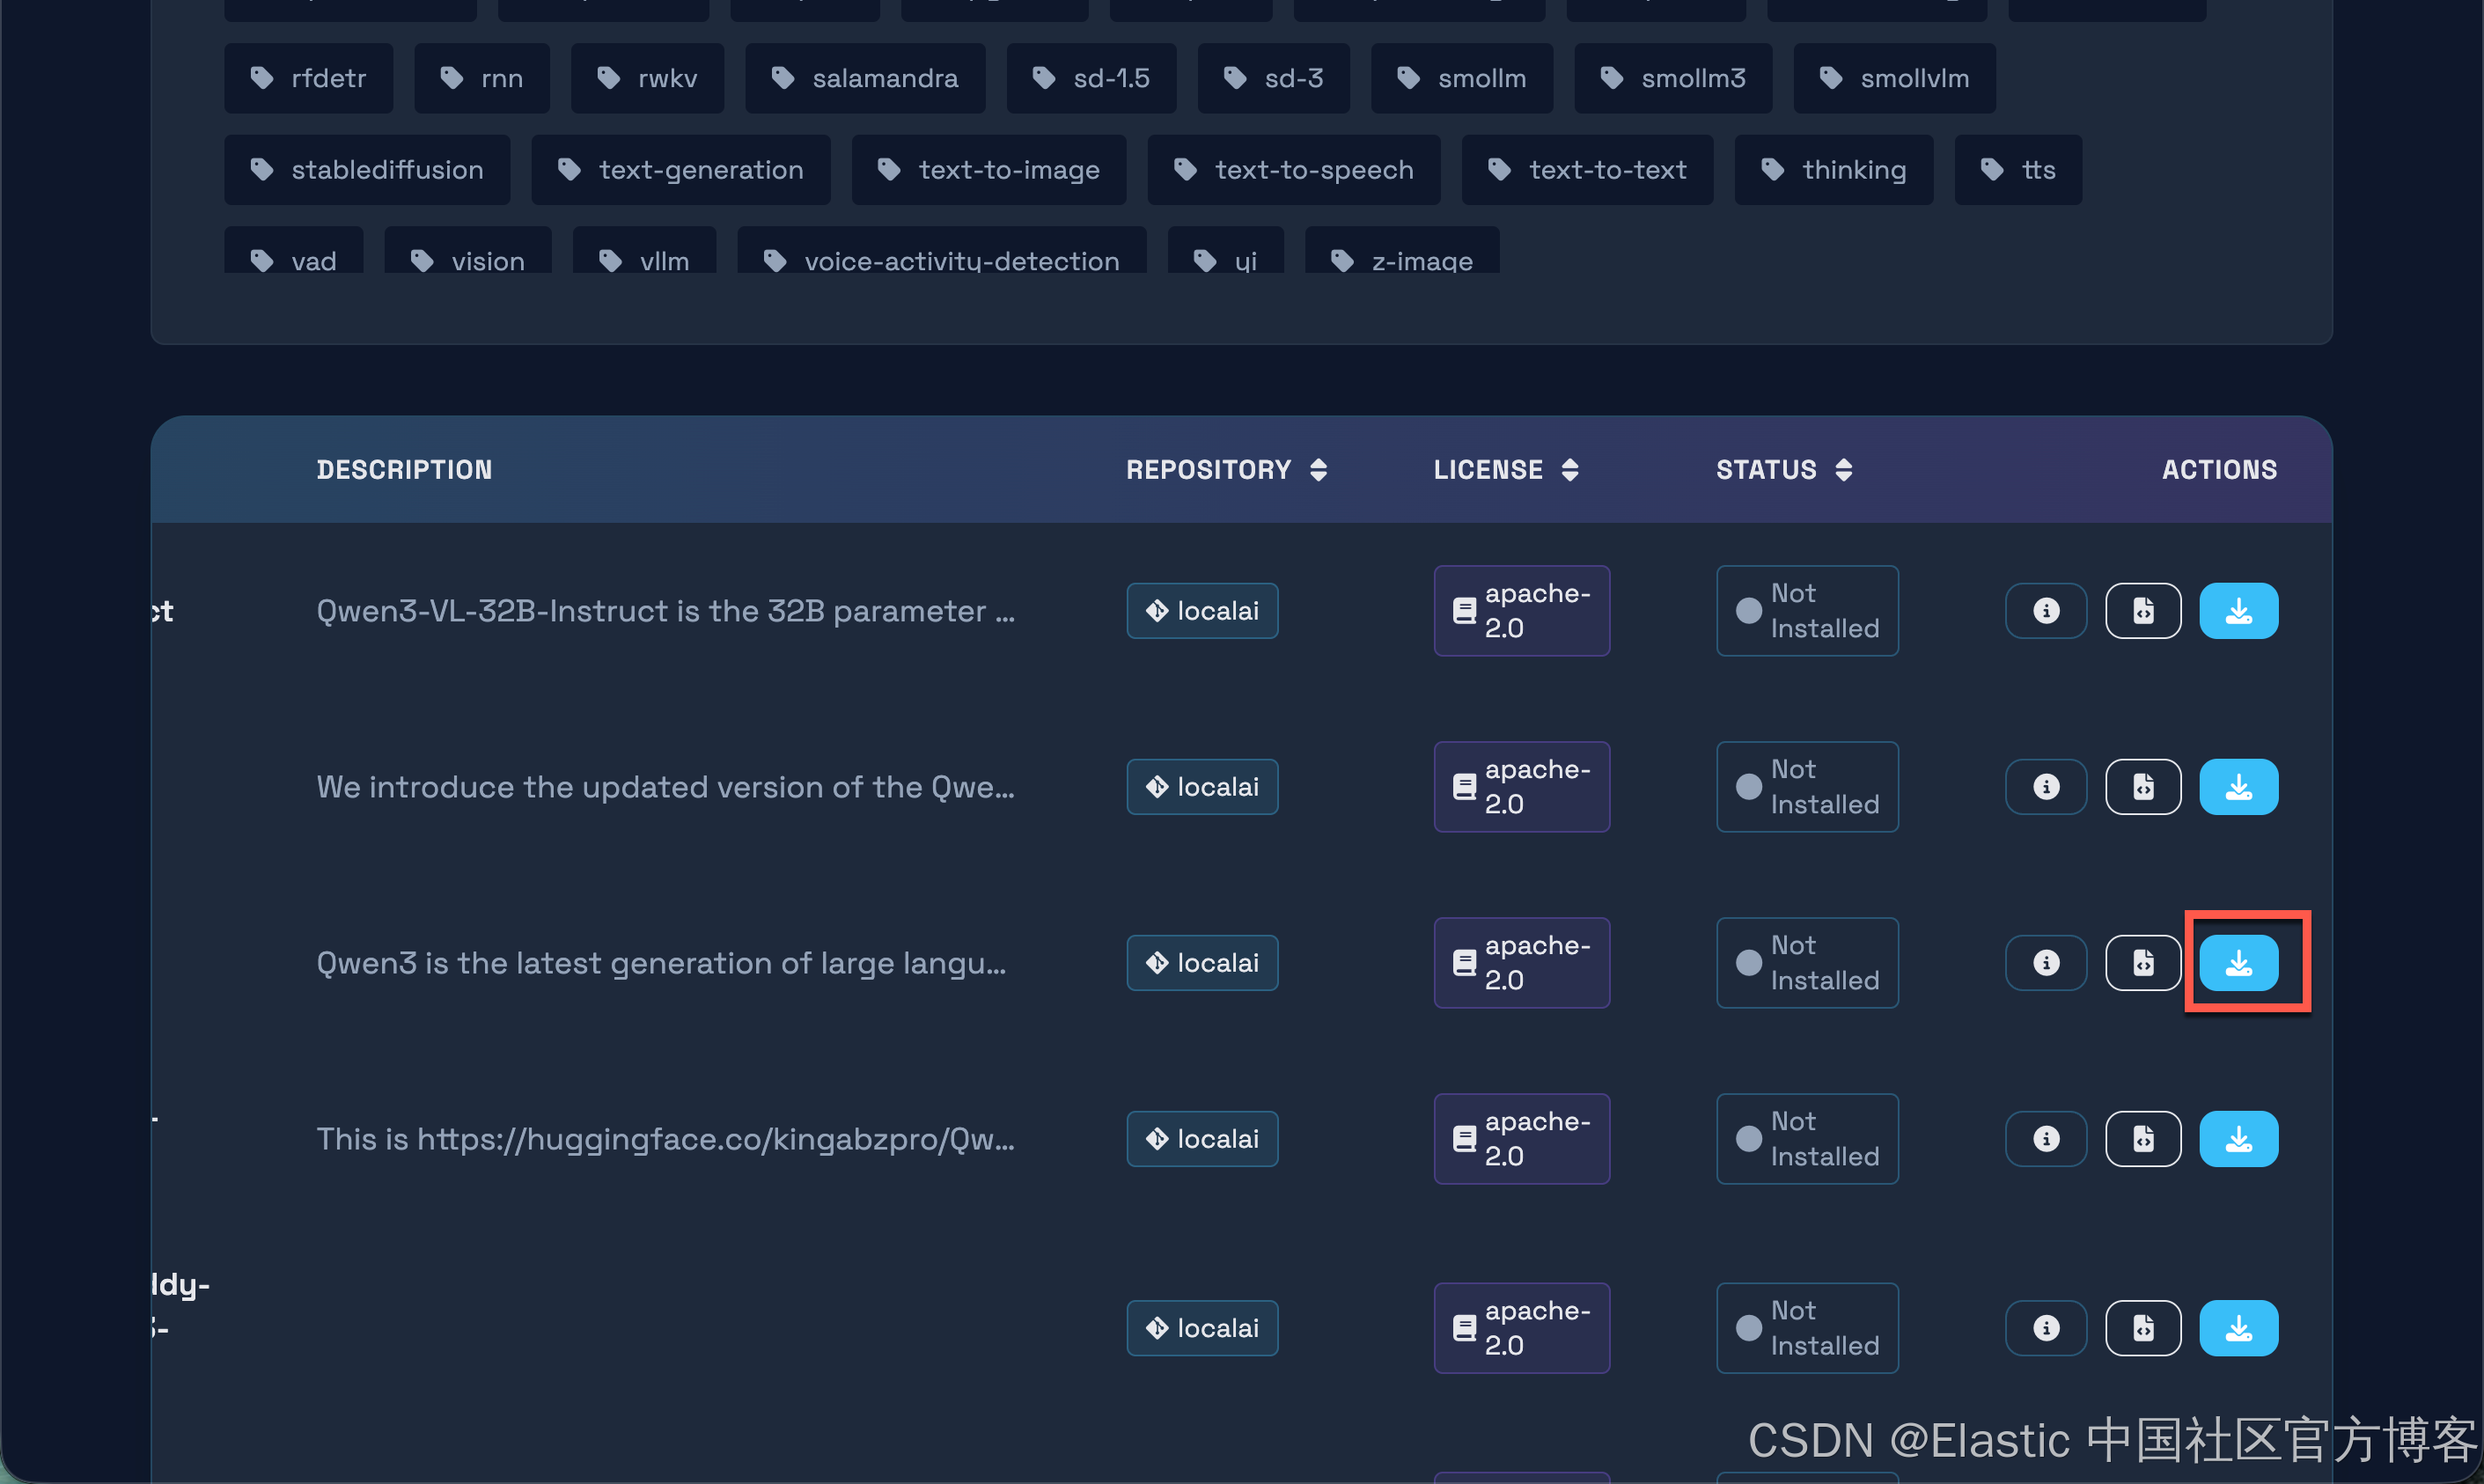
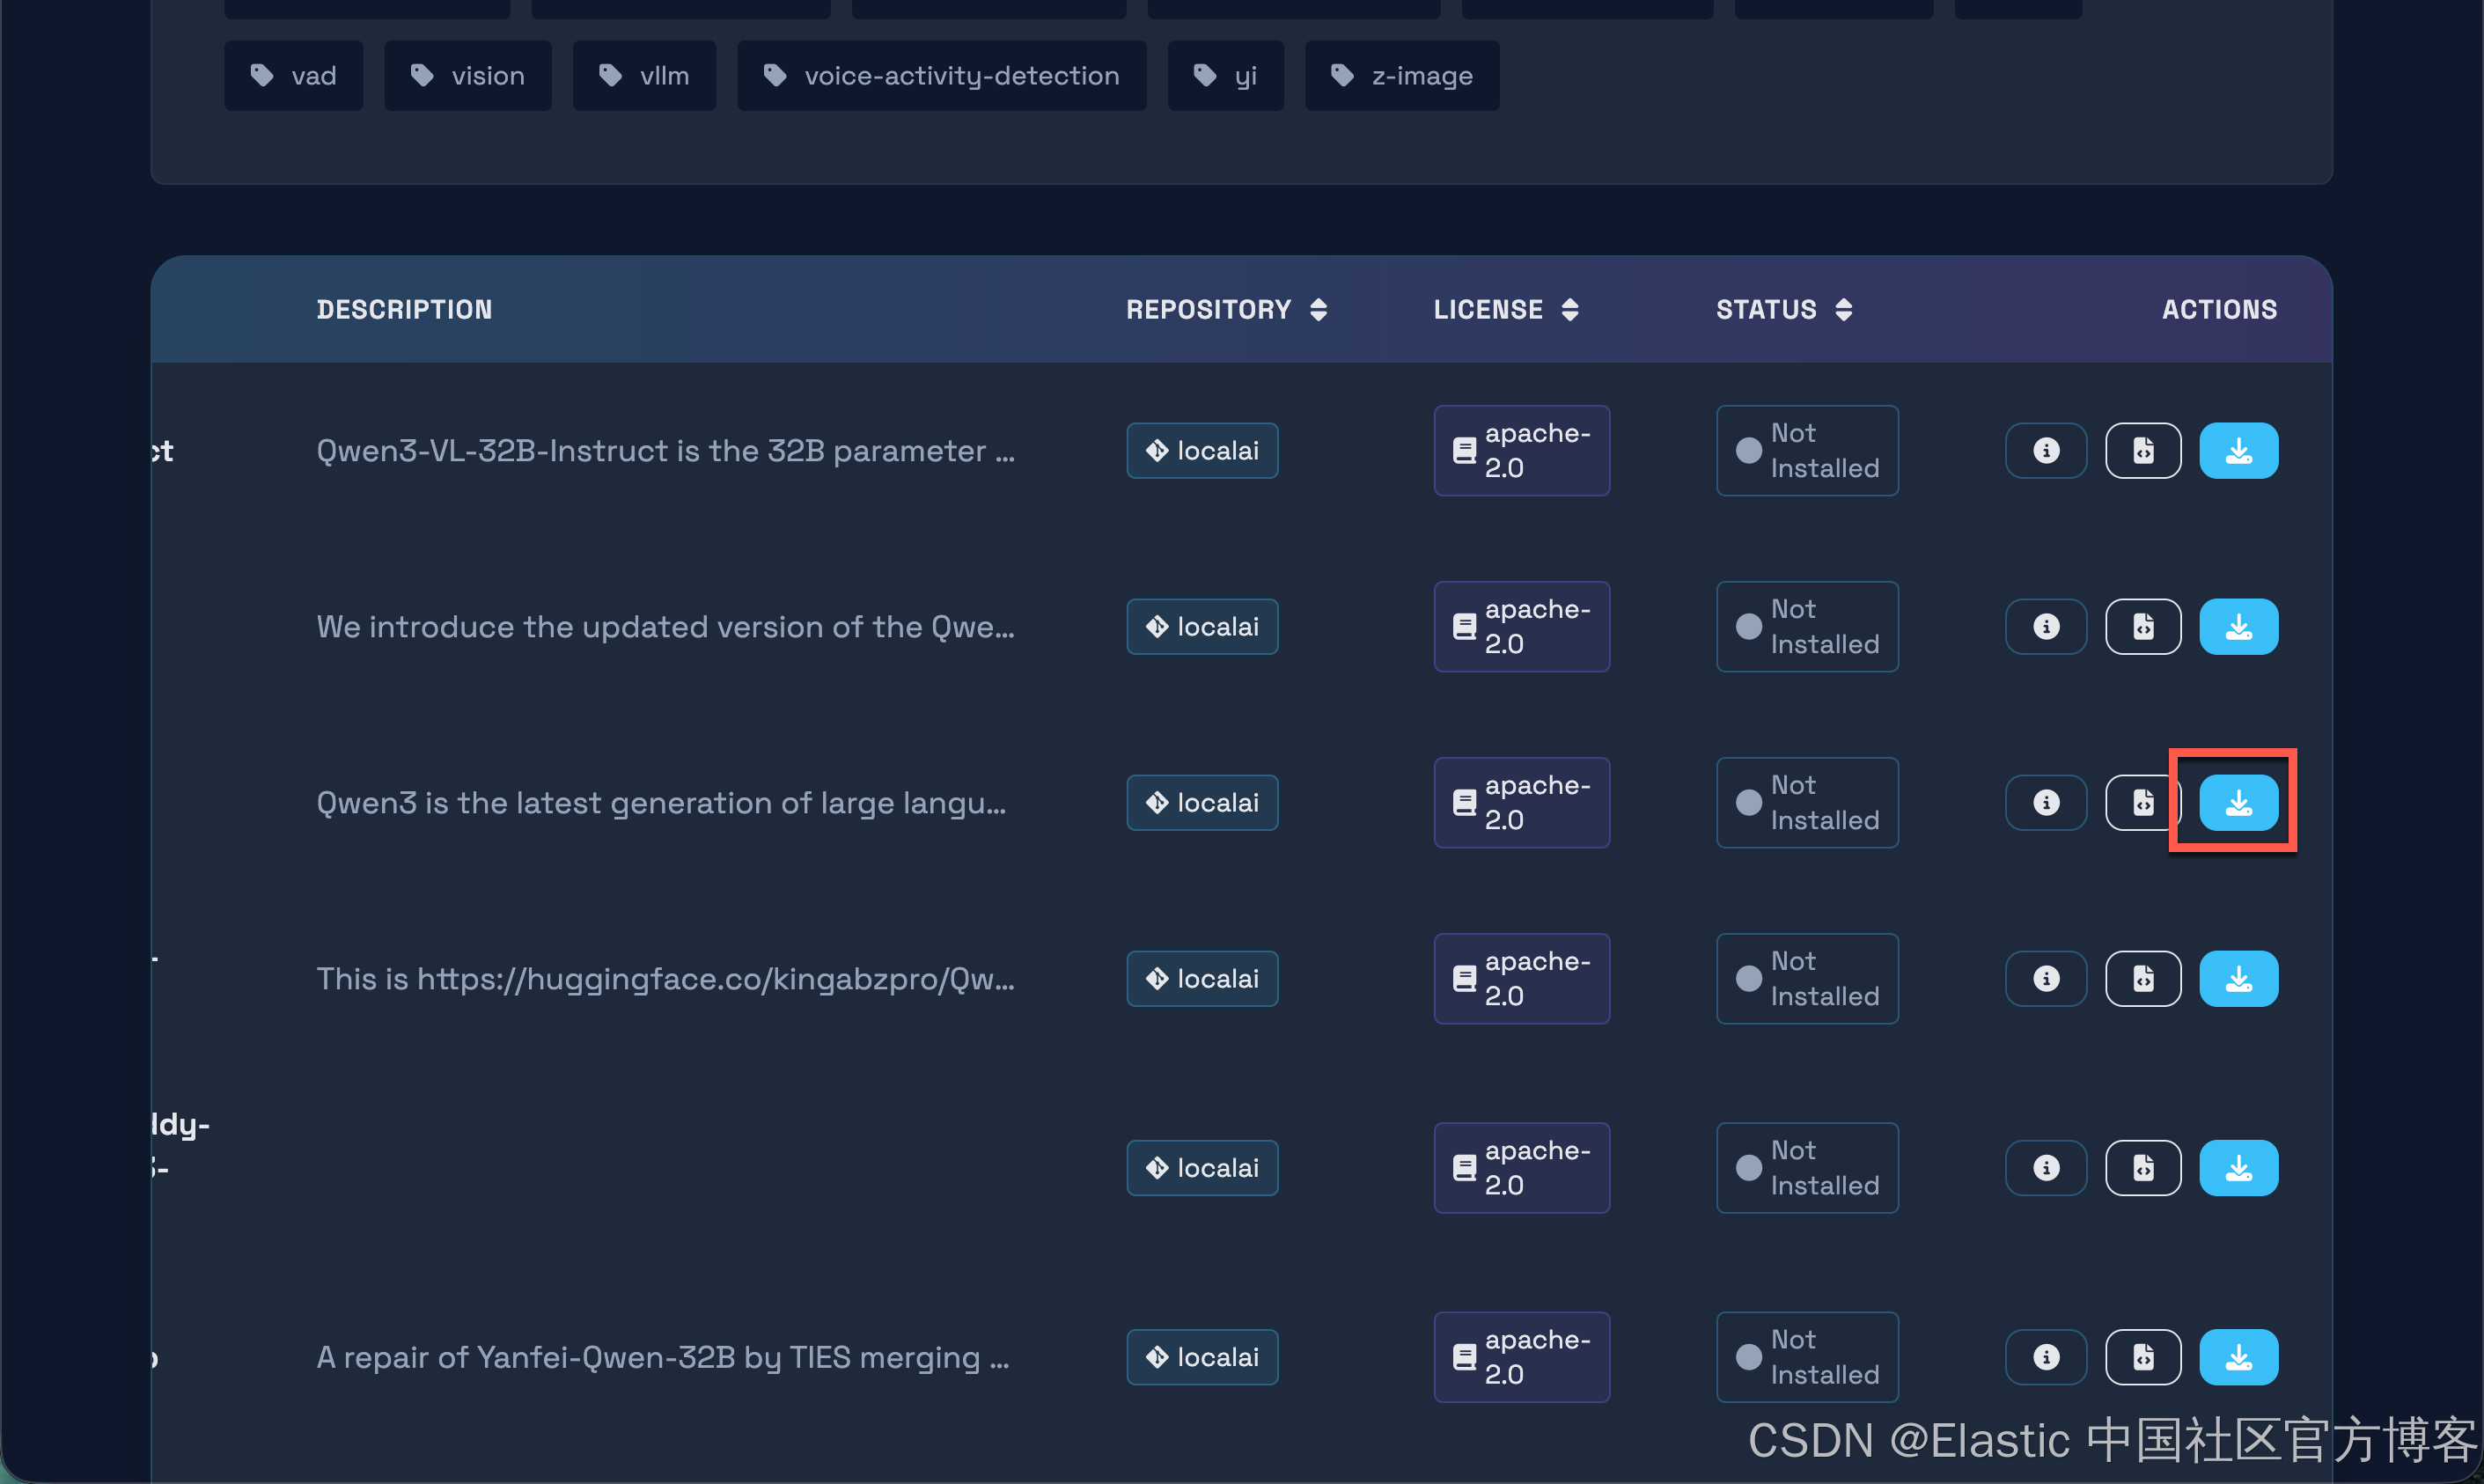
点击上面的下载按钮,就可以安装 qwen3-32b 模型。
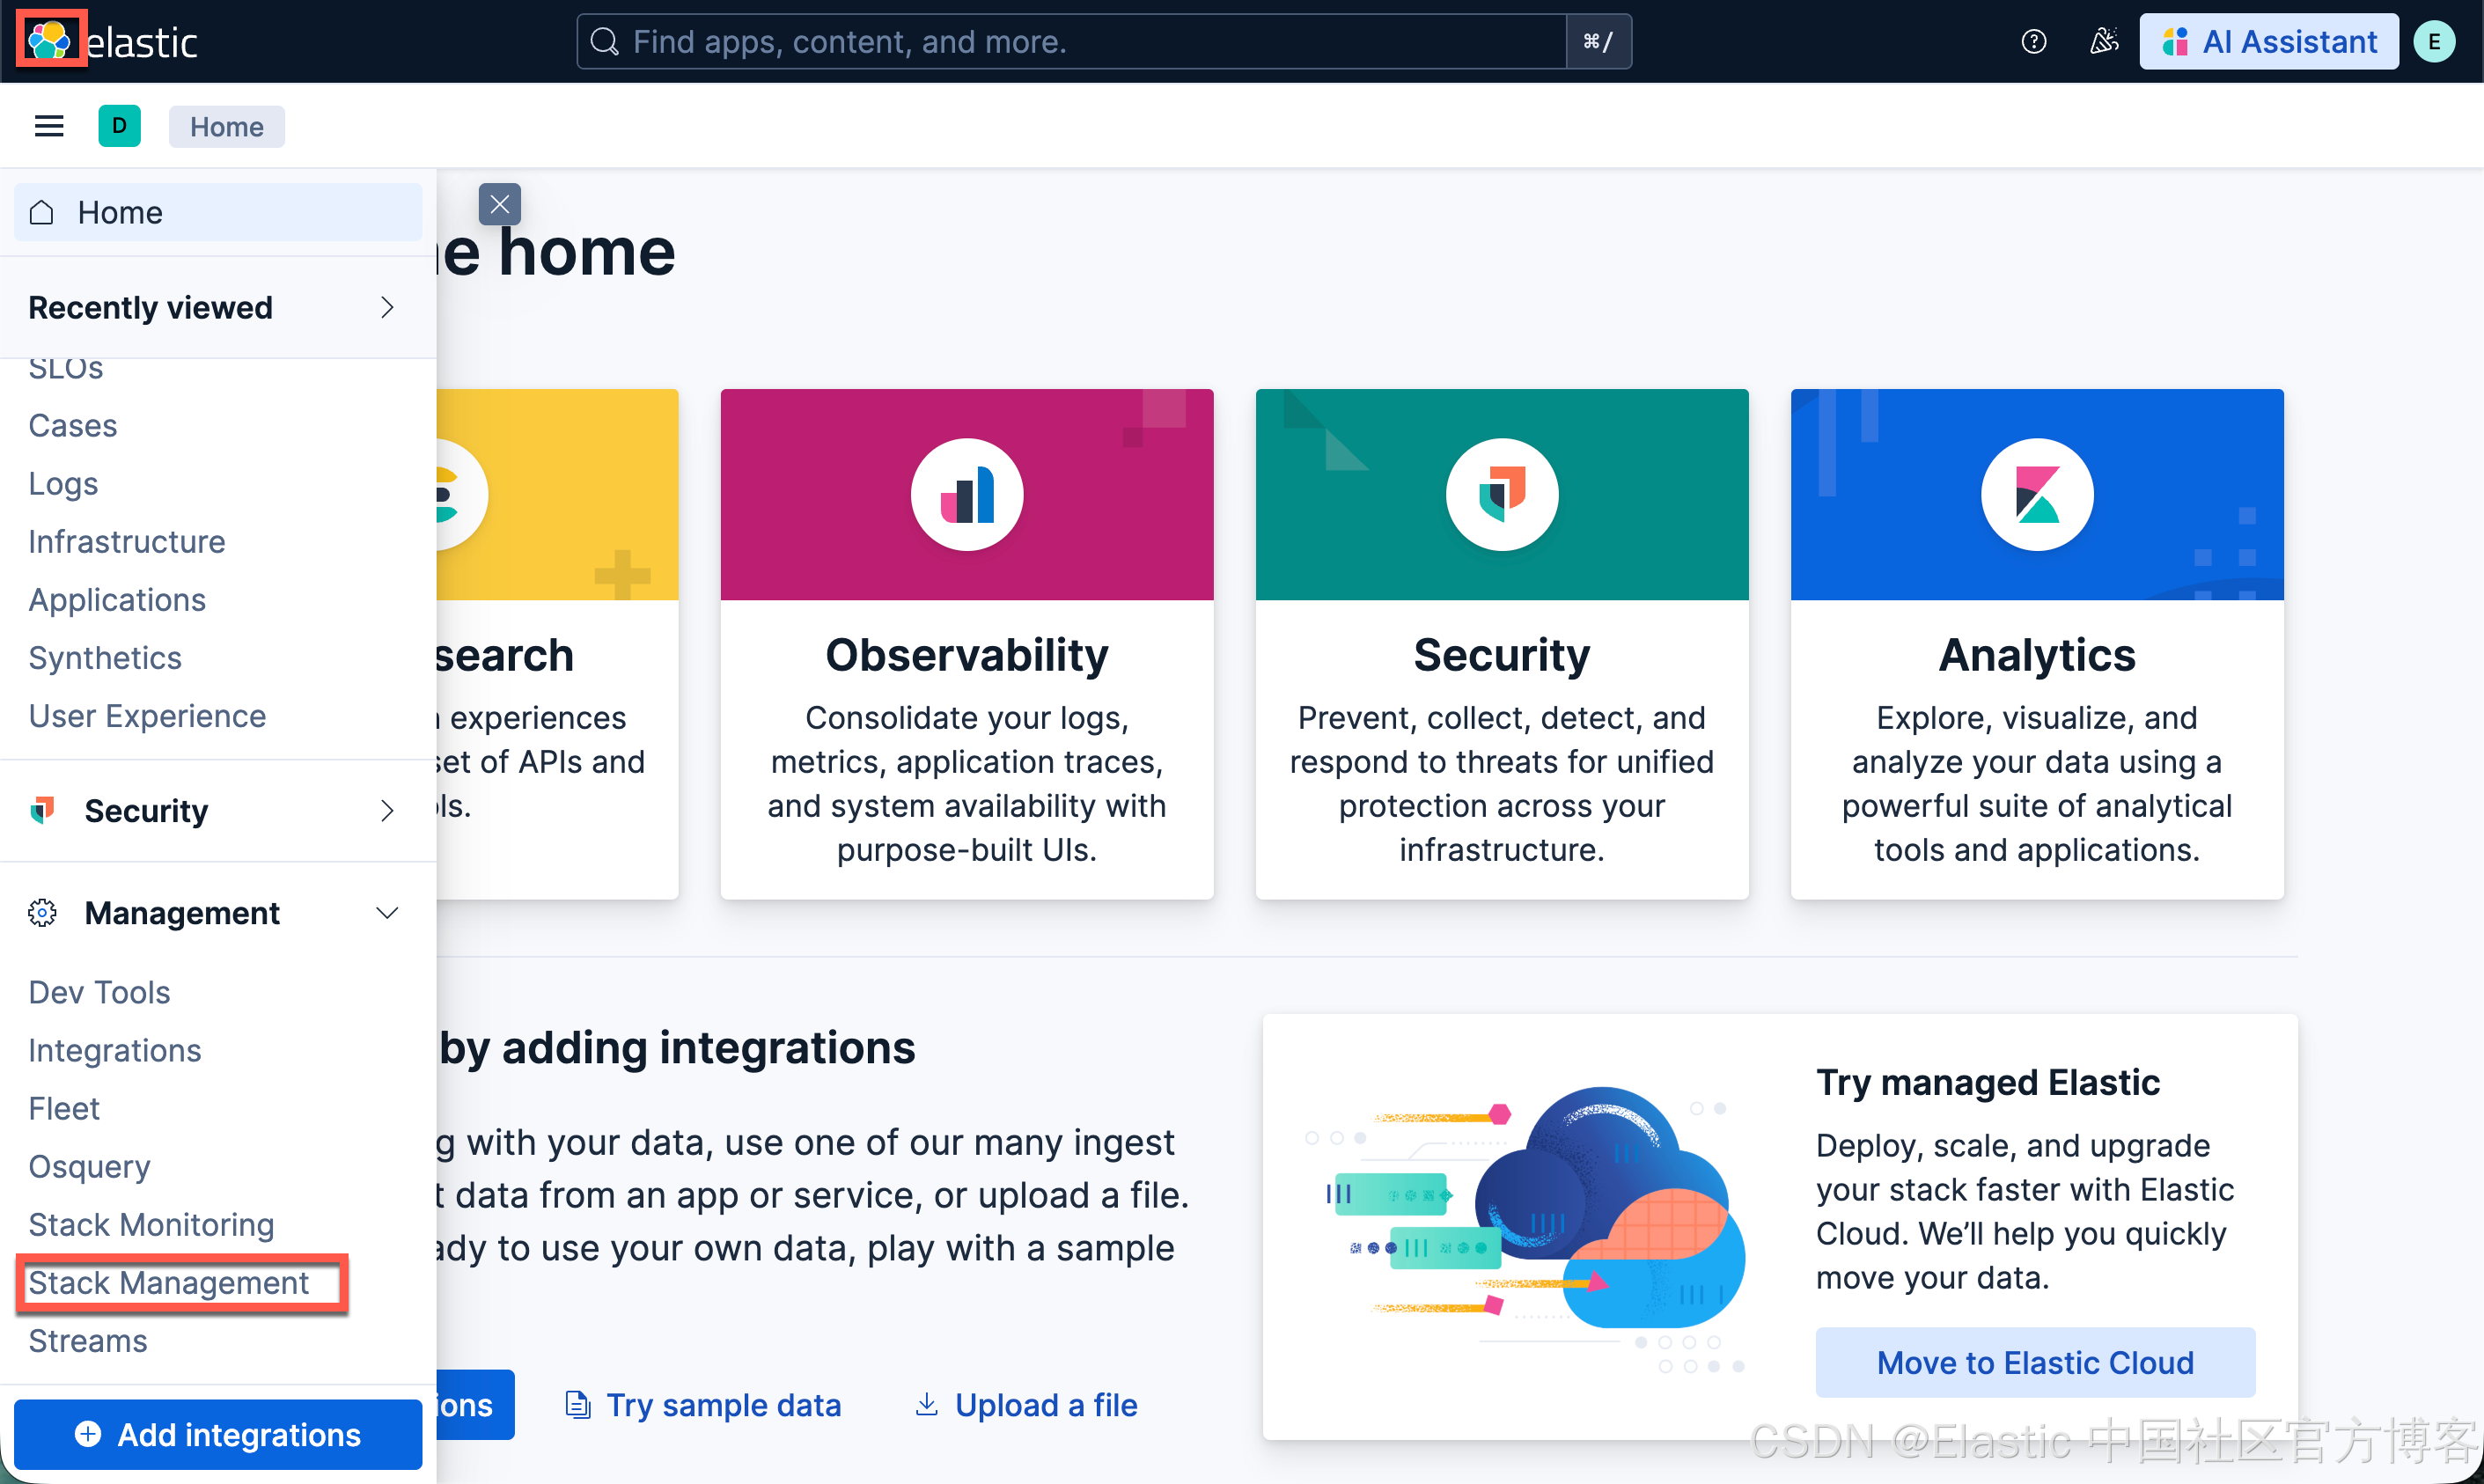
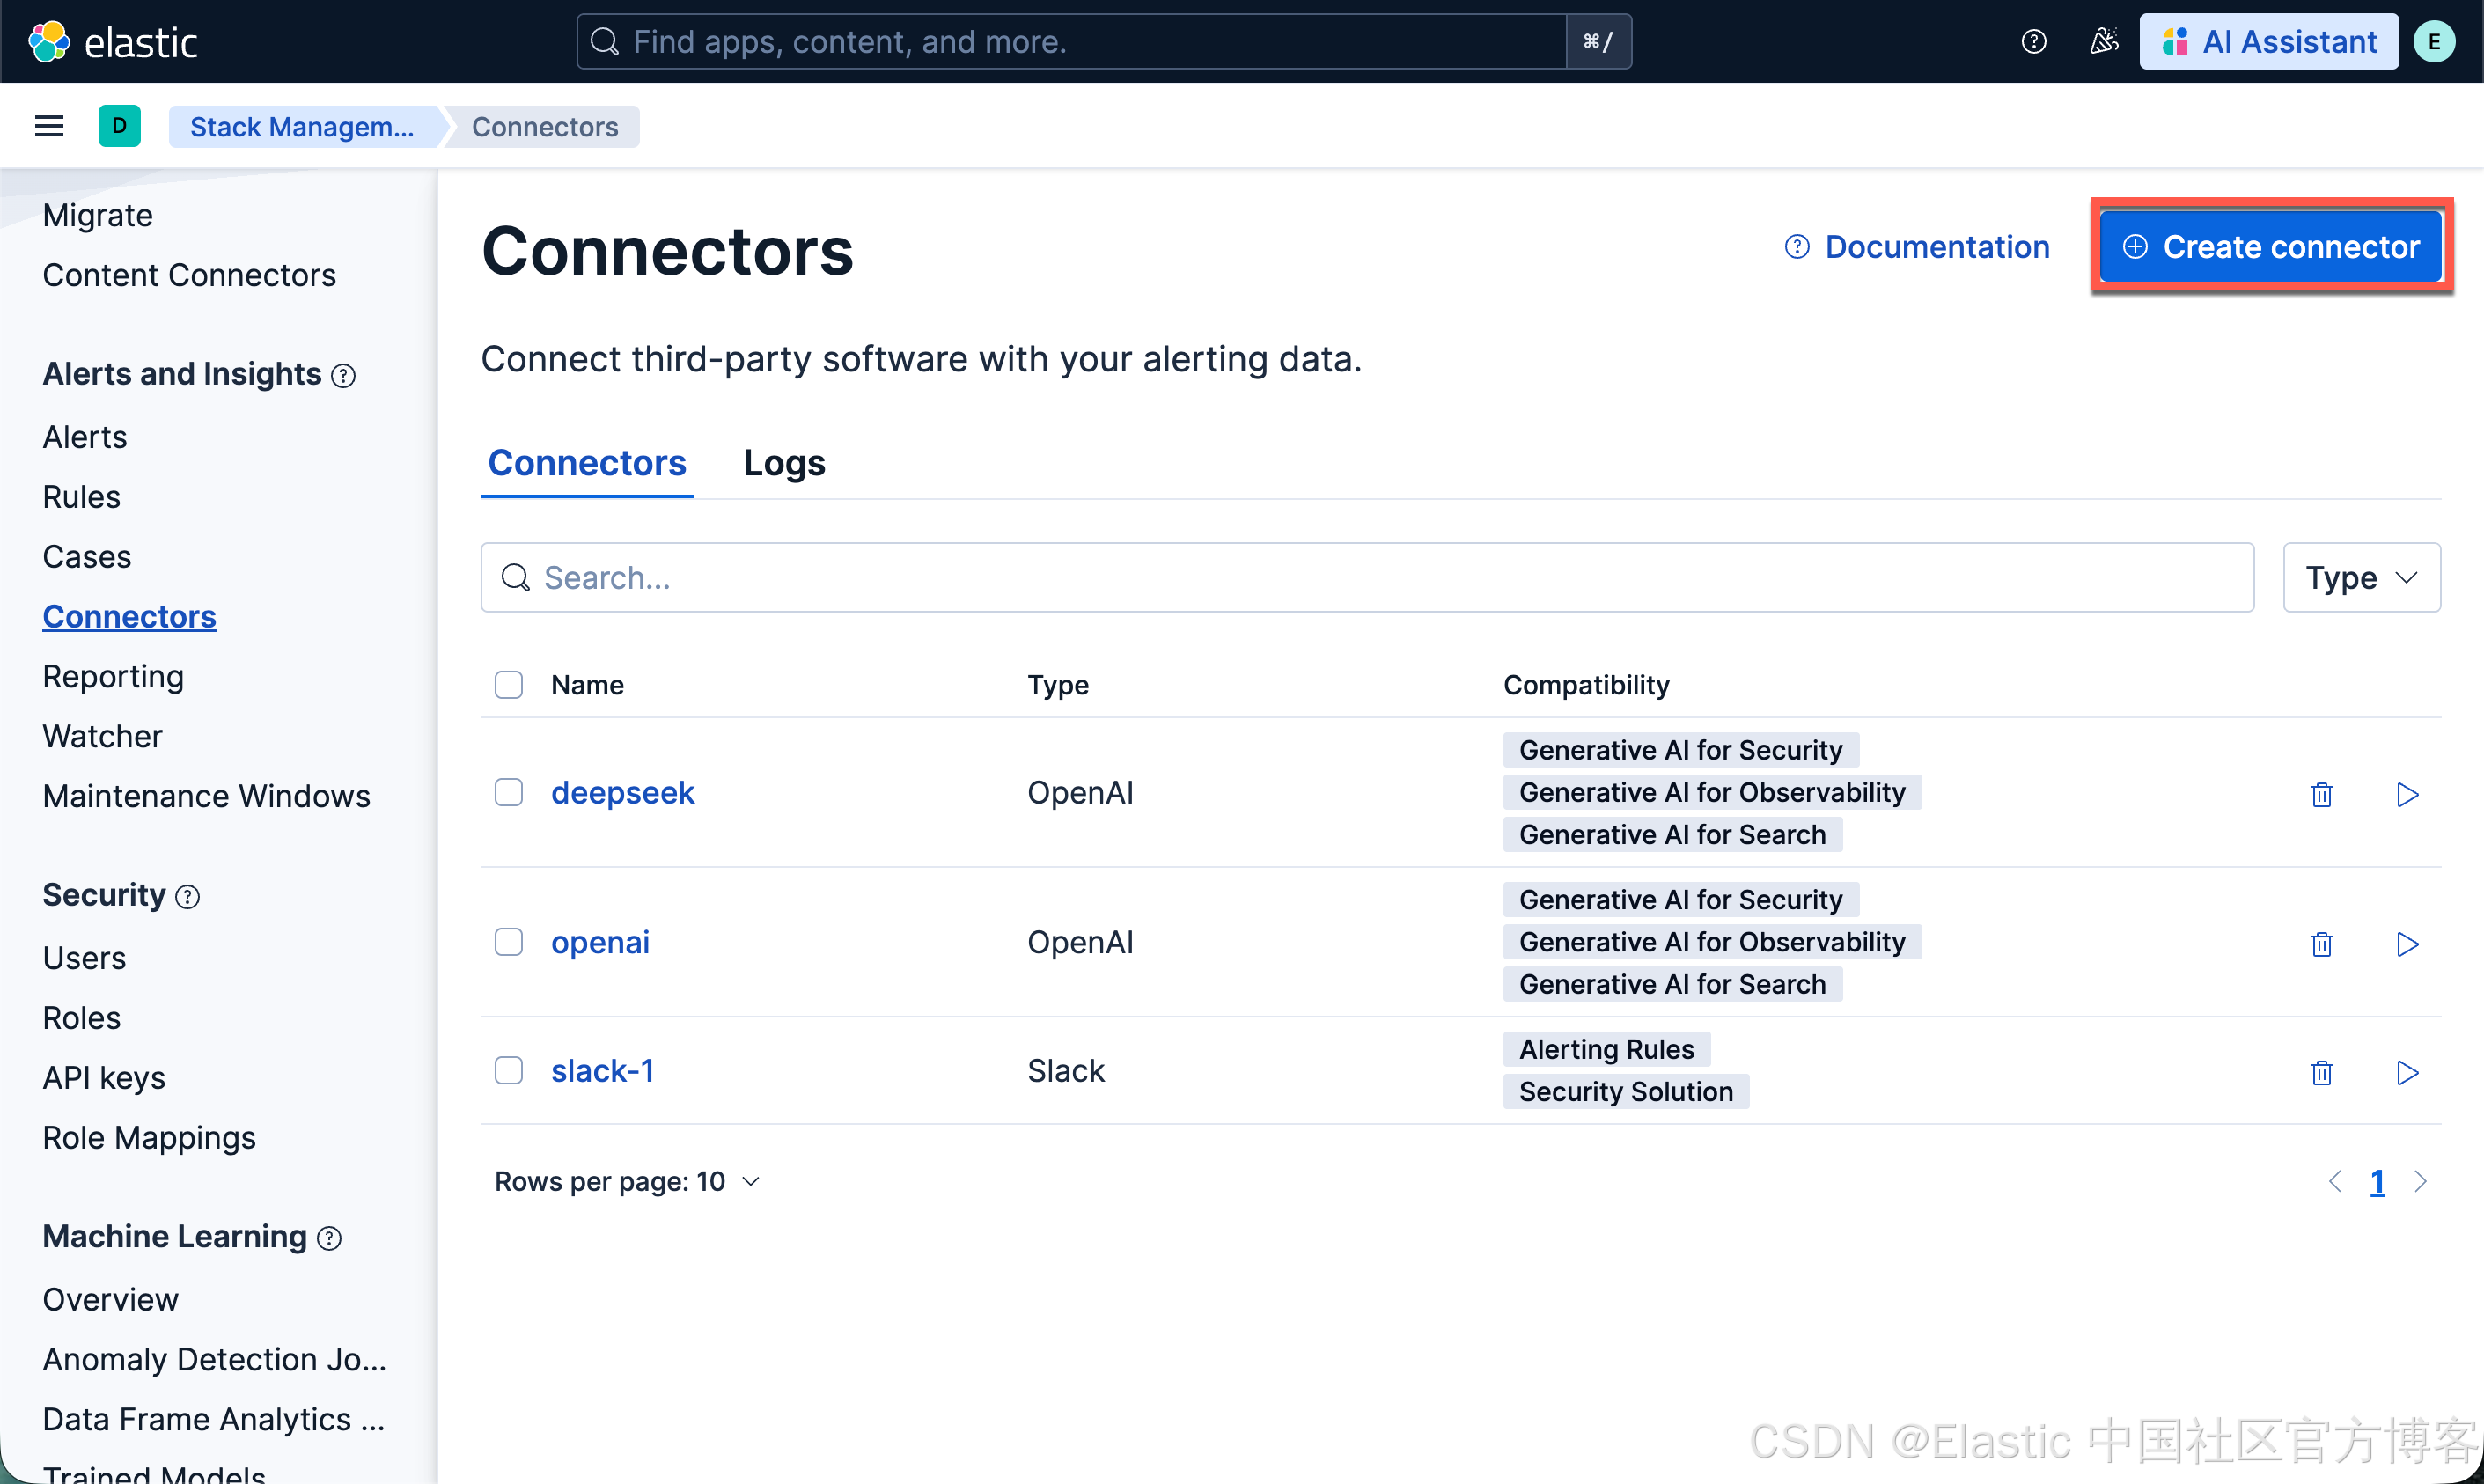
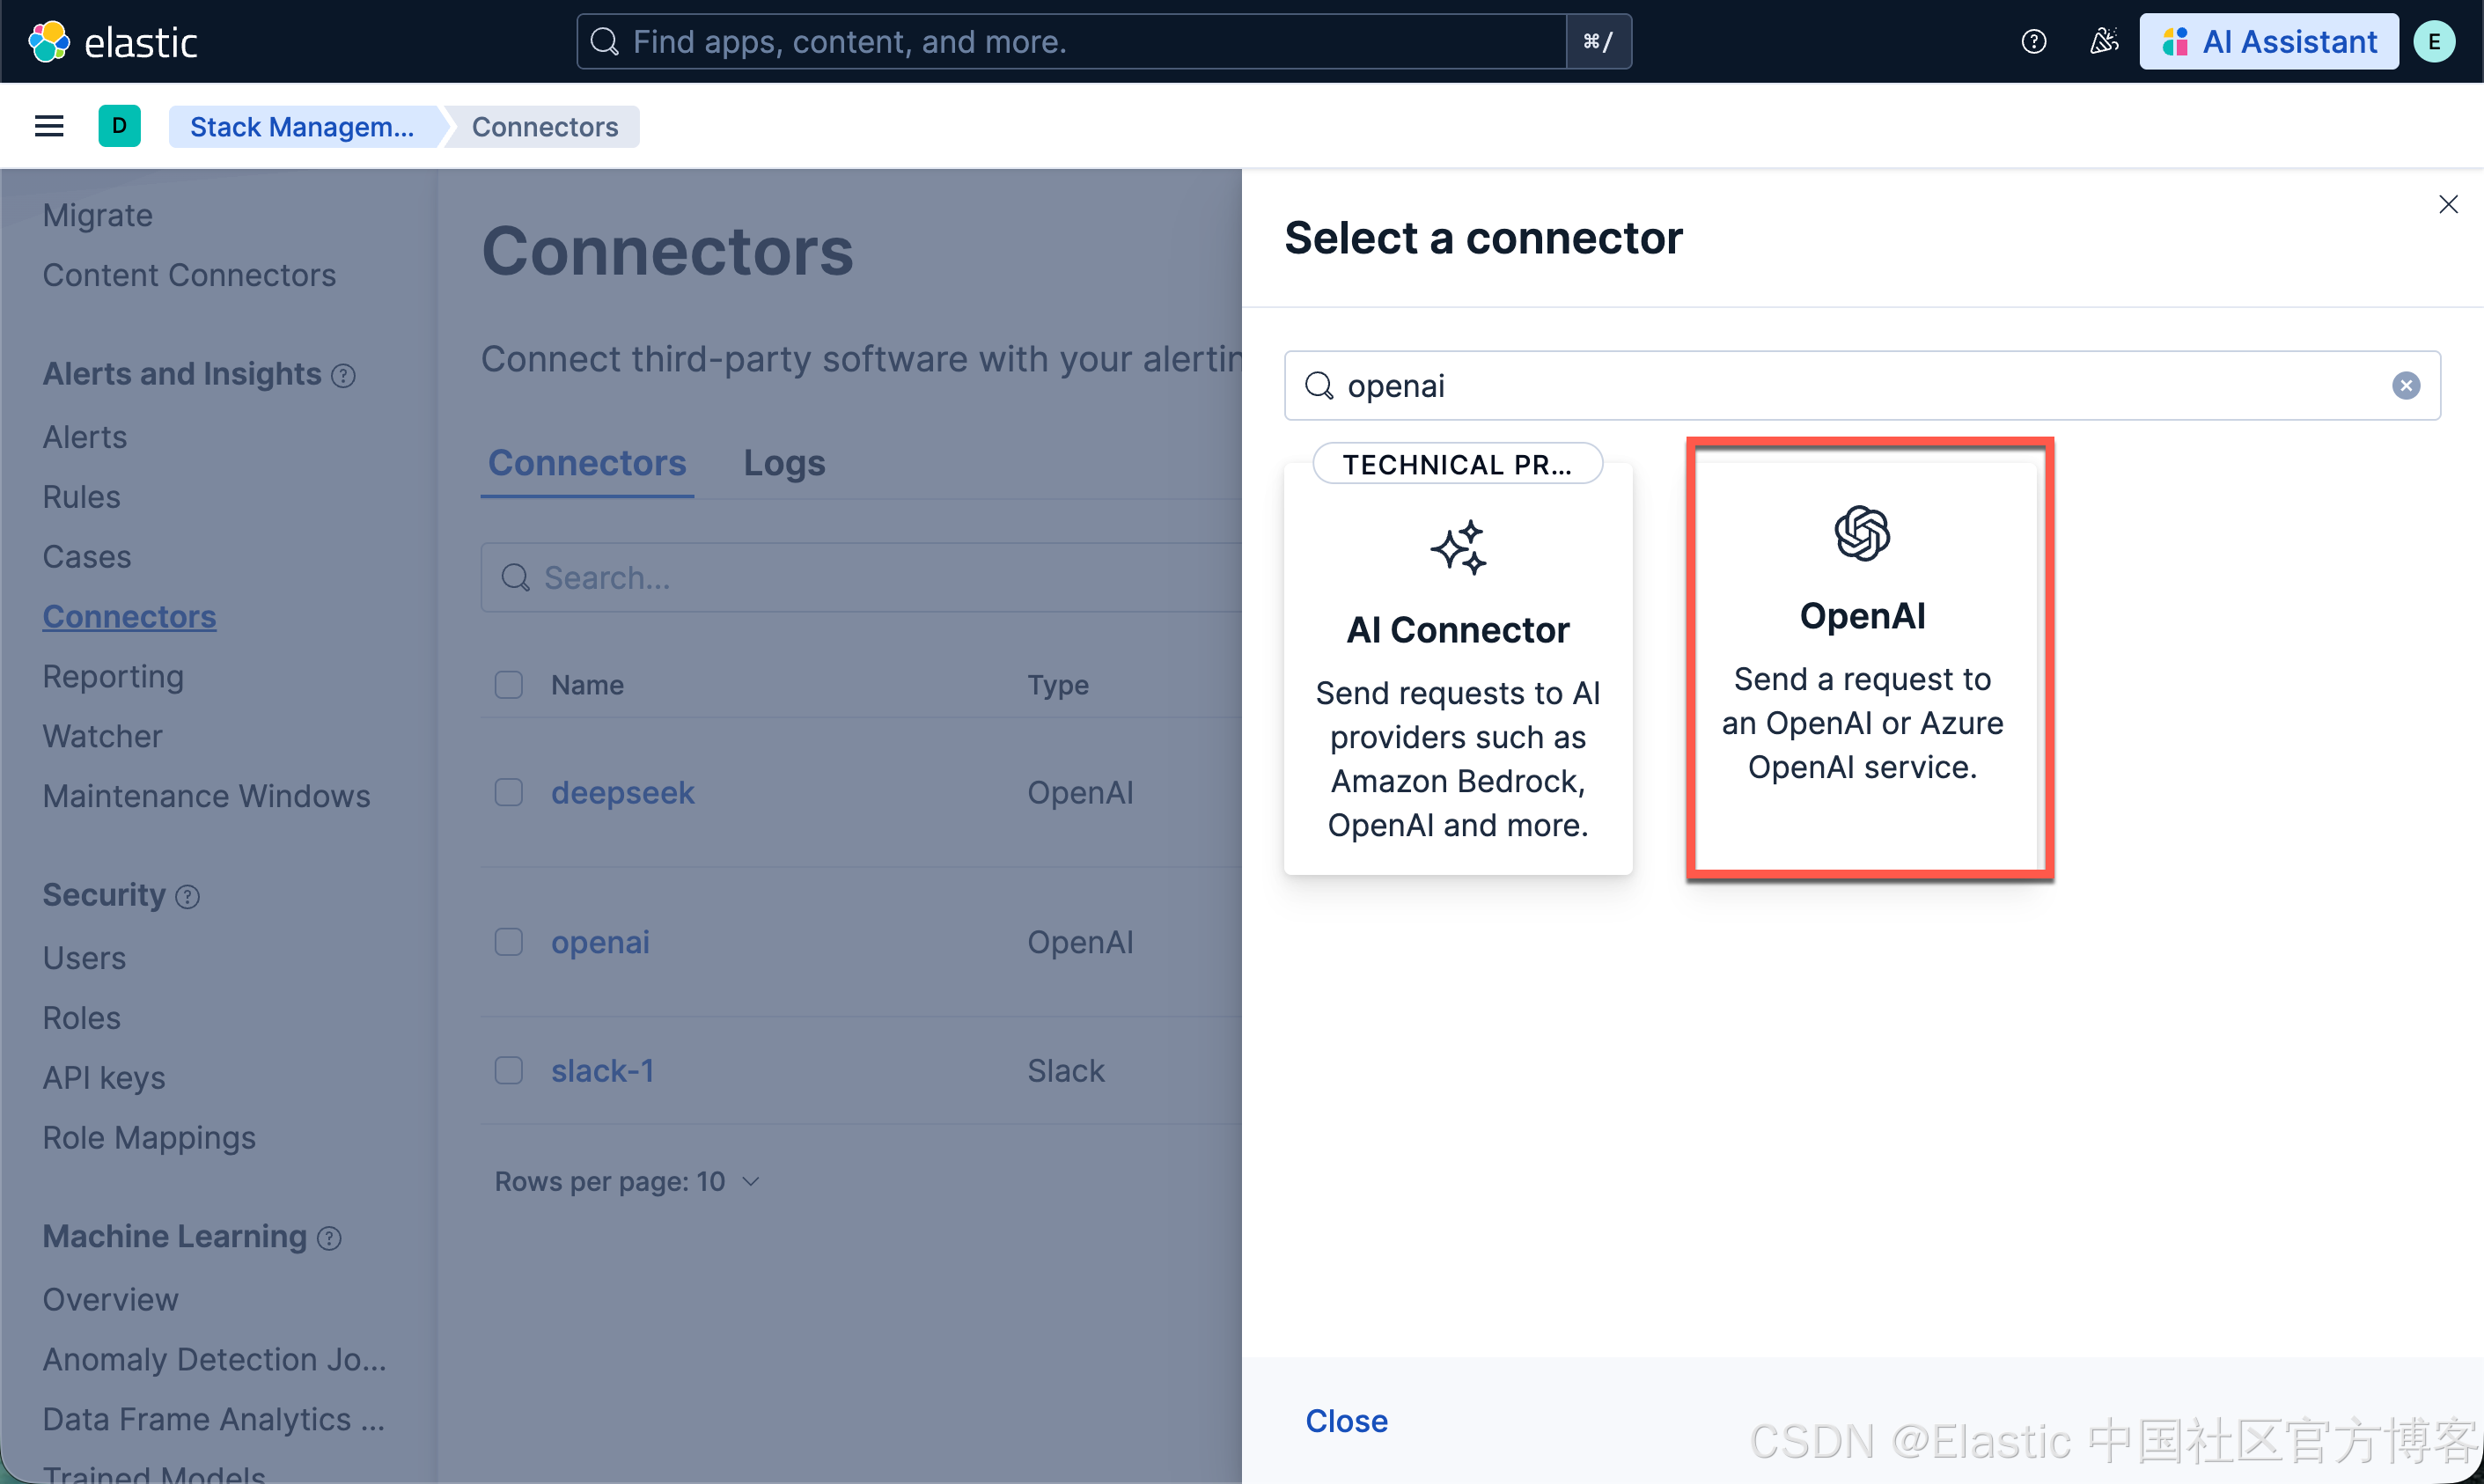
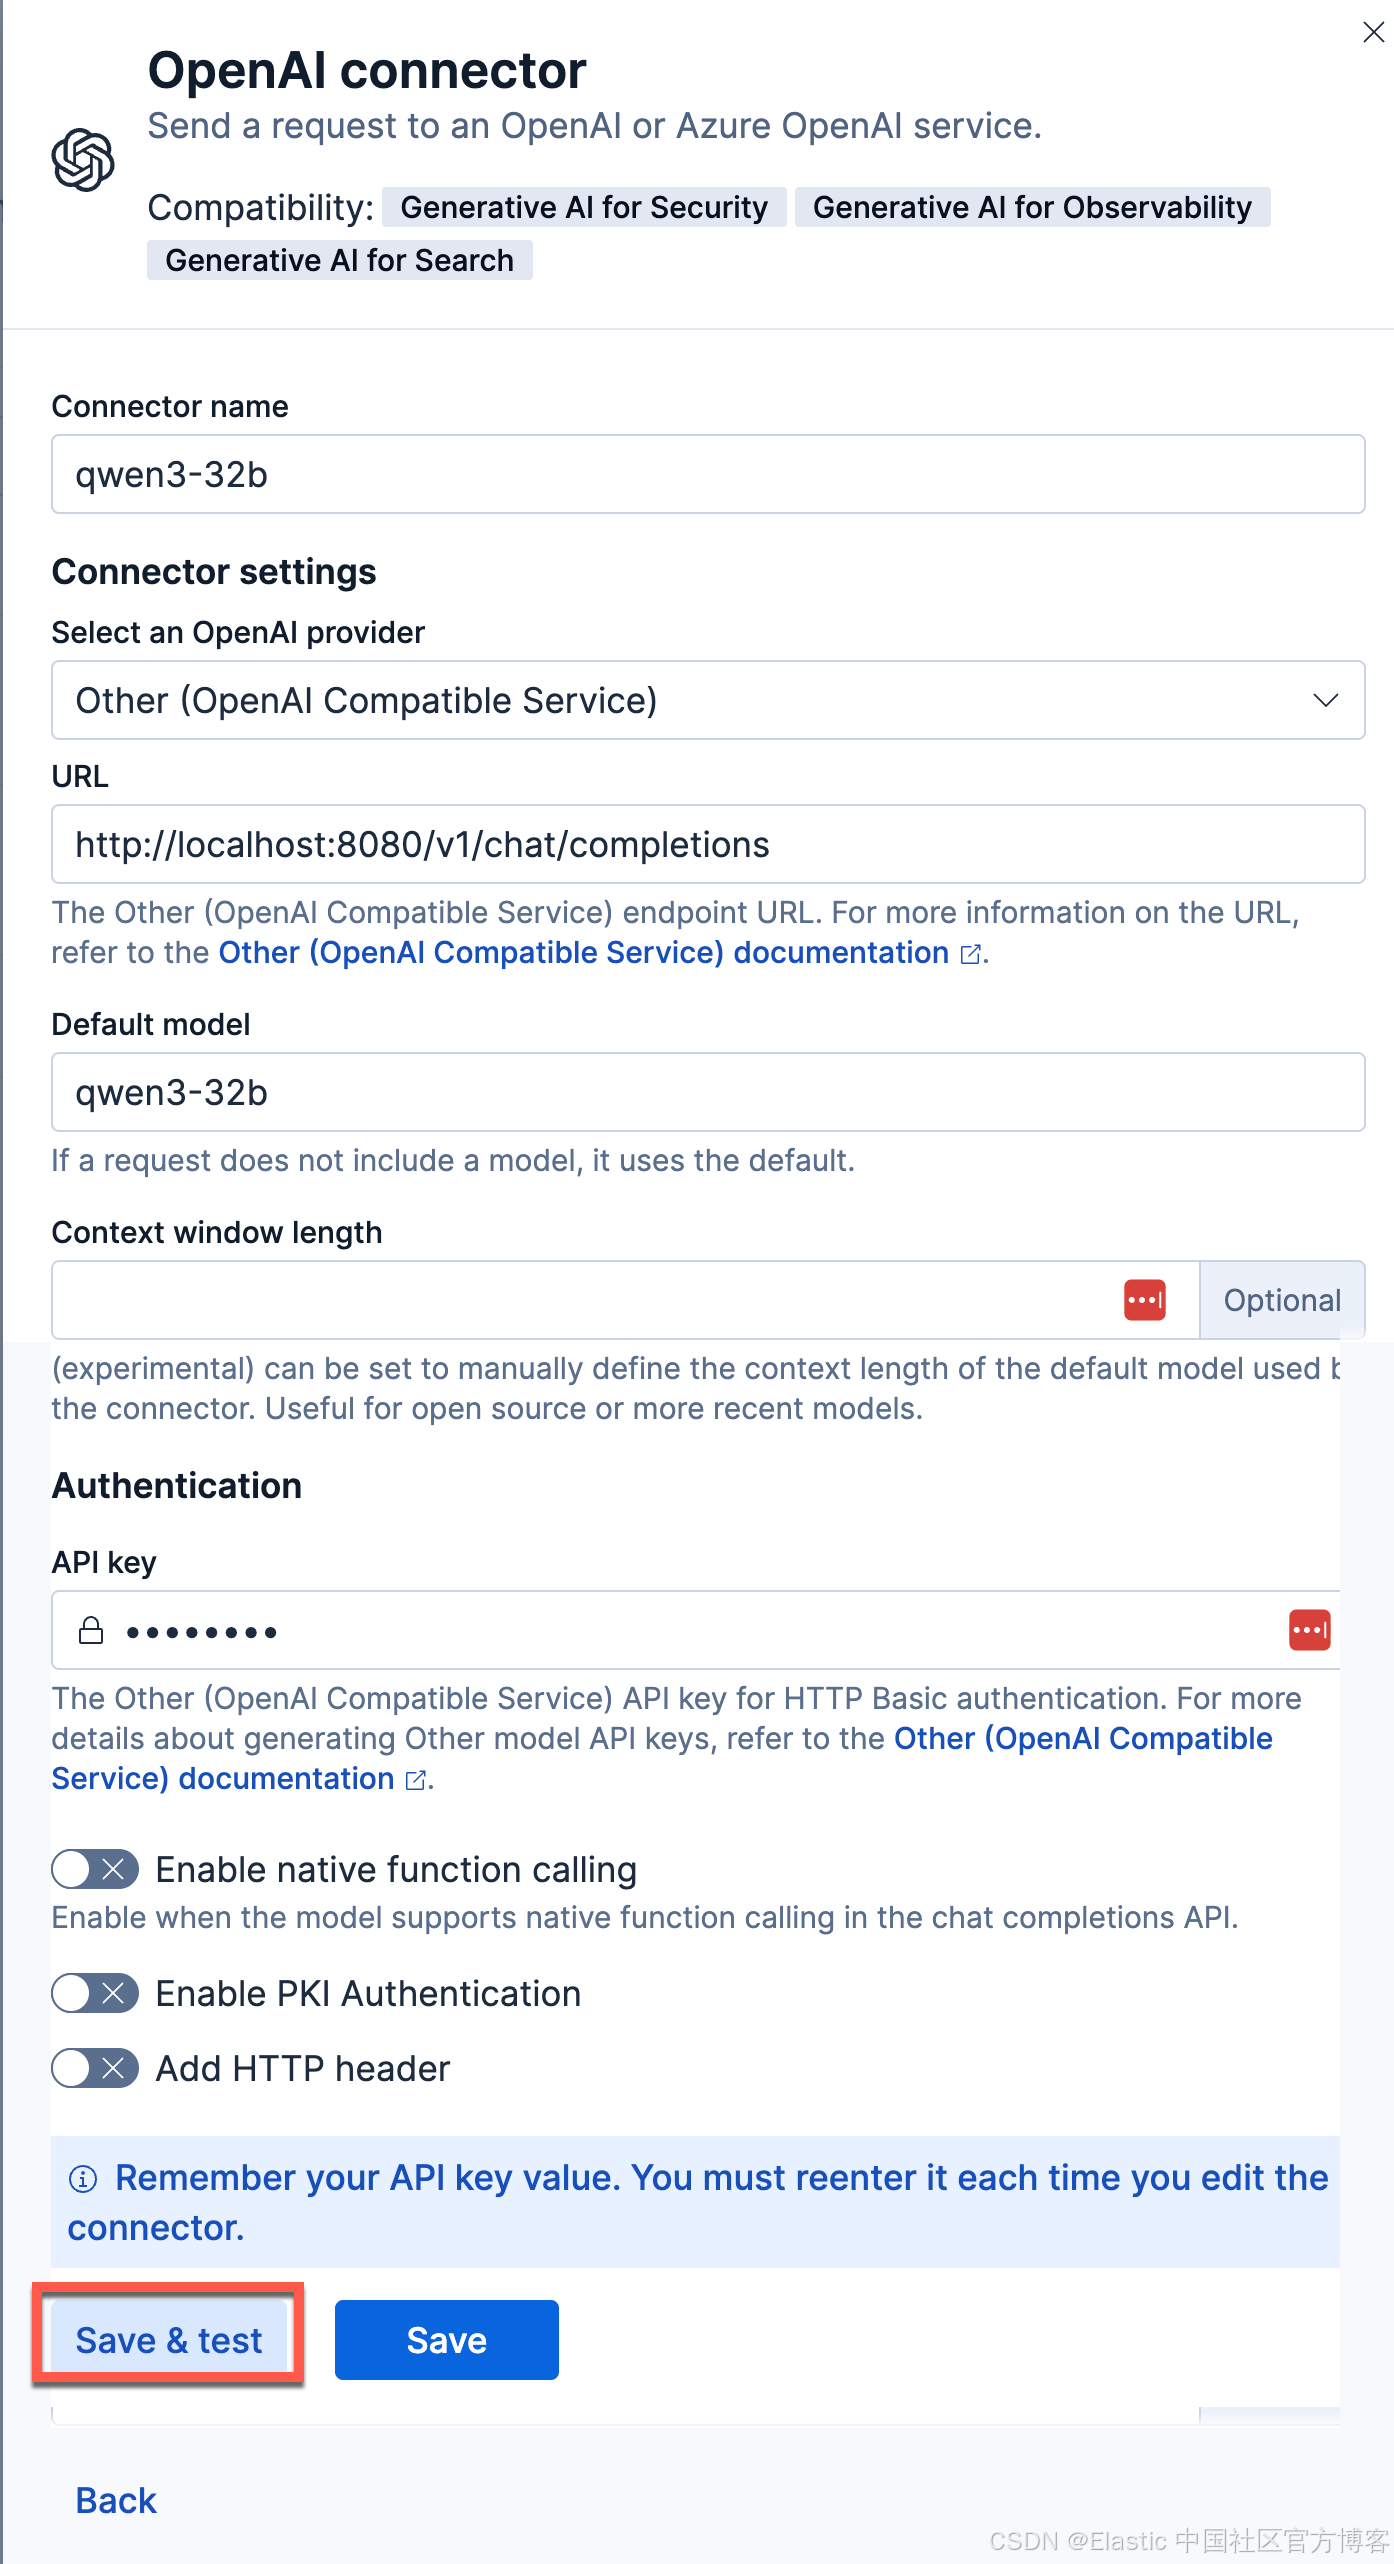
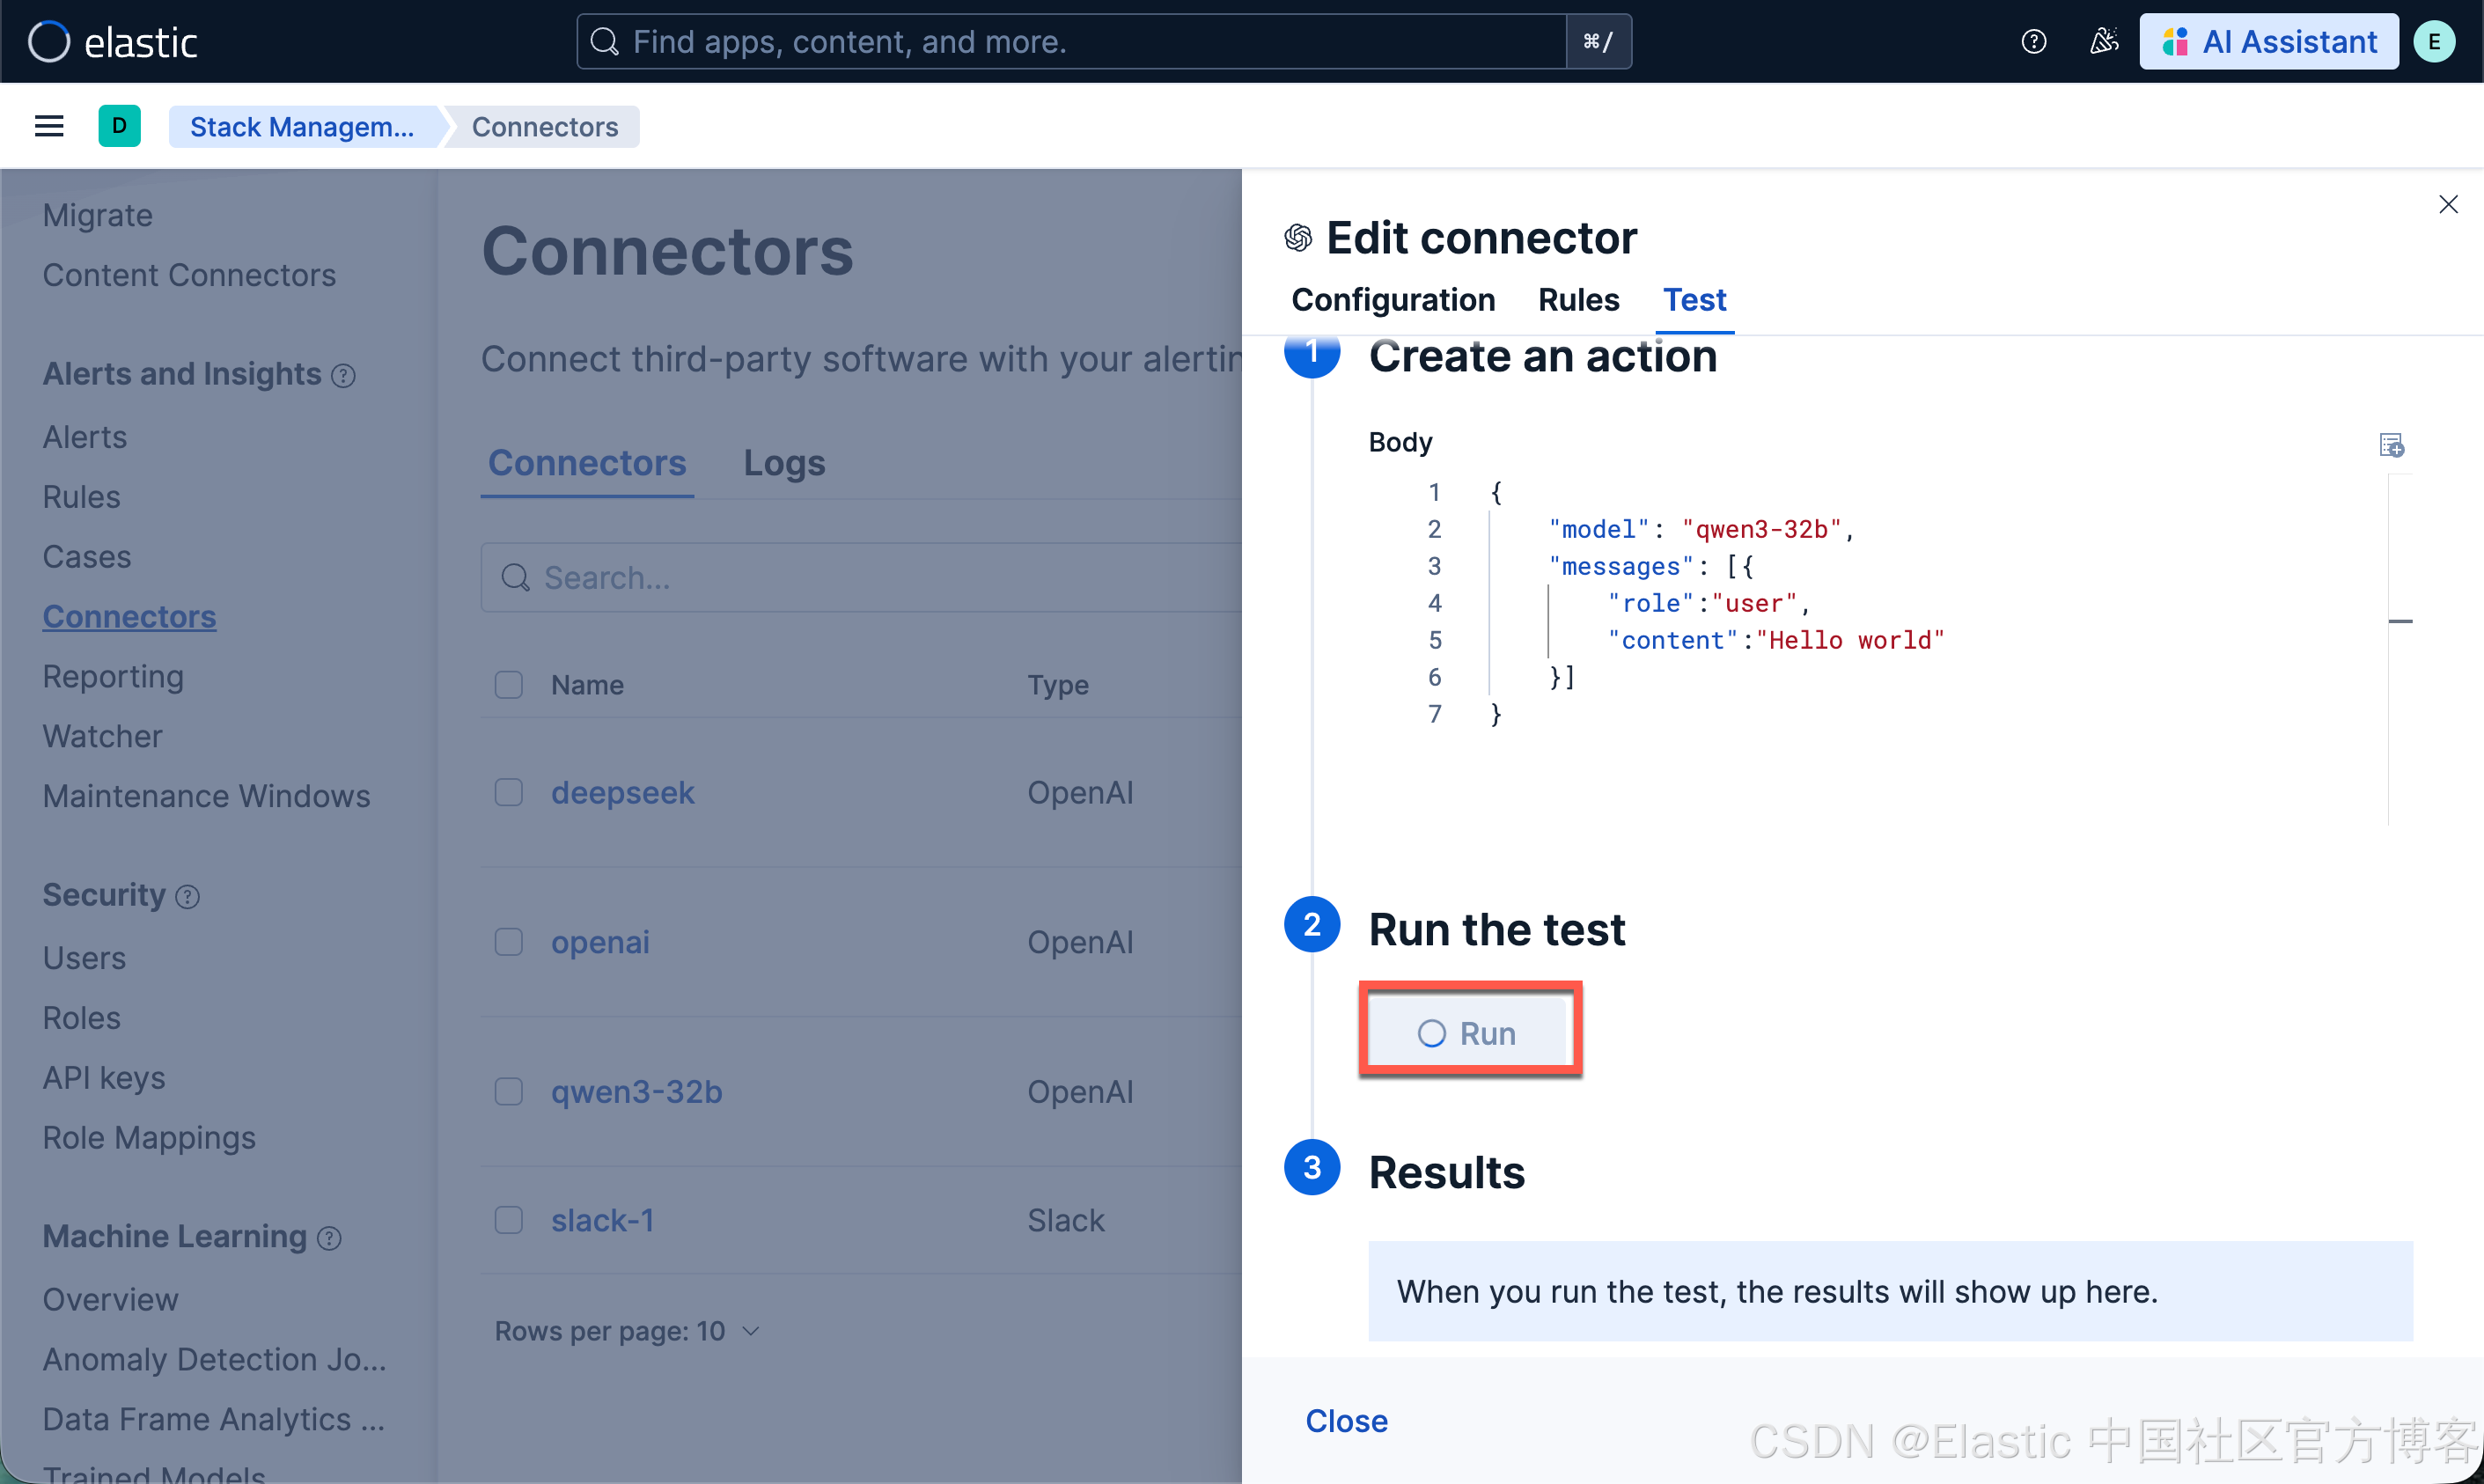
配置连接器连接到 Elasticsearch
我们接下来配置一个 qwen3-32b 的连接器以连接到 Elasticsearch:
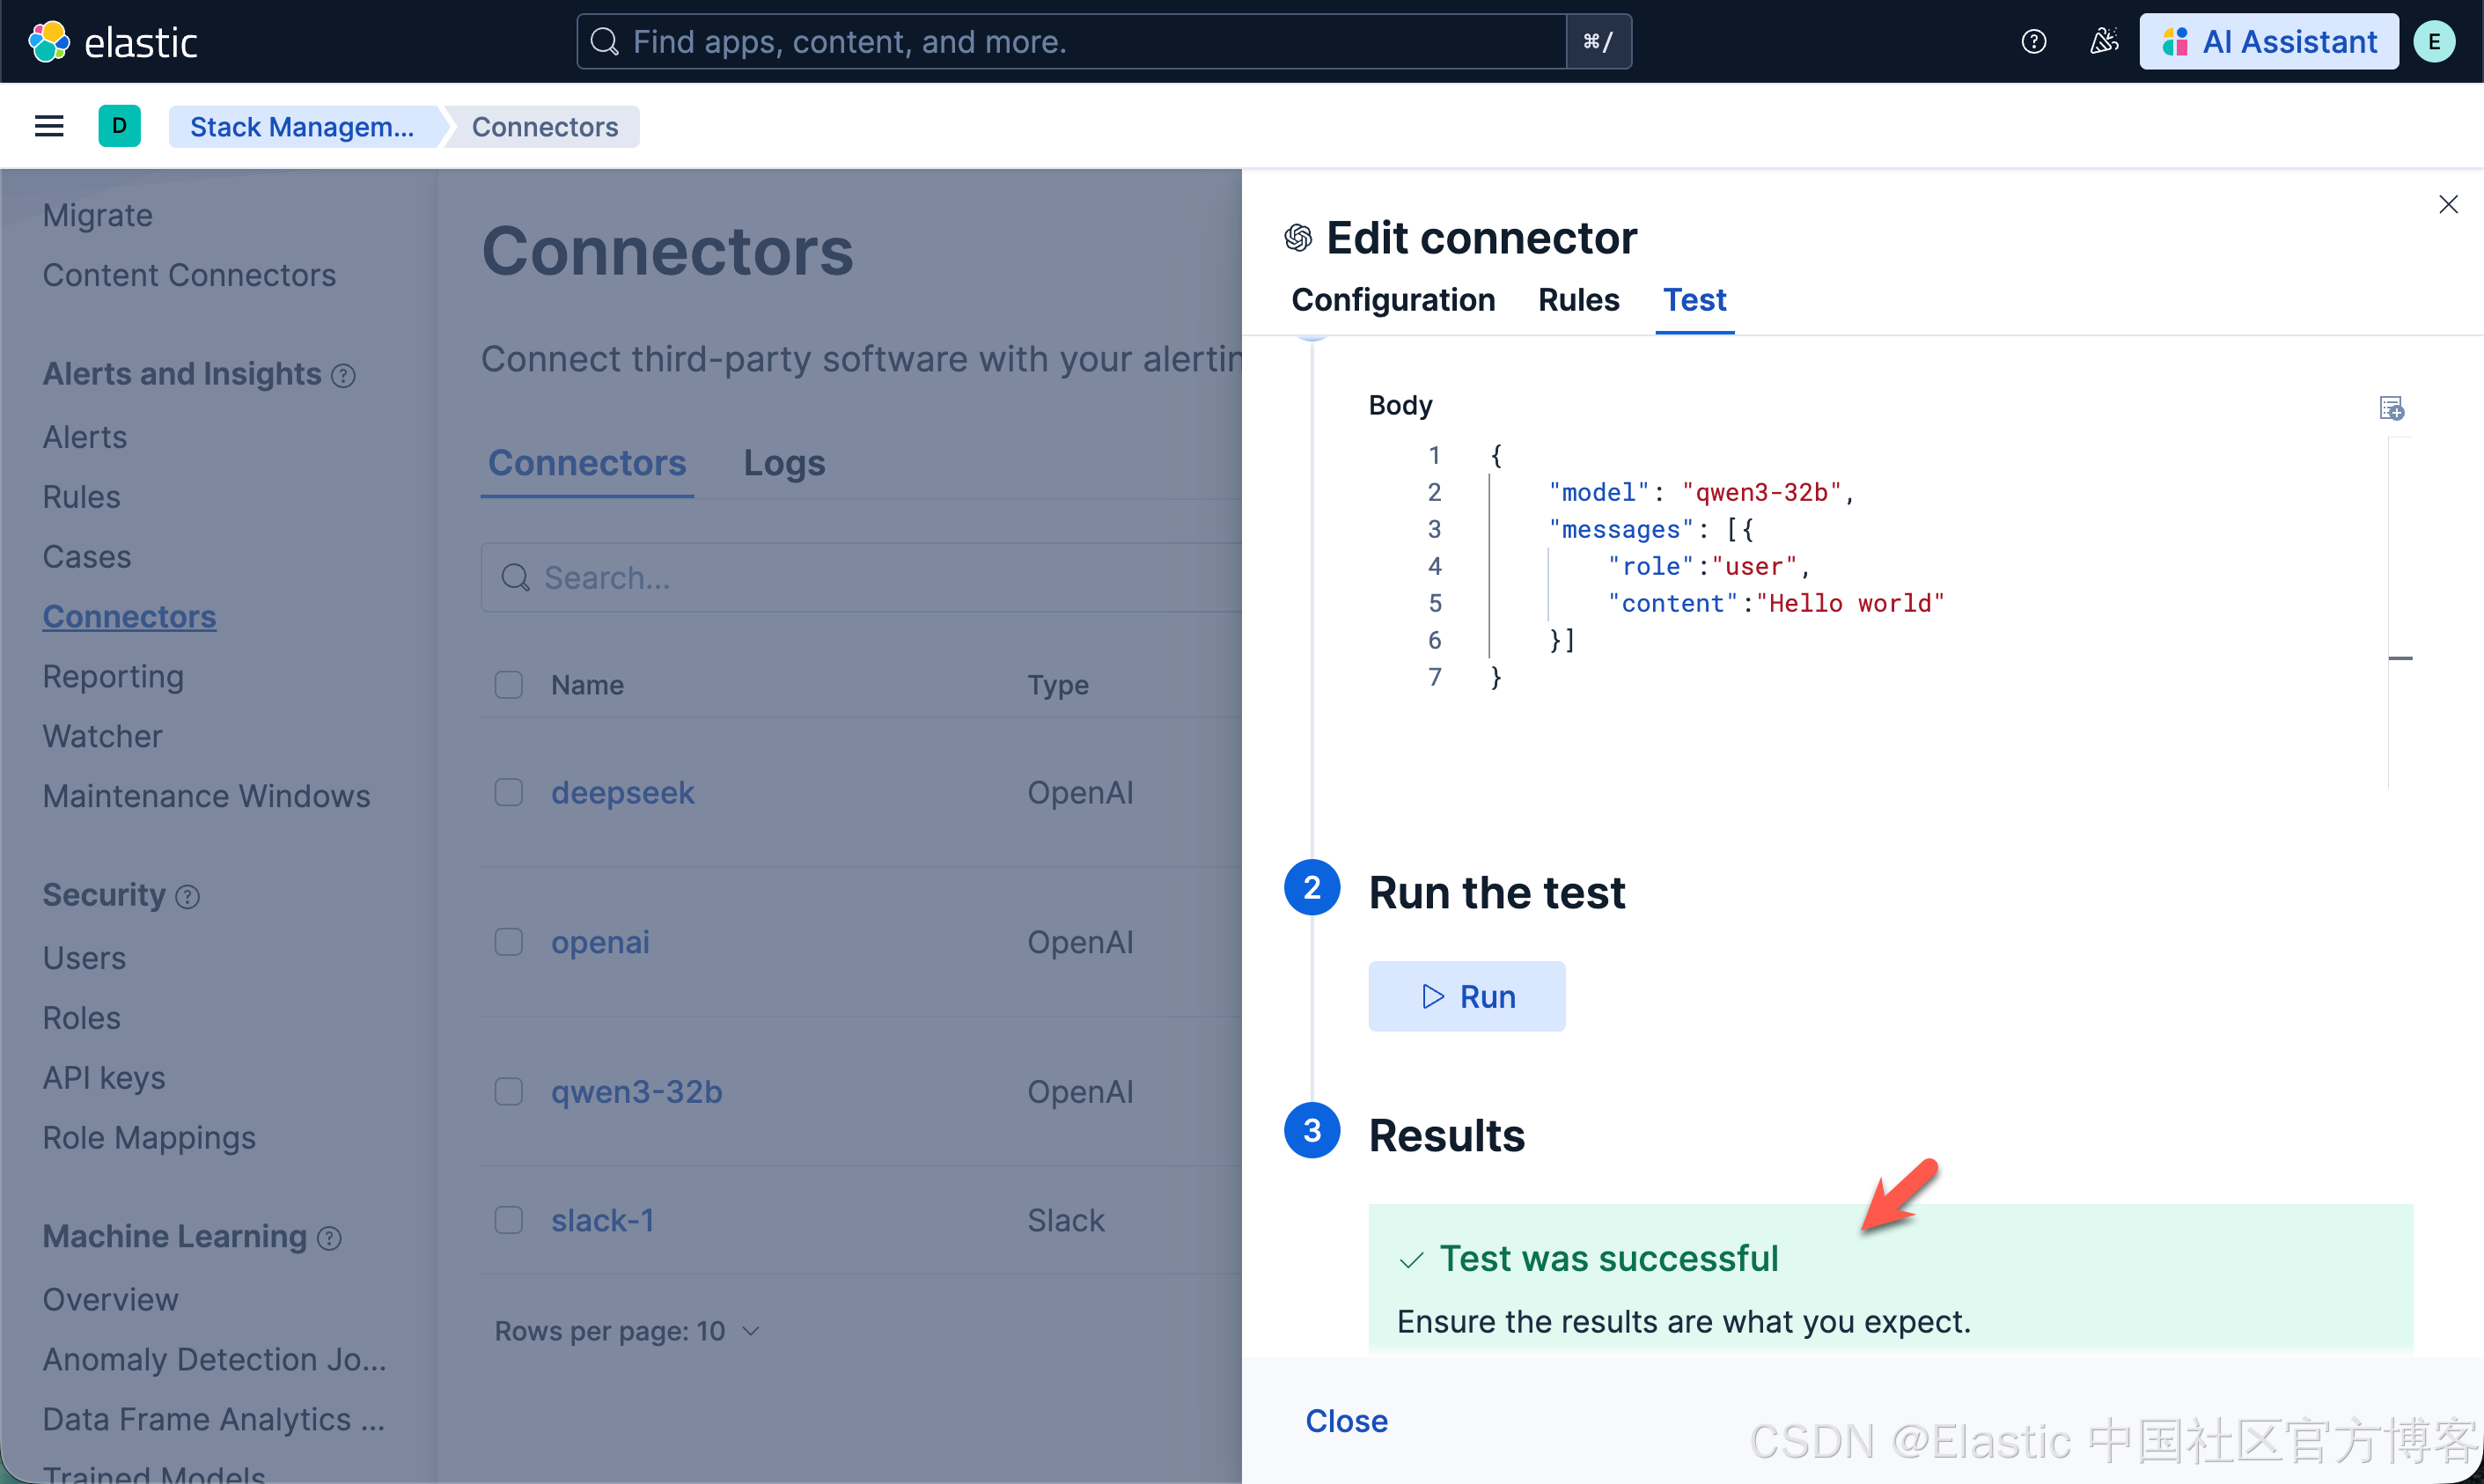
一旦配置完毕。我们就可以按照之前的文章 "在本地电脑中部署阿里 Qwen3 大模型及连接到 Elasticsearch" 来进行创建 RAG 应用。
注意:在这里提醒的一点是使用 docker 来安装我们的 Qwen3 32b 大模型,它不能带来 GPU 的加速。推理非常之慢。比之前的那个 LM Studio 的推理慢很多。在我的 macOS M3 pro 机器上,它每秒只有 0.1 个 token。
为此,我重新使用如下的方式来重新进行安装:
brew install localai我们使用如下的方式来启动 LocalAI:
LOCALAI_BACKEND=metal local-ai run

$ LOCALAI_BACKEND=metal local-ai run
Dec 27 15:07:14 INFO  Starting LocalAI threads=12 modelsPath="/Users/liuxg/models"
Dec 27 15:07:14 INFO  LocalAI version version="3.9.0 ()"
Dec 27 15:07:14 INFO  AgentJobService started retention_days=30
Dec 27 15:07:14 INFO  Using metal capability (arm64 on mac) env="LOCALAI_FORCE_META_BACKEND_CAPABILITY"
Dec 27 15:07:14 INFO  Preloading models path="/Users/liuxg/models"
Dec 27 15:07:14 INFO  core/startup process completed!
Dec 27 15:07:14 INFO  LocalAI is started and running address=":8080"
如上所示,它显示了 Using metal capability (arm64 on mac) ... 它标志我们使用 GPU 的能力。
我们最终下载完整个模型了。我们再次来尝试使用一下:
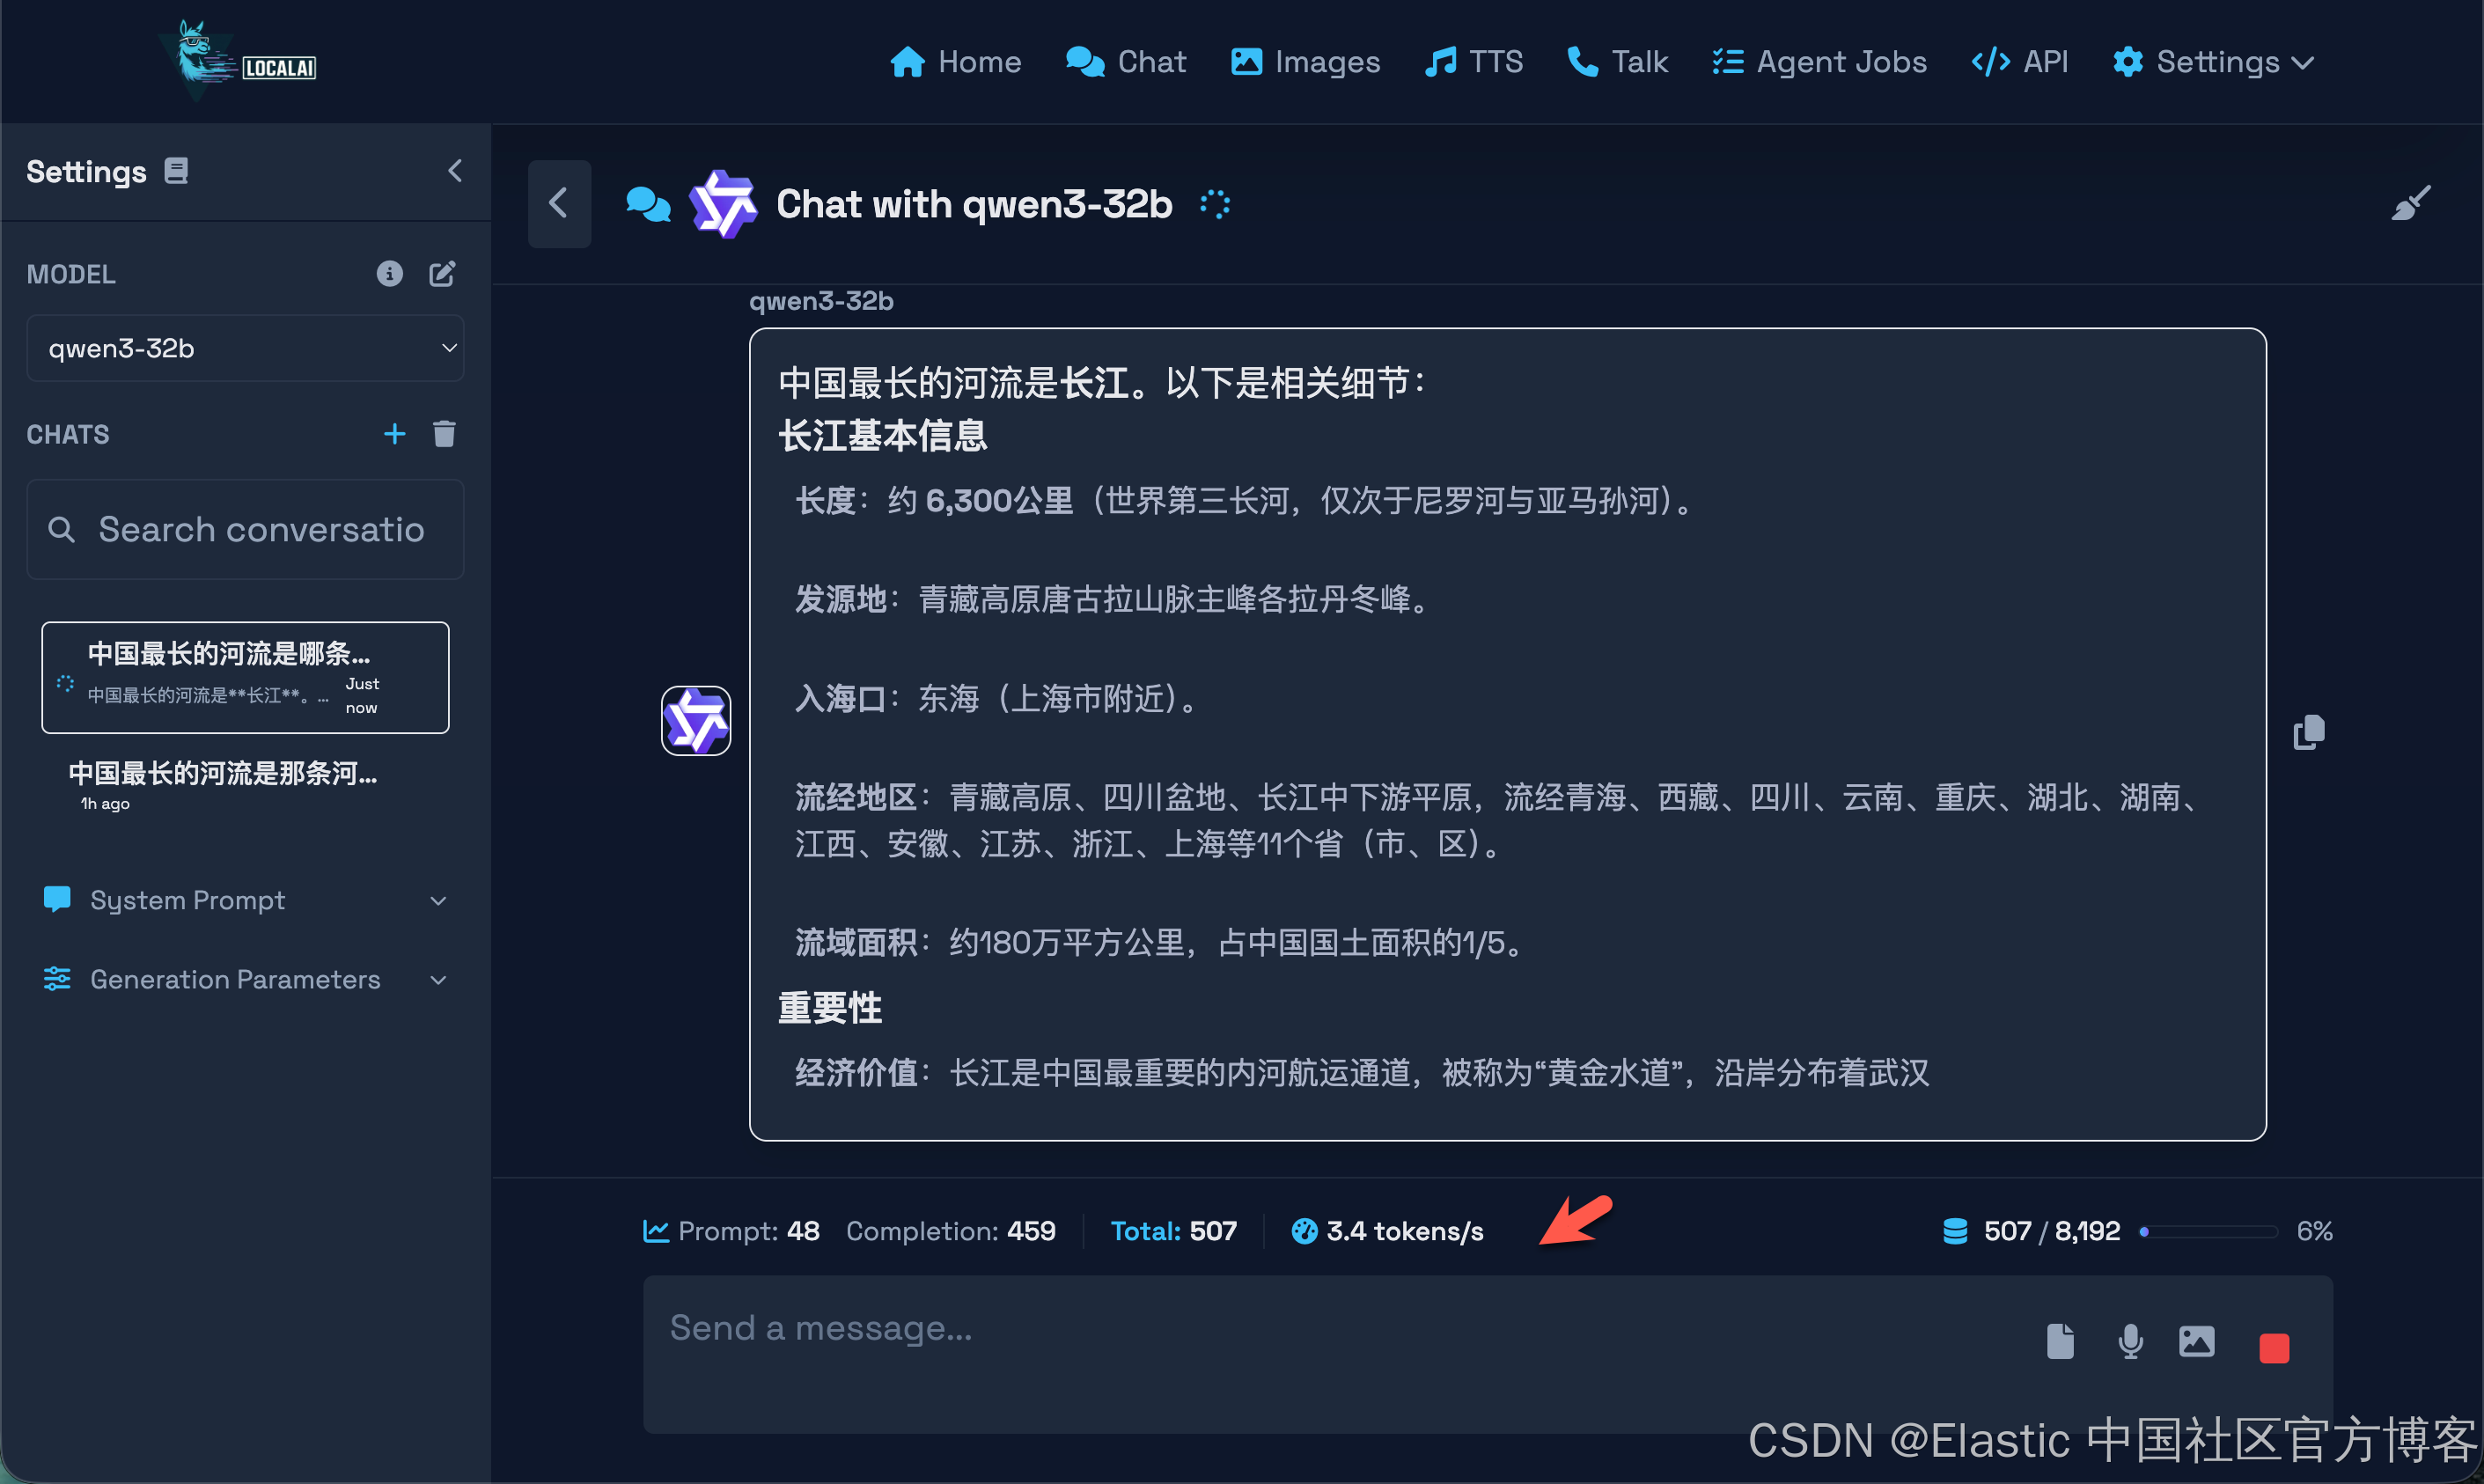
很显然这次比之前的要快一些了。有 3.4 个 token 每秒。